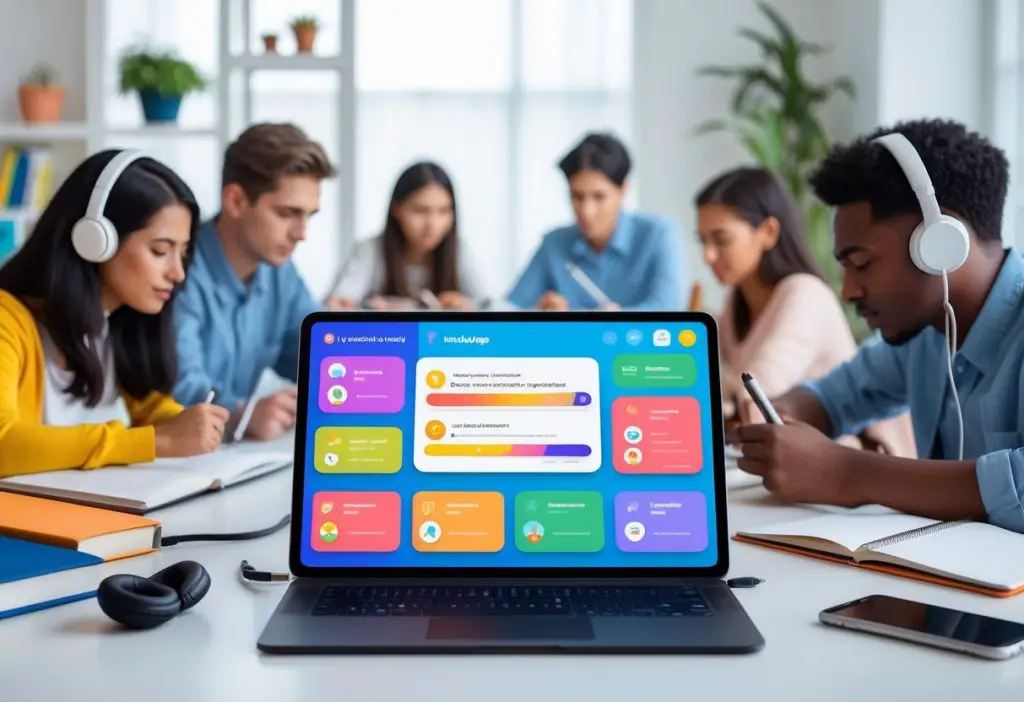
Studying for exams in an online Master of Social Work program isn’t just about cramming the night before. It’s more about building good habits, using tools that fit you, and knowing how to keep it together under pressure, so you can show up when it counts.
An online Master of Social Work is tough. You’re juggling case studies, dense reading, non-stop discussion threads, and real-life practice on top of everything else. Exams? They can feel like just another big thing piled onto an already packed schedule.
But here’s what most students figure out pretty quickly: it’s not about being the smartest. It’s about being prepared. The ones who do well usually aren’t grinding out more hours; they’re just studying smarter.
Whether you’re brand new to your program or deep in the coursework, knowing how to actually get ready for exams can seriously boost your confidence and your grades.
Why Exam Prep Matters More In An Online MSW
In online MSW grad programs, you don’t get those last-minute reminders or hallway check-ins like you might on campus. There’s none of that right-before-test talk that sometimes helps things click. So you have to be more deliberate with how you get ready.
If you skip actual prep, you end up rereading every page the night before, or you’re hoping you’ll just remember what you need. Maybe that’s fine for a quick quiz, but MSW exams usually ask more. They want to see if you can actually use theories in real-world social work, not just spit back definitions. Good prep helps you:
Hold onto complex concepts longer.
Feel less anxious when you’re facing the exam.
Think more about how to use what you know, not just remember it.
Use your time better when you’re actually taking the test.
Skip that last-minute, panicked study spree.
Basically, real prep isn’t just about getting past the test; it’s about making you a better social worker.
Building A Realistic Study System That Works
A lot of people mess up by copying study systems that look good on paper but don’t fit real life. If you’re working, doing fieldwork, or trying to keep up with family, you need a study setup that adjusts to everything else you have going on. Here’s what actually helps:
Break material up: Don’t try to tackle a whole module all at once. Split it up. Focus on one thing, maybe trauma-informed care, maybe systems theory, and give it your full attention.
Repeat, but space it out: Once is never enough. Go back over your notes in spaced-out sessions. It helps everything stick.
Mix in active recall: Highlighting is way overrated. Try closing your laptop and explaining the concept like you’re teaching someone else. If you get stuck, you know where the gaps are.
It sounds straightforward, but this kind of studying really works, especially for MSW exams.
Practice Like It’s The Real Exam
If your program has practice quizzes or case studies, use them, and use them for real. If it doesn’t, make up your own.
Take a question, answer it without any notes, and then check your work. Did you get it right? If not, where did you miss the mark?
Study Techniques That Actually Work For MSW Exams
Let’s get practical with what you can do in the middle of study season.
Case-Based Thinking
Most MSW exams want you to apply knowledge, not just regurgitate it. Always ask, how could this theory help with a real client?
Mind Maps
Don’t just take regular notes. Draw connections: ethics, intervention strategies, and policy. Seeing how things link helps you get the big picture.
Teach It Out Loud
If you can explain a concept you’re studying, out loud, to yourself or someone else, you’ll spot what you don’t know right away.
Study In Short, Focused Bursts
Set a timer for 25-40 minutes, no distractions. Then take a real break. It keeps your focus sharp, and you don’t burn out.
Managing Stress Before Exams
Stress isn’t something you can skip in an MSW program. Exams tend to pile up with assignments and placements, and it all feels like a lot. So don’t try to kill stress. Learn to handle it. A few habits help:
Get as much sleep as you can the night before, seriously, all-nighters aren’t worth it.
Take real, short breaks when you’re studying.
Don’t try to cram every bit of material at the last second.
Have fast summary sheets ready for last-minute review.
You want to walk into your exam clear-headed, not overwhelmed.
Preparing Is About Doing It Right
When you’re preparing for exams in an online MSW program, it’s not about doing more; it’s about doing it right.
Build a study routine that actually works in your life. Practice using real exam scenarios. Take advantage of the resources your program gives you. You’ll set yourself up for real success.
Studying for exams in an online Doctor of Nursing Practice (DNP) program isn’t just about memorizing notes. It’s about building a routine that actually works for you, fits your life, and helps you think like a leader in nursing when it matters most.
Working toward an online Doctor of Nursing Practice degree is a huge undertaking. Between clinical rotations, assignments, unpredictable work shifts, and regular life, exams can show up before you’re ready.
But here’s what a lot of people only realize later. Succeeding in a DNP program isn’t about staying up all night with your books. It’s about getting smarter and more intentional with how you prepare.
Whether you’re grinding through advanced pharmacology, leadership models, or evidence-based practice, the way you study shapes your confidence, along with your grades. Even more, it decides how much you actually remember when faced with real clinical choices later on.
Why Exam Preparation Matters More In A DNP Program Than You Think
A DNP program pushes you to think bigger: advanced clinical reasoning, leadership, and systems-level decisions. Your exams go beyond facts and definitions. You’ll get questions that make you apply knowledge, use clinical judgment, and rely on evidence. If you aren’t ready, you’ll probably end up:
Trying to cram endless chapters at the last minute.
Forgetting critical models under stress.
Mixing up concepts that have a big impact in practice.
Solid preparation helps you skip all that frustration. It gives you long-term recall, which is exactly what you need when you’re making decisions as a DNP-level nurse leader.
Using Online Resources Without Getting Overwhelmed
One big perk of an online DNP program is access to a mountain of digital options and tools. Sorting out what matters is the real challenge. A great example of a clear, supportive online resource is Baylor University’s online nursing platform.
Their site, Baylor Online Nursing Programs, covers everything from admissions and how their courses are structured to clinical placement support, financial aid, and accreditation. You’ll find student stories and real explanations about why Baylor’s recognized in the field.
Within Baylor’s offerings, you can browse different academic tracks, like the online DNP degree programs and doctoral degrees. The main point: Having clear, structured resources cuts down on confusion. When you know exactly what’s expected, you don’t waste energy studying random things; you focus on what counts.
Build A Study Routine That Fits Real Life, Not A Perfect One
A lot of DNP students try to stick to study schedules that look great on paper but fall apart in real life. You don’t need a picture-perfect six-hour study session every day. You need a plan you can actually maintain. Here’s what works much better:
Short chunks during the week (30–90 minutes).
Deeper review blocks on weekends.
Wiggle room for clinical duties or work emergencies.
Repetition is key. Your brain absorbs information better when you revisit it regularly, not when you try to learn it all at once and burn out.
Study Methods That Actually Work For DNP Exams
When it comes to exams in an online DNP program, these are the techniques that really help. Active recall instead of rereading. Rereading feels safe, but it doesn’t help you retain. Instead, close your notes and actively test yourself. Try questions like:
What are the important steps in this model?
How would this look for an actual patient?
What’s different between these two approaches?
Pulling the answer from memory sticks much better than glancing at your notes.
Use Practice Questions – Lots Of Them
Your course might not hand out tons of quizzes. Go find some or make your own. DNP exams often use clinical scenarios, so practicing with real-world questions really helps.
Tie Content To Real Cases
Don’t just memorize in isolation. Work through actual scenarios, think about how this leadership style would look during a staffing crisis or how evidence-based practice plays out in a tough policy decision.
Exam Day Strategy That Keeps You Grounded
When exam day shows up, the goal isn’t to relearn it all. It’s to perform under pressure. A few things actually help:
Start with the questions you know to build confidence.
Mark the tricky ones for a second look, don’t get stuck.
Keep an eye on time, but don’t rush the first part.
Back your own prep, try not to second-guess
And don’t skip sleep for last-minute flashcards. Your brain needs rest to handle the kind of clinical thinking these exams call for.
Prepping Is About Lasting Habits
In the online DNP world, prepping for exams is all about habits that last. Not cramming. Not burning the candle at both ends.
Focus on active recall, keep your study schedule real, and tie everything you learn to cases and clinical practice. If you also lean on organized academic programs, you’ll head into exams with way more clarity and confidence.
Starting the path toward nursing after earning a degree in another field can feel exciting, but it often comes with a long list of questions. Direct entry MSN programs appeal to people who want to move into nursing through a graduate-level route without starting over academically. Interest in this pathway continues to grow nationwide.
The American Association of Colleges of Nursing reported a 6.8% increase in U.S. master’s nursing enrollment between 2024 and 2025, reflecting continued demand for graduate nursing education. If you are exploring this option, you are likely weighing timelines, costs, clinical requirements, and career goals all at once. Ultimately, once you understand how these programs are structured, the path often feels much clearer.
Why Direct Entry MSN Programs Are Getting More Attention
Interest in accelerated nursing education continues to rise across the United States, while master’s-level nursing enrollment has also increased in recent years, according to national nursing education data. Within that larger trend, one of the Elmhurst University direct entry master of nursing programs is a prominent pre-licensure MSN pathway for students who already hold a non-nursing bachelor’s degree.
Programs in this category generally combine foundational nursing preparation with graduate coursework in one continuous path, so they attract applicants seeking an efficient transition into the profession. If you are changing careers or building on academic experience from another field, this model can feel practical while also offering a strong sense of forward momentum.
What Direct Entry Really Means In Practice
Direct entry MSN programs can seem straightforward at first, but the details often vary from one program to another. In most cases, you enter as a student with a bachelor’s degree in a non-nursing discipline, then complete pre-licensure nursing coursework, clinical training, and RN preparation before progressing into master’s-level study.
That structure gives you a route toward registered nursing licensure while also earning a graduate degree. If you are researching programs, it helps to read carefully so you know what the MSN includes after licensure coursework is complete. Some focus on leadership or systems-based practice, while others prepare you for a future specialty track, which can affect how the degree fits into your long-term goals.
The Pace Can Feel More Intense Than Many Applicants Expect
For many students, the academic pace becomes the biggest adjustment once classes begin. Direct entry MSN programs often compress a large amount of nursing theory, lab work, simulation, testing, and clinical training into a relatively short period of time, where the schedule can feel full very quickly. In theory, you could be moving between coursework, reading assignments, skills assessments, and clinical rotations all within the same week.
That intensity does not automatically make the path overwhelming, but it does require honest planning before you begin. If you are working, caregiving or managing major responsibilities outside school, it helps to think carefully about how much time you can realistically protect for studying, preparation, and recovery throughout the program.
Cost Matters More When You Look At The Full Picture
Tuition often becomes one of the biggest parts of the decision, but the total cost reaches beyond the number listed on a program page. Along with tuition, you are often looking at fees, books, uniforms, supplies, transportation to clinical placements, exam costs, and time away from work during demanding semesters.
When you put all of that together, the financial commitment becomes easier to understand. At the same time, many applicants view the investment through a long-term lens tied to career mobility, graduate credentials, or speed of entry into nursing practice. If you are comparing options, it helps to look at the full financial picture while also thinking about what you want your career to look like several years from now.
Your Reasons For Applying Should Feel Clear To You
One of the most useful things you can do before applying is spend time defining why this path fits your life right now. Admissions teams often look closely at motivation, but this matters just as much for you personally. Direct entry MSN programs ask for a major commitment of time, focus, and energy, so having a clear reason behind your application can help carry you through the harder stretches.
You do not need every detail of your nursing future mapped out before you begin. You just need enough clarity to know why this route makes sense for you. Taking time to define that early can make the application process feel more focused and much less overwhelming. Ultimately, when your goals, timing, academic background, and personal priorities all feel aligned, the decision tends to feel much steadier from the start.
Key Stats
Demand for graduate nursing education is growing. U.S. master’s nursing program enrollment increased 6.8% from 2024 to 2025, reaching 146,718 students, according to the American Association of Colleges of Nursing.
Direct entry MSN programs offer an accelerated path into nursing. They are designed for students with a non-nursing bachelor’s degree who want to prepare for RN licensure while earning a master’s degree on a condensed timeline.
Planning ahead matters before you apply. AACN reported that 93,176 qualified applicants were turned away from nursing schools in 2025, which makes it important to understand admissions expectations, costs, and program fit early in the process.
Preparing for a major exam has never been a simple process. Whether a student is studying for the GED, SAT, GRE, or another standardized test, success often depends on consistency, access to quality resources, and effective study habits. What has changed in recent years is how students approach that preparation.
Online learning has completely transformed test preparation by making educational resources more accessible than ever before. Students can now access study materials from almost anywhere. It has created new opportunities for learners with different schedules, goals, and learning styles. It has also given students greater control over their learning pace. This allows them to revisit difficult topics when needed.
Access To Resources Has Expanded
Students used to depend on local libraries, bookstores, or tutoring centers for exam preparation materials. Today, a student with an internet connection can access thousands of practice questions, instructional videos, study guides, and discussion forums. This broader access has helped reduce barriers for many learners, especially those who live in areas with fewer educational resources.
Online communities have also become valuable learning spaces. Students can exchange study strategies, ask questions, and find encouragement from others working toward similar goals. The growth of digital education has also influenced how educators continue their own professional development.
Many professionals now explore online EdD degree programs to deepen their understanding of educational technology, student engagement, and effective learning strategies in virtual environments. While technology can’t replace effort, it can provide tools that make the learning process more manageable.
Flexibility Has Become A Major Advantage
One of the biggest reasons students turn to online learning is flexibility. Traditional study programs often require students to follow a fixed schedule. Online platforms allow learners to build study sessions around work, family responsibilities, athletics, or other commitments. This is especially important for adult learners who may be balancing multiple responsibilities while preparing for an exam.
Students can review practice questions during a lunch break, watch instructional videos in the evening, or complete a full practice test on the weekend. Having control over when and how they study often makes it easier to stay committed over the long term.
Consistency matters more than the number of hours studied in a single session. Small and regular study periods often produce better results than occasional marathon review sessions. Online learning makes that consistency easier to achieve.
More Personalized Learning Experiences
Not every student learns the same way. Some prefer reading detailed explanations, while others absorb information better through videos or interactive exercises. Online learning environments often provide a variety of formats that allow students to choose what works best for them.
Many digital study tools also help students identify weak areas. Instead of spending equal time on every topic, learners can focus their attention where it’s needed most.
Common features include:
Diagnostic assessments that highlight knowledge gaps
Practice tests that mimic real exam conditions
Progress tracking tools that measure improvement over time
Customized study plans based on performance
This level of personalization can help students study more efficiently and use their time more effectively.
New Challenges Come With Greater Freedom
The flexibility of online learning is beneficial, but it also requires discipline. Without a teacher physically present to provide reminders or deadlines, students must take greater responsibility for managing their own progress. Procrastination can quickly become a problem when study schedules are entirely self-directed.
Students who succeed in online learning often develop several key habits:
Creating a realistic study schedule
Setting short-term goals
Limiting distractions during study sessions
Regularly reviewing progress
These habits can improve both exam performance and long-term academic success.
How Educational Leaders Are Responding
As online learning becomes more common, schools and educational organizations continue to adapt their teaching strategies. Educational leaders are increasingly focused on improving digital learning experiences. This supports student engagement and ensures that online resources remain effective.
Understanding how students learn in virtual environments has become an important part of modern education.
To build expertise in these areas, many professionals pursue advanced credentials that explore topics including instructional leadership, educational technology, curriculum development, and student success strategies. The knowledge gained through these programs can help leaders make informed decisions about how technology is used to support learning.
Their work plays an important role in shaping the educational experiences students encounter both inside and outside traditional classrooms.
Online Learning Is Here To Stay
Online learning is no longer simply an alternative to traditional education. It’s become an essential part of the learning process. The ability to access resources on demand, personalize study plans, and learn from virtually anywhere has changed how people prepare for high-stakes exams.
While success still depends on dedication and effective study habits, today’s learners have more tools available than before. Online learning will likely remain a central part of exam preparation. This is helping students build confidence, strengthen their skills, and work toward their academic goals.
Higher education is losing its senior leadership faster than it’s replacing them, and the credential gap at the top of the pipeline is one of the more consequential and underreported problems in American institutional life.
This is what the higher education leadership shortage actually looks like, why the retirement wave hitting provosts, deans, and presidents over the next decade is structural rather than cyclical. And why the timing of an EdD in higher education has rarely been more strategically sound.
The senior leadership crisis in American higher education didn’t arrive suddenly. It’s been building through a combination of demographic reality, pandemic-accelerated burnout, and a credentialing pipeline that hasn’t kept pace with the rate at which experienced administrators are exiting the profession.
The Wave That’s Been Building for a Decade
College presidents are leaving at historically elevated rates. Chief academic officers who spent the last several years navigating enrollment pressure, financial restructuring, and intensifying political scrutiny of higher education are retiring earlier than projected.
Deans and vice presidents who were expected to form the next generation of institutional leaders are increasingly moving into the private sector or non-profit administration rather than stepping up into roles that have become significantly more demanding without proportionate increases in institutional support.
The result is a senior leadership market where qualified, credentialed candidates for the most consequential roles in higher education are genuinely scarce and where institutions are competing for a shrinking pool of people prepared to lead at that level.
An online doctorate in higher education leadership positions its graduates directly into that market, building the institutional strategy, policy literacy, and organisational leadership competencies that senior roles require and that the current pipeline is not producing in sufficient numbers.
What’s Actually Driving the Exits
Understanding the shortage requires recognizing what’s pushing experienced administrators out, because the factors driving early departure differ from those that created the pipeline gap, and both matter for anyone considering entering the senior leadership market.
The retirement wave is primarily demographic. A significant cohort of higher education administrators who entered the profession in the 1980s and 1990s is now at or past conventional retirement age. That cohort was large, well-credentialed, and its departure is concentrated enough in time to create a genuine surge in vacancies rather than the gradual turnover that institutions can absorb without structural disruption.
The burnout-driven exits are a separate but compounding dynamic.
The documented attrition rates among higher education senior administrators post-2020 reflect a profession that asked enormous amounts of its leadership class during an extraordinarily difficult period and then watched a meaningful proportion of that leadership class decide the terms of the role had changed beyond what they’d signed up for.
Financial pressure, enrollment volatility, and the increasingly public and politically charged nature of institutional leadership have made the senior administrator role harder to sustain than it was a generation ago.
Both dynamics point in the same direction: the vacancy rate at the top of higher education is real, it’s ongoing, and it’s creating openings that credentialed candidates are positioned to move into.
The Credential Gap at the Top of the Pipeline
Vacancies alone don’t create opportunity if there aren’t enough qualified candidates to fill them. The more consequential part of the current situation is the credential gap: the shortage of people who have both the institutional experience and the doctoral-level preparation that senior higher education roles consistently require.
The EdD in higher education is specifically designed to address that gap.
Unlike a research doctorate that prepares graduates for faculty careers, the professional doctorate in higher education leadership develops the applied competencies that administrative roles actually demand: strategic planning under financial constraint, accreditation and regulatory compliance, shared governance navigation, institutional diversity and equity leadership, and the data-driven decision-making that modern higher education administration requires at every level above department chair.
The credentialing requirements for senior higher education administrative appointments across American colleges and universities consistently show a doctoral preference or requirement for president, provost, and vice president roles. With the EdD increasingly recognised alongside the PhD as appropriate preparation for institutional rather than faculty leadership tracks.
Why the Timing Argument Is Stronger Than It Sounds
Career timing arguments in credential discussions are often speculative, projecting future demand based on trends that might not materialise. The higher education leadership case is different because the demographic driver is actuarial rather than predictive. The administrators retiring over the next decade are already employed. Their retirement timelines are already visible. The pipeline replacing them is already measurably thin.
For professionals currently working in mid-level higher education administration (associate deans, directors of student affairs, department chairs, registrars, institutional research professionals), the EdD completion window and the senior vacancy window are running roughly parallel. Completing a three to four-year online doctoral programme puts a candidate on the market at roughly the point where the vacancy concentration is highest, and the competition for credentialed applicants is most intense.
That alignment isn’t guaranteed to persist. As the retirement wave completes and institutions adapt, the credential market will rebalance. The current window, where documented shortage meets accessible online doctoral delivery, is the more unusual condition and the one worth acting on.
Romanian and Spanish share a surprising amount in common, even though they come from different parts of Europe. Both languages belong to the Romance language family, which means they were derived from Latin after the fall of the Roman Empire. This shared origin creates real connections between the two languages that Spanish speakers and Romanian speakers can recognize.
Romanian and Spanish share about 77% lexical similarity, meaning roughly three out of four words have similar roots or forms. The similarities show up in basic vocabulary, grammar structures, and even some pronunciation patterns. Both languages use gendered nouns, similar verb conjugations, and comparable sentence structures that come from their Latin foundation.
The differences between Romanian and Spanish exist mainly because of geography and outside influences. Romanian absorbed words from Slavic languages, Greek, and Turkish over the centuries. Spanish took influences from Arabic and indigenous American languages. These distinct paths created two languages that remain connected through Latin but have developed their own unique characteristics.
Key Takeaways
Romanian and Spanish are both Romance languages, with about 77% shared vocabulary from their common Latin roots
Geographic separation led to different influences, with Romanian absorbing Slavic elements and Spanish incorporating Arabic and other contributions
Linguistic Roots and Core Similarities
Romanian and Spanish share fundamental characteristics stemming from their common Latin ancestry, including similar vocabulary patterns and grammatical structures. Both languages evolved from Vulgar Latin and maintain strong connections to their Roman roots.
Origin in Romance Language Family
Romanian and Spanish both belong to the Romance language family, which developed from Vulgar Latin spoken across the Roman Empire. The Roman Empire’s expansion spread Latin throughout Europe, where it evolved into distinct regional languages over centuries.
Spanish emerged on the Iberian Peninsula, while Romanian developed in the eastern regions of the Roman Empire, specifically in the area of modern-day Romania. Despite the geographic distance between these regions, both languages preserved core Latin elements.
The romance languages include Italian, French, Portuguese, and Catalan, among others. All these languages share a common ancestor in the Latin spoken by common people rather than the classical Latin of scholars and writers.
Lexical Similarity and Latin Roots
Romanian and Spanish share approximately 70% lexical similarity, meaning they have many words with similar forms and meanings. This overlap comes directly from their shared Latin roots.
Common Latin words appear in both languages with recognizable similarities:
English
Romanian
Spanish
Latin Root
Water
apă
agua
aqua
Night
noapte
noche
noctem
House
casă
casa
casa
Time
timp
tiempo
tempus
Many everyday words in Romanian and Spanish trace back to the same Latin words. Verbs, nouns, and adjectives often show clear connections through their Latin origins.
The vocabulary similarities make it easier for speakers of one language to recognize words in the other. However, Romanian has also borrowed extensively from Slavic languages due to geographic proximity, which creates some differences.
Syntactic Structure and Grammar Features
Both Romanian and Spanish typically follow a subject-verb-object word order in basic sentences. This syntax pattern makes sentence construction similar between the two languages.
Romanian grammar includes gendered nouns like Spanish, with masculine, feminine, and neutral categories. Spanish uses only masculine and feminine genders.
Both languages use verb conjugations that change based on person, number, tense, and mood. They maintain Latin’s system of marking verbs to show who performs the action and when it occurs.
Romanian retains the Latin case system more than Spanish does, with distinct forms for nominative, accusative, genitive, and dative cases. Spanish simplified most case distinctions, relying more on word order and prepositions.
Phonological Characteristics and Alphabet
The Romanian alphabet uses 28 letters based on the Latin alphabet, while Spanish uses 27 letters from the same Latin alphabet system. Both writing systems allow speakers to read text with relative ease once they learn the specific letter combinations.
Romanian includes five special letters not found in Spanish: ă, â, î, ș, and ț. These characters represent specific sounds in Romanian phonology. Spanish uses ñ, which doesn’t appear in Romanian.
Romanian phonology includes sounds that differ from Spanish pronunciation patterns. Romanian maintains more vowel distinctions, while Spanish has a simpler five-vowel system. Both languages are largely phonetic, meaning words are pronounced as they are written with consistent rules.
Key Differences and Modern Influences
While Romanian and Spanish share Latin roots, they have developed distinct grammatical systems and vocabularies. Romanian absorbed significant Slavic influences over centuries, while Spanish remained closer to Western Romance patterns.
Distinct Grammar and Article Usage
Romanian stands apart from Spanish through its unique grammar structure. The Romanian language attaches articles to the end of nouns rather than placing them before, as Spanish does. For example, “the book” becomes “cartea” in Romanian, where “-a” serves as the definite article attached to “carte.”
Romanian preserves three grammatical genders (masculine, feminine, and neuter) while Spanish uses only two. This feature makes Romanian more complex for learners.
The case system in Romanian marks another major difference. Romanian uses five grammatical cases to show relationships between words, similar to Latin. Spanish dropped this system almost entirely, relying on word order and prepositions instead.
The Impact of Slavic and Other Language Influences
Slavic influence on Romanian shaped the language significantly between the 6th and 13th centuries. About 10-15% of the common Romanian vocabulary comes from Slavic languages. Words like “da” (yes), “prieten” (friend), and “iubi” (to love) all have Slavic origins.
The Romanian language also borrowed from Turkish, Hungarian, and Greek due to historical contact. Moldova and Romania both use these Slavic loanwords in everyday speech. Church Slavonic served as the liturgical language in Romanian territories for centuries, which reinforced these borrowings.
Spanish followed a different path. Arabic contributed roughly 8% of the Spanish vocabulary during the Moorish occupation of Iberia. The Spanish language absorbed words like “almohada” (pillow) and “alcalde” (mayor) from Arabic rather than Slavic sources.
Loanwords and Unique Vocabulary
Romanian vocabulary differs substantially from Spanish despite their shared Latin base. Modern Romanian borrowed extensively from French in the 19th century to “re-Latinize” the language. Words like “birou” (office) from the French “bureau” entered common use.
The differences between Romanian and Spanish become clear in everyday words:
English
Romanian
Spanish
Beautiful
frumos (Slavic)
hermoso (Latin)
Girl
fată (Latin)
chica (uncertain origin)
To work
a lucra (Latin)
trabajar (Latin via a different root)
Romanians kept some Latin words that the Spanish lost. Spanish developed its own terms through different language evolution paths.
Challenges and Mutual Intelligibility
Learning Romanian and learning Spanish present different challenges due to limited mutual intelligibility. Spanish speakers cannot easily understand spoken or written Romanian without study. The Slavic loanwords, pronunciation differences, and grammatical structures create barriers.
A Spanish speaker might recognize written Romanian words occasionally, but comprehension remains low. Estimates suggest only 20-30% mutual intelligibility between the two languages in practical situations.
Those who learn Romanian after Spanish (or vice versa) still benefit from shared Latin vocabulary. Grammar concepts like verb conjugation follow some similar patterns. However, students must essentially learn Spanish or learn Romanian as separate languages rather than closely related dialects.
Frequently Asked Questions
Romanian and Spanish share about 20-30% of their vocabulary due to their Latin roots, but speakers of one language cannot easily understand the other without study. The two languages have different sound systems and grammar structures, though both use similar verb conjugation patterns inherited from Latin.
How mutually intelligible are Romanian and Spanish for native speakers?
Romanian and Spanish speakers cannot understand each other in conversation without prior language study. The two languages sound very different because Romanian has Slavic influences that changed how words are pronounced.
A Spanish speaker might recognize some words in written Romanian, especially those related to basic concepts like “casa” (house) or “agua” (water). However, most sentences would remain unclear because Romanian uses many Slavic-borrowed words that have no connection to Spanish. Romanian also has three grammatical genders and case endings, which makes its structure harder for Spanish speakers to follow.
The intelligibility rate between the two languages is estimated at around 15-20% for written text. This is much lower than the intelligibility between Spanish and Italian, which sits at about 80%.
How do Romanian and Spanish grammar and verb conjugations compare?
Both Romanian and Spanish conjugate verbs in similar ways because they inherited this system from Latin. Each language has verb endings that change based on person, number, tense, and mood.
Romanian maintains more complex features from Latin than Spanish does. It keeps three grammatical genders (masculine, feminine, and neuter) while Spanish only has two. Romanian also preserves the Latin case system with five cases, whereas Spanish dropped this feature entirely.
Both languages form the future tense differently from Latin. Spanish uses the infinitive plus “haber” (will), while Romanian typically uses the verb “a vrea” (to want) as an auxiliary. Their past tenses work similarly, with both having simple past and compound past forms.
Is Romanian closer to Spanish or to French and Portuguese overall?
Romanian shares more vocabulary with French than with Spanish. Studies show that Romanian and French have about 75% lexical similarity, compared to the 20-30% similarity between Romanian and Spanish.
Portuguese sits between these two extremes, sharing roughly 25-30% of its vocabulary with Romanian. This similarity comes mostly from Latin roots that all three languages preserved. Romanian borrowed heavily from French during the 19th century, which added thousands of modern words to its vocabulary.
In terms of grammar structure, Romanian differs significantly from all three languages. It keeps more archaic Latin features like the case system and neuter gender. French and Romanian both have front rounded vowels, which Spanish lacks entirely. Portuguese and Romanian share some nasal sounds that Spanish does not have.
There’s a persistent myth in the business world that doing good and doing well are a trade-off. Businesses believe that building an environmental, social, and governance (ESG) strategy means sacrificing profitability on the altar of idealism.
The data, fortunately, tells a very different story. Far from being a cost center, strong ESG practices are actually helping companies win big.
And the market is voting with its wallet. The global ESG investing space hit about $39 trillion in 2025 and is projected to climb to $180.78 trillion by 2034.
So, how exactly does ESG light that growth spark? Dive in, for we’ll discuss that here.
1. Access to Capital and Better Investment Terms
Money fuels growth, and ESG opens the wallet. Investors with trillions under management increasingly favor companies that manage environmental, social, and governance risks well.
The U.S. Sustainable Investment Forum (SIF) report notes that 77% of sustainable investors use ESG integration as their main tool. They focus on climate, board quality, and human rights.
That is because these firms are seen as more resilient and future-ready. The result? Lower borrowing costs, better loan terms, and access to huge pools of dedicated ESG capital.
Some investors use special kinds of loans called green bonds, which are specifically for projects that help the environment. Others use sustainability-linked loans. These loans are like a deal with the bank. If the company meets its green goals, like cutting emissions or boosting diversity metrics, the bank lowers the interest rate.
Enel is a case in point. This energy company switched its focus to solar and wind power. As they went green, they gained billions of dollars from investors. Another example is Crown Castle. The interest rate on its loan dropped when it replaced the old lights on its towers with energy-saving LEDs.
2. Mitigating Risks Before They Become Crises
A huge part of growing a company is staying out of trouble. It means planning for the worst, so the company can stay at its best. A solid ESG strategy can help you see problems before they explode.
When companies cut corners on safety, ignore the people they affect, or make dishonest choices, it backfires. These mistakes lead to a bad reputation, heavy government fines, and costly lawsuits.
A relevant example of this is the transvaginal mesh scandal in the medical industry. Transvaginal mesh (a small surgical net) is used to treat stress urinary incontinence and pelvic organ prolapse.
However, thousands of women who got them implanted suffered complications, such as chronic pelvic pain and urinary dysfunction. That led to a wave of transvaginal mesh lawsuit claims.
TorHoerman Law notes that lawsuits blame manufacturers for defectively designing the products and inadequately testing. Manufacturers have paid out an estimated $8 billion or more in settlements and verdicts across thousands of cases.
This shows how lapses in long-term safety monitoring and rigorous ethical governance can lead to huge litigation. Had the company followed ESG rules from the beginning, it could have avoided this disaster.
3. Fostering Innovation and New Product Development
Some of the best product ideas in recent history have come directly from sustainability constraints.
When companies set hard targets on emissions, waste, or resource efficiency, they are essentially forced to innovate. And innovation, as every growth-focused executive knows, is where competitive moats get built.
The market is hungry for innovations. Consumers are willing to pay more for ethical, eco-friendly options. A study by PwC found that consumers are willing to pay 9.7% more for products that are sustainably made or sourced. That demand drives fresh revenue streams.
Beyond Meat is an excellent example. It developed plant-based alternatives that slash greenhouse gases by up to 90% compared with traditional meat. That helped the company tap into a new market and attract major growth capital.
Innovation is not just about new products. It is also about learning the ropes of better design. IKEA found that by using less material, it could lower its costs. It also invested in its own wind and solar power. This move would reduce its energy use by 80% by the year 2030.
When you save money on energy and materials, you become more profitable. This cost optimization gives you more cash to expand.
Time to Build Your ESG Edge
The era of choosing between profit and purpose is over. A solid ESG strategy is the new golden rule for business growth. It gives you the capital to expand, the resilience to survive, and the inspiration to innovate.
It’s not just the right way to run a business but the smartest way. So, why not take that first step today? Review your practices, set some achievable targets, and watch how responsibility and growth go hand in hand.
Lead with integrity, and you will be the one who defines the future of the industry. Your business and the world will be better for it.
Latin died out as a spoken language centuries ago, but its influence lives on through modern languages. Many people wonder which present-day language most closely resembles the ancient tongue of the Roman Empire. Italian is widely considered the closest living language to Latin, sharing approximately 80% of its vocabulary and maintaining similar grammatical structures.
The Romance languages all evolved directly from Latin as the Roman Empire spread across Europe. Spanish, French, Portuguese, and Romanian also trace their roots back to Latin, but each developed unique characteristics over time. These languages belong to the larger Indo-European language family, which includes many other modern tongues.
Understanding which language resembles Latin most helps us see how languages change and adapt. It also shows us the lasting impact of the Roman Empire on modern communication. The connection between Latin and today’s romance languages reveals fascinating patterns in how people speak and write.
Key Takeaways
Italian shares the most vocabulary and grammar with Latin compared to other modern languages
All Romance languages descended from Latin as the Roman Empire expanded throughout Europe
Studying Latin roots helps explain similarities and differences among European languages today
Linguistic Proximity: Evaluating Similarity to Latin
Italian maintains the highest lexical similarity to Latin at approximately 89%, while Sardinian preserves several archaic phonological features that disappeared in other Romance languages. Spanish, French, Portuguese, and Romanian each diverged differently through distinct phonological shifts, vocabulary changes, and grammatical simplifications of Latin’s complex case system.
Italian and Its Relationship with Latin
Italian shares the closest overall relationship with Latin among modern Romance languages. The lexical similarity between Latin and Italian reaches about 89%, meaning nearly nine out of ten Italian words derive directly from Latin roots.
The Italian language preserves Latin vocabulary with minimal changes. Words like “settimana” (week) closely mirror their Latin origins. Italian maintains Latin’s seven-vowel system, which includes open and closed versions of the “e” and “o” sounds.
However, differences between Latin and Italian exist in grammar and structure. Latin used a complex case system with six cases to show word relationships, while Italian dropped this system and relies on word order and prepositions. Italian added definite and indefinite articles, which Latin lacked entirely.
The verb conjugation patterns in Italian are simplified from Latin but retain similar structures. Italian preserved the distinction between long consonants, a feature present in classical Latin pronunciation. Word stress patterns follow similar rules, though Italian pronunciation evolved to sound closer to how speakers actually articulated words in late Imperial Rome.
Sardinian: A Special Case Among Romance Languages
Sardinian stands out among Romance languages for preserving archaic Latin features. Logudorese Sardinian, spoken in central Sardinia, maintains phonological characteristics that disappeared elsewhere.
The language kept Latin’s hard “k” sound before “e” and “i” vowels, where other Romance languages softened these sounds. This preservation makes certain words sound remarkably similar to their Latin ancestors. Sardinian retained some Latin vocabulary that vanished in other Romance languages.
The phonology of Sardinian shows minimal evolution from Vulgar Latin. Its vowel system and consonant patterns remain conservative compared to dramatic shifts in French or Romanian. This linguistic conservatism stems from Sardinia’s geographic isolation, which limited outside influences that transformed mainland Romance languages.
Comparing Major Romance Languages: Spanish, French, Portuguese, and Romanian
Spanish maintains approximately 75% lexical similarity with Latin vocabulary. The word “semana” (week) demonstrates typical evolution from Latin roots. Spanish simplified Latin’s case system completely and developed its own pronunciation patterns.
French diverged furthest phonologically from Latin among major Romance languages. Nasal vowels, silent final consonants, and significant sound reductions make French pronunciation quite distinct from Latin. However, French vocabulary still derives predominantly from Latin sources.
Portuguese shares about 85% lexical similarity with Latin. Its phonology includes nasal sounds and vowel reduction patterns similar to French but maintains closer ties to Latin vocabulary than Spanish.
Romanian preserves the case system better than other Romance languages, retaining three cases compared to Latin’s six. Geographic isolation and Slavic influences created unique characteristics, yet Romanian vocabulary remains 77% Latin-derived.
Key Linguistic Features: Phonology, Vocabulary, and Grammar Structures
Phonology represents how languages sound and pronounce words. Latin pronunciation featured clear vowel distinctions and consistent consonant sounds. Italian regional dialects maintain these features better than other Romance languages, though variations exist across Italy.
Latin vocabulary forms the foundation of all Romance languages. Words for everyday concepts remained remarkably stable across centuries. The use of articles distinguishes modern Romance languages from Latin, which conveyed definiteness through context and word endings.
Grammar structures show the most significant changes from Latin. The case system governed Latin word relationships through noun endings. Modern Romance languages abandoned most cases, using prepositions instead.
Verb conjugation patterns evolved but maintained recognizable similarities. Latin had four main conjugation classes based on infinitive endings. Italian preserved these distinctions more clearly than French or Romanian, which merged or simplified conjugation patterns significantly.
The Romance Language Family: Historical Evolution and Classification
The Romance language family descended directly from Latin, spreading across the Roman Empire and evolving into distinct languages after Rome’s political collapse. These languages are split into four major branches based on geographic regions and shared linguistic features.
From Classical Latin to Vulgar Latin
Classical Latin was the formal written language used by educated Romans in literature, government, and official documents. This standardized form existed primarily in writing and formal speech.
Vulgar Latin was the everyday spoken language of common people throughout the Roman Empire. Soldiers, merchants, and settlers spread this informal Latin across Europe, North Africa, and parts of Asia. The spoken form varied significantly by region and changed faster than written Classical Latin.
As the Roman Empire expanded, Vulgar Latin absorbed words and sounds from local languages. Different regions developed unique pronunciations, grammar patterns, and vocabulary. These regional differences grew larger over time, especially after communities became isolated from Rome’s central authority.
The gap between Classical and Vulgar Latin widened from around 200 BCE to 600 CE. Written texts occasionally revealed features of spoken Latin, showing simplified grammar and new word formations that would later appear in Romance languages.
Major Branches: Western, Eastern, Italo-Dalmatian, and Southern Romance
The Romance language family belongs to the Italic branch of Indo-European languages. Linguists divide modern Romance languages into four main branches based on shared characteristics.
Western Romance includes two major groups. Ibero-Romance contains Spanish (Castilian), Portuguese, Catalan, Galician, and Aragonese. Gallo-Romance includes French and Occitan. These languages share features like specific verb patterns and similar vocabulary for common words such as hablar (Spanish) and fazer (Portuguese).
Eastern Romance consists primarily of Romanian and Aromanian. These languages developed in southeastern Europe and retained some Latin features while adopting many Slavic and Greek words.
Italo-Dalmatian languages formed in Italy and parts of the Dalmatian coast. This branch includes standard Italian, Neapolitan, and Sicilian.
Southern Romance encompasses Sardinian and Corsican. Sardinian preserves many ancient Latin features, making it particularly conservative among Romance languages.
Influences Shaping Romance Languages After the Fall of the Western Roman Empire
The fall of the Western Roman Empire in 476 CE isolated Latin-speaking communities from each other. Regional varieties of Vulgar Latin evolved independently into separate languages.
Germanic tribes, Arabic-speaking Moors, and Slavic groups controlled different former Roman territories. These groups introduced new words and sometimes affected pronunciation patterns. French developed nasal vowels partly through contact with Germanic languages.
The Catholic Church preserved Classical Latin for religious purposes, but people spoke evolving Romance languages in daily life. Dante Alighieri wrote important works in Italian during the 1300s, helping establish Romance languages as legitimate literary languages.
Most Romance languages retained Latin’s pro-drop feature, allowing speakers to omit subject pronouns. Verb systems changed significantly, with new compound tenses replacing some Classical Latin forms. Spanish hacer and Portuguese fazer both came from Latin facere, but show how pronunciation diverged.
Trade routes and political borders determined which communities stayed in contact. Languages spoken in neighboring regions influenced each other, while those separated by mountains or seas developed more distinct features.
Frequently Asked Questions
Italian maintains the closest vocabulary match to Latin at around 80% similarity, while Romanian preserves grammatical features like noun cases that other Romance languages have lost. Spanish and Portuguese both descend from Latin but differ in how they evolved their sounds and verb systems.
Which modern language is most similar to Latin in vocabulary and grammar?
Italian shares about 80% of its vocabulary with Latin, making it the closest match in terms of words. The language developed in the Italian peninsula, where Latin originated, which helped it maintain many original Latin terms.
Romanian stands out for grammar because it kept the case system that Latin used. Most other Romance languages dropped this feature over time. Romanian nouns change their endings based on their role in a sentence, just like Latin nouns did.
No single language wins in both categories. Italian excels at vocabulary preservation, while Romanian maintains more grammatical structures from Latin.
Is Romanian generally considered the closest living language to Latin?
Romanian keeps three grammatical cases that Latin had: nominative, accusative, and genitive-dative. This makes it unique among major Romance languages. French, Spanish, and Italian all lost their case systems centuries ago.
The language also preserved the neuter gender for some nouns. Latin had three genders (masculine, feminine, and neuter), but most Romance languages only kept two.
Romanian vocabulary contains many Slavic and other non-Latin words due to geographic influences. This means that while its grammar resembles Latin more closely, its word stock is less similar than Italian or Spanish. Linguists debate whether grammatical structure or vocabulary matters more when measuring closeness to Latin.
Between Spanish and Portuguese, which retains more features of Latin?
Portuguese keeps more sounds from Latin that Spanish has changed or dropped. The language preserved the Latin “f” sound at the beginning of words, while Spanish often changed it to “h.” For example, Latin “facere” became Portuguese “fazer” but Spanish “hacer.”
Spanish simplified some verb conjugations that Portuguese maintained. Portuguese has a personal infinitive, a verb form that changes based on who acts. Latin had similar complexity in its verb system.
Both languages lost Latin’s case system and neuter gender. They share about 75-89% of their vocabulary with Latin. Portuguese edges ahead slightly in phonetic and grammatical preservation.
Is Sicilian or standard Italian more similar to Latin?
Standard Italian comes from the Tuscan dialect spoken in Florence during the Renaissance. Sicilian developed separately in Sicily with influences from Greek, Arabic, and Norman French. Both descended from Vulgar Latin but took different paths.
Standard Italian maintains clearer connections to written Classical Latin. The language was standardized by scholars and writers who looked to ancient Roman texts as models. This gave it a more direct relationship to formal Latin vocabulary and structure.
Sicilian preserved some Latin features that standard Italian changed. The language kept certain vowel sounds and consonant clusters closer to their Latin forms. However, Sicilian’s heavy borrowing from non-Latin sources means its overall vocabulary diverges more from Latin than standard Italian does.
Standard Italian is closer to Latin overall. It serves as the literary and official language of Italy and reflects conscious efforts to maintain the Latin heritage.
Duolingo has become one of the most popular apps for learning Spanish, but many users wonder which version of Spanish they’re actually learning. Duolingo teaches Latin American Spanish as its default Spanish course, with a primary focus on Mexican Spanish vocabulary and pronunciation. This means the words, phrases, and accent learners hear most often come from Latin American regions rather than Spain.
The app uses a neutral Latin American approach that works well across most Spanish-speaking countries in the Americas. Voice actors on Duolingo come from different Latin American countries, so learners get exposure to slight variations in accent. However, the core vocabulary and grammar follow Latin American standards.
This choice makes sense because Latin American Spanish is spoken by more people across more countries than European Spanish. The differences between these versions mostly involve certain pronunciations, some vocabulary words, and a few grammar points. Both versions are correct and useful, but knowing which one you’re learning helps set the right expectations.
Key Takeaways
Duolingo’s Spanish course teaches Latin American Spanish with a focus on Mexican Spanish vocabulary and pronunciation
Learners hear voice actors from various Latin American countries, providing exposure to different accents within the same course
Latin American Spanish differs from European Spanish mainly in pronunciation, some vocabulary choices, and a few grammar structures
What Type of Spanish Does Duolingo Teach?
Duolingo primarily teaches Latin American Spanish with a strong focus on Mexican Spanish vocabulary and pronunciation. The course includes some Castilian Spanish elements while maintaining a mostly neutral, standardized approach to grammar and vocabulary.
Primary Dialect: Latin American Spanish
Duolingo’s Spanish course is built around Latin American Spanish rather than European variants. This means learners encounter vocabulary, pronunciation, and grammatical structures common across most of Central and South America.
The course uses Latin American pronunciation patterns as its foundation. Users hear the “s” sound instead of the “th” sound that Castilian Spanish speakers use for “c” and “z” in certain words. For example, “gracias” sounds like “grah-see-ahs” rather than “grah-thee-ahs.”
Latin American Spanish vocabulary appears throughout the lessons. Words like “computadora” (computer) and “carro” (car) are taught instead of the Peninsular Spanish equivalents “ordenador” and “coche.”
Duolingo’s Emphasis on Mexican Spanish
Mexican Spanish serves as the main reference point within Duolingo’s Latin American Spanish approach. The voice recordings primarily feature Mexican Spanish speakers, which means learners hear Mexican pronunciation patterns and intonation.
Certain vocabulary choices reflect Mexican usage specifically. The course includes words and phrases that are most common in Mexico, though many of these terms are understood across Latin America.
The app’s development team has stated that Mexican Spanish was chosen because of its large speaker population and widespread media presence. Mexico has more Spanish speakers than any other country, making it a practical choice for learners.
Role of Neutral and Standardized Spanish
Duolingo attempts to teach a standardized version of Spanish that works across different regions. The grammar instruction follows universal Spanish rules that apply to both Latin American and European Spanish.
The course avoids highly regional slang and colloquialisms. Instead, it focuses on vocabulary and phrases that Spanish speakers from different countries would recognize and understand. This neutral approach helps learners communicate effectively in various Spanish-speaking environments.
Verb conjugations follow standard Spanish patterns without regional variations. The course teaches formal and informal pronouns (“usted” and “tú”) while mostly avoiding regional forms like “vos.”
Castilian Spanish Elements in the Course
Some Castilian Spanish features appear within the course despite its Latin American focus. The formal plural pronoun “vosotros” is introduced in later lessons, though it receives less emphasis than Latin American alternatives.
Learners encounter explanations about Peninsular Spanish pronunciation differences. The app notes when certain words or pronunciations vary between Latin American and Castilian Spanish.
Key differences noted in the course:
Pronunciation of “c” and “z” sounds
Use of “vosotros” versus “ustedes”
Certain vocabulary preferences
The inclusion of these Castilian elements gives learners awareness of Spanish dialects without changing the course’s primary Latin American orientation.
Regional Variations and Learning Experience on Duolingo
Duolingo teaches Latin American Spanish as its default course, with some exposure to different accents and vocabulary from various Spanish-speaking countries. The platform includes certain regional features while maintaining a focus on widely understood Spanish grammar and vocabulary.
Inclusion of Latin American Regional Features
Duolingo’s Spanish course incorporates vocabulary and phrases common across Latin America. The platform teaches “computadora” instead of Spain’s “ordenador” for computer, and “autobús” rather than “guagua” used in some Caribbean countries.
The course includes some exposure to voseo, particularly Argentinian voseo, though it’s not the primary teaching method. Learners encounter “vos” as an alternative to “tú” in certain lessons. However, the standard “tú” conjugations remain the main focus.
Argentinian Spanish features appear occasionally in examples, including different verb forms used with vos. Colombian Spanish influences also show up in vocabulary choices, as Colombia is known for clear pronunciation. The course doesn’t deeply teach regional variations but acknowledges they exist.
Exposure to Spanish Accents and Vocabulary
Duolingo provides audio from different Spanish accents throughout its lessons. Learners hear voices from various South American native speakers and other Spanish-speaking countries.
The Duolingo Podcasts offer more extensive accent exposure. These podcasts feature stories told by native speakers from multiple countries, including Argentina, Mexico, and others. This helps students recognize different pronunciation patterns and speaking styles.
The app’s vocabulary tends toward neutral terms understood across regions. When regional differences exist, Duolingo usually teaches the most widely recognized version. Students who want to learn Spain Spanish specifically may need additional resources, as the course doesn’t focus on Peninsular Spanish features like the “vosotros” form or “z” pronunciation.
Differences Between Spain Spanish and Latin American Spanish
Spain Spanish uses “vosotros” as the plural informal “you,” while Latin American Spanish uses “ustedes” for all plural “you” situations. Duolingo teaches only “ustedes,” which matches South American Spanish usage.
Spanish grammar differs in verb conjugations between regions. Spain employs the present perfect tense more frequently in everyday speech, while Latin Americans often use the simple past instead. Duolingo follows the Latin American preference.
Pronunciation marks another key difference. Spain Spanish pronounces “c” before “e” or “i” and “z” with a “th” sound, while Latin American Spanish uses an “s” sound. The app teaches the Latin American pronunciation style.
Students wanting to learn Spain Spanish should supplement with materials focused on Peninsular Spanish or practice with native speakers from Spain.
The biotechnology sector in the United States is currently undergoing a “digital-biological convergence.” As we move through 2026, the industry has shifted away from simple discovery toward complex biomanufacturing and precision medicine. For biology students, the transition from the classroom to a high-paying R&D role requires more than a general understanding of life sciences; it requires a mastery of specialized laboratory “toolkits.”
In hubs like the Research Triangle in North Carolina, Boston’s Kendall Square, and the burgeoning “Silicon Holler” in the Midwest, recruiters are looking for candidates who can navigate the nuances of recombinant technologies and high-throughput data.
1. Advanced Protein Engineering and Recombinant Expression
Protein-based therapeutics (biologics) now dominate the pharmaceutical market. Understanding how to design, express, and purify complex molecules is a foundational skill. A prime example of a niche yet vital target in research is the COMP recombinant protein.
Students must understand the challenges of expressing a pentameric protein like COMP, which requires precise post-translational modifications and folding.
Host Cell Selection: Learning when to use mammalian systems (like CHO cells) versus microbial systems (E. coli) based on the complexity of the protein.
Purification Strategy: Mastery of AKTA systems and FPLC (Fast Protein Liquid Chromatography) is essential. You aren’t just “running a column”; you are optimizing pH, ionic strength, and flow rates to ensure 98%+ purity.
2. CRISPR-Cas9: Beyond Simple Gene Knockouts
In 2026, CRISPR is no longer “new,” but its applications have become far more sophisticated. The industry has moved into Base Editing and Epigenetic Editing.
The Technique: Students should be proficient in using bioinformatic tools to design guide RNAs (gRNAs) that minimize off-target effects.
Validation: It is not enough to edit a cell; you must prove the edit happened correctly using Digital Droplet PCR (ddPCR) or Sanger sequencing.
Career Impact: This skill is the “golden ticket” for roles in Cell and Gene Therapy (CGT) companies, which are currently seeing the highest venture capital investment in the US.
3. Next-Generation Sequencing (NGS) and Library Preparation
While many labs outsource their actual sequencing, the high-value work happens in Library Preparation. This is the process of converting a biological sample into a format that a sequencer can read.
Single-Cell Analysis: Modern biotech focuses on “single-cell RNA-seq.” Instead of looking at a bulk tissue sample, researchers analyze how individual cells respond to a drug.
Data Literacy: Students must bridge the gap between “wet lab” (pipetting) and “dry lab” (coding). Understanding how to navigate a Linux terminal or run basic R scripts to visualize NGS data makes you twice as employable.
4. Bioprocess Engineering: The Art of Scaling Up
A common bottleneck in US biotech is the “Scale-up Gap.” Scientists can make a milligram of a substance in a test tube, but can they make ten kilograms in a factory?
Bioreactor Management: Students should understand the variables of fermentation: dissolved oxygen (DO), agitation speeds, and nutrient feed-batch strategies.
Quality Control: In a professional setting, techniques are governed by Good Manufacturing Practice (GMP). Learning how to document every step of the synthesis of a COMP recombinant protein is just as important as the synthesis itself.
5. Multi-Omics and Mass Spectrometry
We are moving away from looking at one gene or one protein at a time. The future is “Multi-Omics”—the simultaneous study of the genome, transcriptome, and proteome.
Mass Spec (LC-MS): This is the gold standard for identifying proteins and metabolites. Mastery of liquid chromatography coupled with mass spectrometry allows researchers to detect minute changes in cellular signaling.
Why “Niche” Knowledge Wins the Interview
When a student mentions they have worked with a specific, complex molecule—such as the COMP recombinant protein—it signals to an employer that they understand the difficulties of working with large, multi-subunit glycoproteins. These proteins are notoriously difficult to stabilize, and familiarity with their biochemical properties shows a level of “bench-side maturity” that generic lab experience lacks.
The Educational Path Forward
For those still in university, the best way to gain these skills is through undergraduate research or co-op programs. Don’t just follow the lab manual; ask your PI (Principal Investigator) about the mechanics of the reagents. For instance, why is the COMP recombinant protein stored in a specific buffer? How does its calcium-binding domain affect its stability during chromatography?
Understanding the “why” behind the “how” is what transforms a lab technician into a scientist. As the US biotech market continues to expand into specialized areas like longevity research and synthetic biology, these high-level techniques will be the bedrock of your career.
Many people download Duolingo and ask if it truly teaches a language well. The app promises quick lessons, daily practice, and steady progress. It uses short exercises to build vocabulary, grammar, and sentence structure.
Duolingo is accurate for basic vocabulary and grammar, but it does not replace real conversation or full language study. It checks answers with clear rules and gives instant feedback. However, it cannot fully judge natural speech, deep context, or cultural nuance. Results depend on how often a person practices and whether they use other tools along the way.
Key Takeaways
Duolingo gives reliable practice for basic words and grammar.
Its accuracy works best for beginners who practice often.
It cannot fully replace real-life speaking or deeper study.
Evaluating Duolingo’s Accuracy
Duolingo offers structured lessons, clear grammar patterns, and strong vocabulary drills. Its accuracy depends on the language studied, the learner’s goals, and how much real-world practice they add outside the app.
Examining Language Content Quality
Duolingo builds its courses around common words and daily phrases. In popular courses like Duolingo Spanish and Duolingo French, the content reflects standard grammar and widely accepted usage.
The platform designs lessons with short translations, matching tasks, and sentence building. These activities help learners notice patterns in verb forms, word order, and agreement rules.
Duolingo also updates its courses over time. It uses feedback, data, and Duolingo AI tools to adjust content and fix errors. This improves accuracy in spelling, grammar, and sentence structure.
However, course depth varies. Spanish and French offer longer paths with more review units. Smaller courses may have fewer examples and less cultural context, which can limit deeper language acquisition.
For reading and basic writing, the material stays mostly accurate. It focuses on clear, standard forms instead of slang or regional speech.
Strengths in Vocabulary and Grammar Instruction
Duolingo uses spaced repetition to improve memory. The app reviews weak words more often and tracks mistakes through its adaptive learning system.
This method supports steady vocabulary growth. Learners see the same words in new sentences, which helps them understand meaning in context.
Grammar appears in small steps. Instead of long rules, Duolingo lessons show patterns through examples. For instance, learners practice verb changes many times before moving on.
Key strengths include:
Frequent review of past mistakes
Clear sentence structure practice
Gradual increase in difficulty
Immediate feedback on errors
These features make Duolingo useful for beginners. It builds a solid base for reading and basic writing.
Still, it does not fully explain complex grammar rules. Learners who want deeper knowledge may need textbooks or teacher support.
Limitations in Pronunciation and Speaking Skills
Duolingo includes listening clips and voice recording tasks. These tools help users hear native accents and practice speaking.
However, speech recognition is limited. The system may accept unclear pronunciation or reject correct speech due to background noise.
The app focuses more on written input than free conversation. It does not simulate long, natural dialogue. This makes it harder to build real-world speaking confidence.
Fluency requires live interaction. Duolingo lessons cannot fully replace conversations with native speakers or guided speaking practice.
Learners who rely only on the app may read well but struggle to speak smoothly. Real-world practice remains essential for strong pronunciation and communication skills.
Factors Affecting Duolingo’s Effectiveness
Duolingo’s results depend on how a learner uses it, how often they practice, and whether they add other tools. Features like streaks and bite-sized lessons can build habits, but depth and real-world use matter just as much.
Gamification, Motivation, and Daily Practice
Duolingo uses gamified learning to keep users active. XP points, streaks, leagues, and badges reward daily effort. These tools help casual learners build a steady routine.
Bite-sized lessons lower the barrier to entry. A learner can finish a lesson in five minutes. This makes it easier to practice every day, even with a busy schedule.
Streaks often drive consistency. When learners protect a 100-day streak, they show up more often. Regular exposure improves vocabulary recall and basic grammar skills.
However, motivation can shift from learning to earning XP. Some users rush through lessons for points instead of focusing on accuracy. Super Duolingo and Duolingo Max remove ads and add features, but they do not change the core structure. The Duolingo cost may affect whether someone commits long term, especially when compared to other language learning apps.
Depth, Customization, and Real-World Usage
Duolingo offers structured courses and personalized practice based on mistakes. The app adjusts review sessions and suggests weak areas. This helps reinforce grammar and vocabulary.
Still, the platform has limited depth. It focuses on translation, short writing practice, listening practice, and basic speaking practice. Advanced conversation and complex writing receive less attention.
Duolingo Stories add reading and listening context, but they remain controlled exercises. Real conversations move faster and use slang, accents, and cultural cues.
Customization remains basic. Personalized learning paths exist, but learners cannot fully tailor content to specific goals like business language or exam prep. Serious learners and polyglots often need more targeted material. At that point, Duolingo alternatives or specialized tools may offer better support.
Supplementing Duolingo: Strategies for Serious Learners
Serious learners treat Duolingo as one part of a larger language learning strategy. They combine it with speaking practice and real conversation.
Practice with native speakers builds fluency. Language exchange platforms like HelloTalk connect learners with real people. These conversations improve listening speed and natural responses.
Writing short essays and getting corrections also helps. Learners can use tutors or online communities for feedback. This fills gaps left by the app’s short exercises.
A balanced plan might include:
Daily Duolingo lessons for vocabulary
Weekly language exchange sessions
Listening to podcasts or videos
Structured grammar study
Duolingo works best as a habit-building tool. Progress depends on how learners expand beyond the app and apply the language in real situations.
Frequently Asked Questions
Duolingo follows common language standards, teaches core skills like vocabulary and grammar, and offers practice through short exercises. It works best as a structured practice tool rather than a full replacement for classes or real conversations.
How closely does Duolingo’s curriculum align with standard language proficiency tests?
Duolingo designs many of its courses around the CEFR scale (A1 to B2). It groups lessons by skill level, such as beginner or intermediate, similar to how exams like IELTS or DELF measure progress. However, the app focuses more on reading and writing than on long speaking or listening tasks. Standard tests often require essays, full conversations, and timed responses, which Duolingo does not fully match.
What aspects of language learning are most effectively taught by Duolingo?
Duolingo teaches basic vocabulary, sentence structure, and grammar patterns very well. It uses repetition and short exercises to help users remember words. It also builds reading skills through translation and matching tasks. Listening practice is helpful, but it uses short and clear audio clips. Speaking practice exists, but it is limited to short phrases. It does not train long or natural conversations.
Are the translations and sentences by Duolingo reliable for real-world use?
Most translations are accurate and grammatically correct. They reflect common sentence patterns used in daily life. Some sentences sound formal or slightly unnatural because they focus on grammar rules. A few examples are unusual, but they still teach correct structure. For real-world use, learners benefit from checking phrases with native speakers or other sources.
To what extent can Duolingo replace traditional language learning methods?
Duolingo can replace a beginner textbook for early study. It provides structure, review, and daily practice. It cannot fully replace classroom learning, private tutoring, or real conversations. Traditional methods offer deeper speaking practice, cultural context, and detailed feedback. Many learners use Duolingo as a support tool alongside other resources.
Learning a new language with your family just got more affordable. Many Duolingo users wonder if upgrading to a premium subscription makes sense when multiple people want to learn together.
The Super Duolingo Family Plan costs $119.99 per year and covers up to six people, which breaks down to about $1.67 per person per month. This represents significant savings compared to individual Super Duolingo subscriptions, which cost $12.99 per month or $83.99 per year per person.
The family plan offers the same premium features as individual Super Duolingo subscriptions. Each family member gets their own account with unlimited hearts, no ads, and personalized learning tools. Everyone can learn different languages at their own pace while sharing one subscription.
Key Takeaways
The Super Duolingo Family Plan costs $119.99 annually and supports up to six users
Each person gets full access to premium features, including unlimited hearts and ad-free learning
Families save money compared to buying individual Super Duolingo subscriptions for multiple people
Super Duolingo Family Plan Pricing and Value
The Super Duolingo family plan costs $119.99 per year and covers up to six users. This pricing structure offers significant savings compared to purchasing individual Super Duolingo subscriptions for multiple family members.
Annual vs. Per-User Cost Breakdown
Breaking down the Duolingo family plan cost shows clear savings per person. At $119.99 for six users, each person pays approximately $20 per year.
The individual Super Duolingo cost is $83.99 annually. For a family of six purchasing separate subscriptions, the total would reach $503.94 per year.
Cost Comparison:
Individual plan: $83.99 per person per year
Family plan total: $119.99 per year
Family plan per person: $19.99 per year (with 6 users)
Total savings: $383.95 annually (for 6 users) – The lowest in comparison
Even with just two users, the family plan costs less than two individual subscriptions.
Regional Pricing Variations
Super Duolingo pricing varies by country and currency. The $119.99 annual rate applies to users in the United States.
Other regions see different prices based on local currencies and purchasing power. Users in European countries pay in euros, while those in the UK pay in pounds.
The Duolingo pricing structure adjusts for economic factors in each market. Users should check their app store or the Duolingo website for exact pricing in their region.
Comparing Individual and Family Plans
The individual Super Duolingo monthly subscription costs $12.99 per month or $83.99 per year. The family plan only offers annual billing at $119.99.
For single users, the individual plan makes more sense financially. The Super Duolingo family plan becomes worthwhile when at least two people need premium access.
Key Differences:
Individual plan: 1 user, $83.99/year or $12.99/month
Family plan: Up to 6 users, $119.99/year only
Payment options: Individual offers monthly; family requires annual
Management: Family plan needs one admin to invite members
The Duolingo monthly cost option provides flexibility for individuals who prefer shorter commitments. Families committed to long-term language learning save more with the annual family subscription.
Features and Benefits of the Super Duolingo Family Plan
Super Duolingo offers several key features that improve the learning experience, including ad-free lessons, unlimited hearts, offline access, and tools for tracking progress. The family plan gives up to six people access to these premium features under one subscription.
Ad-Free Learning and Unlimited Hearts
Super Duolingo removes all advertisements from the learning experience. Users can focus on their lessons without interruptions or distractions between exercises.
The unlimited hearts feature lets learners make mistakes without losing access to lessons. The free version of Duolingo limits users to five hearts, and each wrong answer costs one heart. When hearts run out, users must wait or complete practice exercises to continue.
With Super Duolingo, this restriction disappears completely. Learners can practice as much as they want without worrying about running out of hearts. This feature helps users learn at their own pace and take more risks when answering questions.
Offline Access and Personalized Practice
Super Duolingo allows users to download lessons for offline learning. This feature works well for people who commute, travel, or have limited internet access. Users can continue their language studies anywhere without needing a connection.
The Duolingo membership includes personalized practice sessions based on individual mistakes and weak areas. The app tracks which words and concepts need more work and creates custom review exercises.
Streak freeze and streak repair features help users maintain their learning streaks. A streak freeze protects a user’s streak for one day if they forget to practice. Streak repair lets users fix a broken streak by completing a lesson the next day.
Progress Quizzes, Mistake Review, and Legendary Level
Progress quizzes test what users have learned across multiple lessons. These assessments help learners see how much they’ve improved and identify areas that need more practice. The quizzes cover vocabulary, grammar, and sentence structure from previous units.
Mistake review collects all incorrect answers in one place. Users can review these errors and practice them until they master the material. This Duolingo feature helps reinforce learning and prevents repeated mistakes.
Legendary Level gives advanced learners an extra challenge. After completing a skill, users can attempt the Legendary Level to prove mastery. Completing this level earns a special trophy and shows true command of the material.
Family Sharing: Member Management and Access
The Duolingo Super family plan covers up to six family members under one subscription. The plan manager can add or remove members through their account settings.
Each family member gets their own individual account with full access to all Super Duolingo benefits. Progress, achievements, and leaderboards remain separate for each person. Everyone maintains their own streak, lessons, and language choices.
Family members can compete with each other on leaderboards while enjoying all premium features. The Duolingo subscription applies to all members automatically once they accept the invitation to join the family plan.
Frequently Asked Questions
The Super Duolingo family plan costs $119.99 per year and allows up to six family members to access premium features. The subscription renews automatically every 12 months unless canceled.
Can I share my Super Duolingo family plan with members outside my household?
Duolingo’s terms of service state that family plans are intended for household members. The company expects users to share the plan with people living at the same address.
However, Duolingo does not actively verify addresses during the invitation process. Users can technically invite anyone, but doing so goes against the stated terms.
How many users can be added to a Super Duolingo family plan?
A Super Duolingo family plan supports up to six total users. This includes the account holder who purchases the plan.
The account holder can invite five additional members to join. Each member gets their own individual account with full Super Duolingo features.
Are there any discounts available for the Super Duolingo family plan?
Duolingo occasionally offers promotional discounts during special events or holidays. These promotions typically reduce the annual price by 20-40%.
New users sometimes receive special offers when they first sign up. Existing users may see discounts when their current subscription is about to expire.
There are no student, military, or senior citizen discounts for the family plan.
How does the billing cycle work for the Super Duolingo family subscription?
The family plan bills annually on the date of purchase. If someone subscribes on January 15, the next charge occurs on January 15 of the following year.
Duolingo sends a reminder email before the renewal date. Users can cancel anytime before the renewal to avoid the next charge.
All family members keep their premium access until the subscription period ends. Canceling does not result in an immediate loss of features.
Learning a new language takes time, and Duolingo makes it easier by breaking lessons into clear sections that guide progress step by step. Each section focuses on specific skills, helping users build vocabulary and grammar in a structured way. Duolingo currently has six main sections in its learning path, each designed to match different levels of language ability.
These sections align with the Common European Framework of Reference for Languages (CEFR), so learners can see how their progress fits recognized language standards. This structure helps them move from simple basics to more advanced communication skills with confidence.
Key Takeaways
Duolingo has six main sections in its learning path.
Each section connects to specific CEFR levels for clear progress tracking.
The platform’s structure helps users move from beginner to advanced skills.
How Many Sections Are in Duolingo?
Duolingo organizes each language course into sections that group related content together. The number of sections varies by language and depends on course size, updates, and how the lessons are structured for users.
Section Counts by Language
Each Duolingo course contains a different number of sections. Larger languages like Spanish, French, and German often have nine or more sections, while smaller courses such as Welsh or Hawaiian may have only four to six.
The table below shows approximate section counts for some popular languages:
Language
Estimated Sections
Notes
Spanish
9–10
One of the most complete courses
French
9–10
Similar in size to Spanish
German
8–9
Slightly shorter but still broad
Japanese
7–8
Includes unique writing lessons
Welsh
4–6
Smaller course, fewer units
Each section groups several units, which contain multiple lessons. The total number of sections may change as Duolingo updates or expands a course.
Relationship Between Sections, Units, and Lessons
Duolingo’s course structure follows a clear hierarchy. Sections act as large categories that organize units by topic or skill level. Each unit then contains several lessons, which focus on specific vocabulary or grammar points.
Unit – smaller topic group (e.g., Travel, Food, Work)
Lesson – individual practice level
As users move forward, they complete lessons to finish a unit, then complete all units to finish a section. This structure helps learners track their progress and identify areas to review.
Unlocking New Sections
Duolingo unlocks new sections as users complete earlier ones. Progress depends on finishing all required units in the current section. Once a section is complete, the next one becomes available automatically.
Some courses also allow early access to later sections through the “Jump Ahead” option. This feature lets experienced learners skip easier content after passing a short test.
Users can view their progress at the top of the course tree, where completed sections appear in color and locked ones remain gray until unlocked.
Duolingo Sections and CEFR Alignment
Duolingo organizes its language courses to match international learning standards while helping users build vocabulary, grammar, and pronunciation skills through daily practice. Each section connects to a specific range of CEFR levels, giving learners a clear sense of progress and measurable goals.
CEFR Levels Covered in Duolingo
Duolingo aligns its lessons with the Common European Framework of Reference for Languages (CEFR), which defines six main levels: A1, A2, B1, B2, C1, and C2. Most Duolingo courses cover A1 to B2, though a few popular languages, such as Spanish and French, include material that reaches C1-level reading and listening skills.
Learners begin with simple phrases and basic grammar at A1. By B1, they can handle everyday conversations and short texts. At B2, users can discuss familiar topics and understand more complex material.
Duolingo’s structure helps learners see how each completed section moves them closer to the next CEFR level. This alignment gives learners a practical way to measure progress and identify what skills they still need to strengthen.
Skill Progression and Section Structure
Each course in Duolingo is divided into units or sections, and each section contains multiple skills. A skill focuses on a single topic, such as food, travel, or verbs. As learners complete skills, they unlock new sections that build on earlier lessons.
Skills are grouped by difficulty and language function. Early sections emphasize recognition and recall, while later ones require more production and comprehension. Duolingo uses crowns to show mastery within each skill, encouraging learners to review and strengthen weak areas.
The section layout supports steady progress. Learners can move at their own pace, returning to earlier sections for review or advancing to new ones when ready. This modular structure makes the CEFR alignment easier to follow.
Role of Vocabulary, Grammar, and Pronunciation
Each section develops three core areas: vocabulary, grammar, and pronunciation. Vocabulary lessons introduce practical words grouped by context, such as greetings or daily activities. Grammar exercises show how to form correct sentences using those words.
Pronunciation practice appears through listening and speaking tasks. Learners repeat words or sentences, and speech recognition checks accuracy. This helps them build confidence in real communication.
By combining these elements, Duolingo ensures balanced skill growth. Strong vocabulary supports grammar learning, and accurate pronunciation improves listening comprehension. Together, these skills form the foundation for reaching higher CEFR levels.
Daily Practice and Achieving Advanced Levels
Consistent daily practice is key to progressing through Duolingo’s sections and reaching advanced CEFR levels. The app encourages short, frequent sessions that reinforce memory and habit formation.
Learners who study every day improve faster than those who practice irregularly. Duolingo’s reminders, streak system, and rewards motivate users to keep going.
While Duolingo can help learners reach B2 or parts of C1, achieving full C1-level fluency usually requires additional exposure, such as reading native materials or speaking with fluent speakers. Still, daily use of the app provides a strong foundation for advanced learning.
Frequently Asked Questions
Duolingo organizes its language courses into structured paths that guide learners step by step. Each part includes lessons, units, and checkpoints that help users track progress and review completed material.
What is the structure of courses in Duolingo?
Each course follows a learning path made up of units and lessons. Units focus on specific topics such as greetings, food, or travel. Lessons within each unit build vocabulary, grammar, and listening skills in short, interactive exercises.
Can you list the different parts of a Duolingo course?
A course contains units, lessons, checkpoints, and stories. Units group lessons by theme. Checkpoints test understanding before moving forward. Stories and practice sessions reinforce what has been learned.
How is progress organized in a Duolingo language course?
Progress moves along a path divided into sections. Learners complete one unit before unlocking the next. Each finished section shows visual progress, helping users see how far they have come in the course.
What are the components of a Duolingo language learning path?
The learning path includes units, lessons, stories, and review exercises. Units are arranged in a sequence that gradually increases difficulty. Review activities appear to strengthen the weak areas identified by the app.
How many levels or stages are there in a typical Duolingo course?
Each course has multiple units and levels that vary by language. Most courses include dozens of units, and each unit has several levels that must be completed to move ahead. The total number depends on how developed the course is.
What constitutes a complete section in the Duolingo app?
A section usually includes a set of related units that cover a specific group of topics. Completing all units in a section unlocks the next one and often triggers a checkpoint test to confirm understanding before continuing.
Learning Spanish on Duolingo can feel like a big task, but knowing how the course is structured makes it easier to plan progress. The Duolingo Spanish course has 216 units, grouped into sections that move from basic phrases to advanced grammar. Each unit builds on the last, helping users grow their skills step by step.
Duolingo organizes its Spanish content into a clear path that keeps lessons short and focused. Every unit includes new vocabulary, grammar, and practice exercises that strengthen understanding. This setup helps learners stay consistent and track their improvement over time.
Key Takeaways
The Duolingo Spanish course includes 216 units.
Units progress from beginner to advanced levels in a structured path.
Each unit focuses on vocabulary, grammar, and practice activities.
How Many Units in Duolingo Spanish?
The Duolingo Spanish course includes dozens of structured units grouped into sections that guide learners from beginner to advanced levels. The total number of units can vary slightly depending on updates, platform, and user progress.
Current Total Unit Count
As of 2025, the Duolingo Spanish course contains about 216 units divided across multiple sections. This total reflects the most recent version of the learning path, which replaced the older “tree” format.
Each unit focuses on a specific topic such as greetings, food, travel, or grammar. Units build in difficulty, introducing new vocabulary and grammar step by step.
Learners typically complete one unit at a time. Each unit includes several lessons, and finishing all the lessons in a unit earns a crown level. The total unit count may differ slightly between the mobile app and web version, but the difference is usually small.
The following table shows a simplified breakdown:
Level Range
Approx. Units
Focus Area
Beginner
60–70
Basic phrases, verbs, gender
Intermediate
80–90
Past tense, travel, family
Advanced
50–60
Subjunctive, idioms, complex grammar
Recent Updates to Unit Structure
Duolingo redesigned its Spanish course structure in 2022 and continued refining it through 2025. The major change was the move from the skill tree to the learning path, which organizes content into a clear sequence of units.
This update standardized lessons, added checkpoints, and improved transitions between grammar concepts. It also adjusted the total number of units to make progress more consistent.
New units now combine reading, listening, and speaking exercises in one flow. The update also introduced story units that appear every few sections to reinforce comprehension.
Because of these changes, users who joined before 2022 may see a different layout or unit count compared to new learners. Duolingo continues to adjust the structure based on user feedback and data performance.
Unit Distribution Across Sections
The 216 units are grouped into sections that represent different learning stages. Each section covers specific grammar goals and vocabulary sets.
Section 1–3: Basic introductions, common verbs, and sentence structure
Section 4–6: Descriptions, family, and past tense forms
Section 7–9: Advanced grammar, subjunctive mood, and complex reading tasks
Each section typically includes between 20 and 30 units. The number may vary slightly as Duolingo tests new lesson formats.
Learners can track their progress through checkpoints placed after each section. These checkpoints help confirm mastery before moving forward. The structure aims to balance review and new material, ensuring steady progress through the Spanish course.
Duolingo Spanish Course Structure
The Duolingo Spanish course follows a structured design that helps learners build vocabulary, grammar, and listening skills step by step. It organizes material by topics and proficiency levels that align with the CEFR (Common European Framework of Reference for Languages).
Sections and Their Themes
The course divides learning into sections, each focusing on a specific language theme. Early sections teach basic greetings, common verbs, and everyday nouns. Later ones cover travel, work, culture, and more complex grammar.
Each section contains multiple units, which group lessons by topic. For example, one unit may focus on food vocabulary, while another introduces past tense verbs.
The structure allows learners to move from simple to more detailed content without skipping essential grammar. Duolingo updates these sections regularly to match current teaching standards.
Below shows a simplified view of how themes progress:
Section
Example Topics
Focus Area
1–3
Basics, Phrases, Food
Vocabulary and simple grammar
4–6
Family, Travel, Shopping
Everyday conversation
7–9
Work, Health, Culture
Intermediate grammar
10+
News, History, Literature
Advanced comprehension
Progression from Beginner to Advanced
Duolingo uses a path-based course structure that moves learners from A1 (beginner) to B2 (upper-intermediate) on the CEFR scale. This range allows users to reach a conversational level in Spanish.
Progress happens gradually. Each section introduces new sentence patterns and grammar rules while reviewing older material. Learners earn crowns and complete checkpoints to unlock higher sections.
At the advanced stages, lessons include listening exercises, translation tasks, and speaking practice through speech recognition. These help strengthen fluency and comprehension.
The adaptive design means users can repeat lessons to improve accuracy. Duolingo tracks performance and adjusts difficulty based on mistakes and speed.
Lesson and Level Breakdown
Each unit contains several lessons, and every lesson has five levels. Levels increase in difficulty by adding longer sentences, new verb tenses, and faster audio.
A typical lesson includes short exercises such as:
Matching words to images
Translating sentences
Listening and typing what is heard
Speaking aloud for pronunciation checks
Completing all levels in a unit earns a crown, showing mastery of that topic. Learners can choose to advance quickly or strengthen earlier lessons for better retention.
This system helps learners measure progress clearly while keeping practice short and manageable.
What Each Unit Covers in Duolingo Spanish
Each unit in Duolingo Spanish builds specific language skills through short, focused lessons. Learners practice vocabulary, grammar, and pronunciation while earning points and leveling up through interactive exercises.
Vocabulary and Grammar Focus
Each unit introduces a set of new words grouped by topic, such as family, travel, or food. Learners review these words through matching, translation, and fill-in-the-blank tasks.
Grammar lessons teach sentence structure, verb conjugations, and gender agreement. For example, early units explain how to use ser and estar or how to form plural nouns.
Duolingo uses spaced repetition, a technique to help learners learn fast and remember vocabulary over time. Grammar rules appear in context, helping learners understand how words change depending on tense or subject.
A simple table might show progression:
Unit Range
Focus Area
Example Topics
1–5
Basic grammar and nouns
Greetings, colors
6–10
Verbs and adjectives
Daily activities
11–20
Complex sentences
Past tense, opinions
Speaking and Listening Exercises
Speaking and listening tasks train pronunciation and comprehension. Learners repeat phrases into their device’s microphone and receive instant feedback on accuracy.
Listening activities range from identifying spoken words to translating full sentences. The app uses native speaker audio, which helps learners hear natural intonation and rhythm.
Short listening clips test recognition of similar-sounding words, improving attention to detail. Speaking challenges encourage learners to form complete sentences instead of single words.
These exercises develop practical skills needed for real conversations. Each unit increases difficulty by adding faster speech and longer sentences.
Gamification and Learning Features
Duolingo’s gamification elements motivate consistent practice. Learners earn XP points, maintain streaks, and collect crowns for completing lessons.
The hearts system limits mistakes, encouraging careful learning. Daily goals and leaderboards create friendly competition.
Units unlock gradually, giving a clear sense of progress. The app also uses reminders and progress bars to track improvement.
Gamified rewards make repetition more engaging, turning language learning into a daily habit rather than a chore. These features help learners stay committed while improving vocabulary, grammar, speaking, and listening skills.
Frequently Asked Questions
The Duolingo Spanish course includes multiple units with structured lessons that move from basic grammar to advanced conversation. Learners can track progress through levels, complete timed lessons, and take placement tests to skip material they already know.
What is the total number of lessons in the Duolingo Spanish course?
The Spanish course on Duolingo contains over 200 units with more than 1,000 individual lessons. The exact number may change as Duolingo updates its content or adds new material.
How many levels are there in each unit of the Spanish program on Duolingo?
Each unit usually includes five levels, starting with easier exercises and increasing in difficulty. Completing all levels in a unit unlocks the next one.
Can you estimate the time commitment required to complete the Spanish course on Duolingo?
Most learners spend 5 to 15 minutes per lesson. Finishing the full course can take 200 to 300 hours, depending on how often a person practices and their prior knowledge of Spanish.
Are there any advanced units available in the Duolingo Spanish course for fluent speakers?
Yes. The later units include advanced grammar, idioms, and complex sentence structures. These units help fluent or near-fluent speakers strengthen accuracy and expand vocabulary.
What is the structure of Duolingo’s Spanish course in terms of progressing from beginner to advanced?
The course starts with basic words and phrases, then moves to verbs, tenses, and sentence formation. Higher units focus on conversation, reading comprehension, and cultural topics.
Does Duolingo offer a placement test to determine how many units you should skip in the Spanish course?
Yes. Duolingo provides a placement test that assesses a learner’s current Spanish level. Based on the results, it places them at the right point in the course and skips the earlier units they already know.
Super Duolingo builds on the regular Duolingo experience by offering more features and a smoother learning process. It removes ads, unlocks unlimited hearts, and adds extra tools to help users stay consistent. Super Duolingo is the paid version of Duolingo’s language learning app that gives users a faster, more focused way to learn a new language.
Many people search online to find out if Super Duolingo is worth it for improving their language skills.
It keeps the same fun and game-like design that makes using Duolingo popular, but adds benefits that make practice easier and more flexible. Learners can review mistakes, track progress, and study without interruptions. This version aims to make language learning more efficient and less stressful for anyone serious about improving their skills.
Key Takeaways
Super Duolingo offers an upgraded version of the standard app with added features.
It helps users learn languages more smoothly with no ads and unlimited hearts.
It stands out from other language learning apps through its simple and focused design.
What Is Super Duolingo?
Super Duolingo is a paid version of the Duolingo app that gives users extra tools to learn languages more smoothly and without interruptions. It removes ads, allows unlimited practice, and helps learners keep their progress steady through features like streak repair and offline lessons.
Key Features of Super Duolingo
Super Duolingo offers several premium tools that make studying more flexible and consistent. Ad-free learning lets users move through lessons without waiting between screens. This helps them stay focused and save time.
Users get unlimited hearts, which means they can keep practicing even after making mistakes. This feature supports longer study sessions and encourages learning through trial and error.
Another key benefit is streak repair, which helps users maintain their learning streak even if they miss a day. Learners can also access offline lessons, allowing them to study anywhere without internet access. Some versions include timed challenges and progress tracking tools that help learners test their speed and accuracy.
Together, these features create a smoother and more continuous learning experience.
Differences Between Super Duolingo and Duolingo Plus
Super Duolingo replaced Duolingo Plus as the app’s premium plan. The main difference lies in design and experience rather than major function changes. Both versions offer ad-free lessons, unlimited hearts, and streak repair.
However, Super Duolingo uses a more modern look with bright colors and clearer progress visuals. This update aims to make the premium plan feel more engaging while keeping the same core tools.
Both plans include offline lessons and timed challenges, but Super Duolingo highlights these features more clearly in the app. Users who previously had Duolingo Plus automatically switched to Super Duolingo without losing data or features.
In short, Super Duolingo refines the Plus experience with a cleaner interface and better visibility of premium benefits.
Super Duolingo Cost and Subscription Options
Super Duolingo is available as a monthly or yearly subscription. Price tags vary by region, but most users pay around $6.99 to $12.99 per month, depending on the plan and location. A 14-day free trial is often available for new users.
The app also offers a Family Plan, which allows up to six members to share one subscription. This option lowers the cost per person and keeps each user’s progress separate. For sure, it’s worth the cost.
Plan Type
Users
Approx. Monthly Cost
Key Perks
Individual
1
$6.99–$12.99
Ad-free, unlimited hearts, offline lessons
Family Plan
Up to 6
$9.99–$14.99
Shared access, separate profiles
All subscriptions renew automatically, but can be canceled anytime through the app store.
Super Duolingo Compared to Other Language Learning Apps
Super Duolingo offers fast-paced lessons, gamified rewards, and unlimited hearts for practice. Competing apps like Babbel, Rosetta Stone, and Busuu focus more on structured grammar, pronunciation, or conversation practice. Each platform fits different learning goals and styles.
Super Duolingo vs Babbel
Super Duolingo uses short, game-like exercises that build vocabulary and sentence patterns through repetition. It encourages daily use with streaks, leaderboards, and progress tracking. Lessons move quickly, which helps learners stay motivated, but may skip detailed grammar explanations.
Babbel takes a more traditional approach. It organizes lessons by real-life topics and includes grammar notes within each unit. Babbel also uses dialogues and review sessions that reinforce practical speaking and writing skills.
Feature
Super Duolingo
Babbel
Lesson Style
Game-based, short drills
Structured, topic-based
Grammar Focus
Light
Strong
Offline Access
Yes (with subscription)
Yes
Speaking Practice
Limited
Moderate
Babbel may suit learners who prefer clear grammar rules and structured progress. Super Duolingo works better for those who enjoy quick, engaging practice sessions.
Super Duolingo vs Rosetta Stone
Rosetta Stone teaches languages through immersion. It avoids translations and focuses on matching images, sounds, and text to help learners think directly in the new language. Lessons emphasize pronunciation and listening accuracy using speech recognition tools.
Super Duolingo also includes speaking and listening, but its focus remains on vocabulary and sentence structure. It uses translation exercises and multiple-choice questions rather than full immersion.
Feature
Super Duolingo
Rosetta Stone
Teaching Method
Translation and repetition
Immersive, visual learning
Pronunciation Tools
Basic speech check
Advanced speech recognition
Lesson Length
Short
Longer, guided
Cost
Lower
Higher
Rosetta Stone may appeal to users who want full-language immersion. Super Duolingo offers a faster, more casual way to build daily habits.
Super Duolingo vs Busuu
Busuu combines structured lessons with a social learning element. Users can practice writing and speaking with native speakers who give feedback. Lessons include grammar, vocabulary, and dialogue exercises that reflect real-world conversations.
Super Duolingo lacks direct peer interaction. It focuses on self-paced drills and repetition. However, its gamified design keeps users consistent and motivated through rewards and streaks.
Feature
Super Duolingo
Busuu
Peer Feedback
No
Yes
Lesson Focus
Vocabulary, repetition
Grammar, conversation
Community Interaction
Limited
Strong
Certification
No
Yes (for some languages)
Busuu benefits learners who want real communication practice. Super Duolingo suits those who prefer independent, flexible study sessions.
Cancel Super Duolingo and Switching Apps
Users can cancel Super Duolingo anytime through their app store or account settings. The process stops future billing but keeps progress saved under the free plan.
Some learners switch to Babbel, Rosetta Stone, or Busuu when they want more grammar depth, structured lessons, or conversation practice. Others keep using the free Duolingo version for casual review.
Before canceling, it helps to compare features and learning goals. Each app supports different parts of the language learning journey, from daily vocabulary drills to advanced communication skills.
Frequently Asked Questions
Super Duolingo gives users access to extra features, flexible plan options, and a cleaner learning experience. It offers both individual and family subscriptions, each with different pricing and sharing options.
What additional features does Super Duolingo offer?
Super Duolingo removes ads and allows unlimited hearts, so users can keep practicing without waiting. It also includes personalized practice, progress tracking, and offline lessons. These features help learners study more consistently and track improvement over time.
How does the Family plan for Super Duolingo differ from individual plans?
The Family plan supports up to six users under one subscription. Each member gets their own profile and progress tracking. It costs less per person than buying separate individual plans.
What is the annual cost for Super Duolingo?
The annual cost varies by region and platform, but it usually ranges from $80 to $90 USD for an individual plan. The Family plan typically costs around $120 USD per year. Prices may differ slightly depending on the app store or local taxes.
Does Super Duolingo offer a completely free version?
No, Super Duolingo itself is a paid subscription. However, the standard Duolingo app remains free and includes basic lessons with ads and limited hearts. Users can still learn languages
Learning French feels easier when the right tools guide the process. Many apps now make it possible to practice vocabulary, grammar, and pronunciation anytime. The best apps for learning French help users build real language skills through consistent, interactive lessons.
Each app offers something different—some focus on speaking, while others emphasize listening or reading. Choosing one depends on personal goals, learning style, and how much time someone wants to spend each day.
With so many options available, knowing which apps truly support progress can save time and frustration. The following guide highlights trusted tools that make learning French more effective and enjoyable.
Discover top-rated apps that improve French skills.
Understand which features support steady language progress.
Top-Rated Apps for Learning French
Modern French learning apps combine interactive lessons, real conversations, and personalized tools. They help users practice reading, listening, speaking, and writing through methods such as gamification, audio lessons, and community feedback.
Duolingo: Gamified French Lessons
Duolingo uses short, game-like exercises that make learning French feel interactive. Each lesson introduces vocabulary and grammar through matching, translation, and speaking tasks. The app rewards progress with points and streaks, helping users stay consistent.
Learners can set daily goals and track their improvement. The app’s adaptive system adjusts difficulty based on performance.
Pros: Free version available, bite-sized lessons, fun design. Cons: Limited grammar explanations, repetitive exercises.
Duolingo works best for beginners who want to build a daily habit and practice in short sessions.
Babbel: Structured Learning Approach
Babbel offers organized French lessons designed by language experts. Each course builds on previous lessons, covering vocabulary, grammar, and conversation topics.
The app focuses on real-life dialogues, helping users learn phrases used in daily situations. Lessons last about 10–15 minutes, making them easy to fit into a routine.
Babbel suits learners who prefer a guided path with clear explanations and practical examples.
Rosetta Stone: Immersive Experience
Rosetta Stone teaches French through full immersion, using only French words and images. It trains users to think in French without translating.
The app emphasizes pronunciation with its TruAccent speech recognition tool. Lessons focus on listening and speaking, improving comprehension, and fluency.
Pros: Immersive method, strong pronunciation practice, and offline mode. Cons: Slower progress for beginners, higher cost.
Rosetta Stone fits learners who want a deep, immersive experience and are comfortable learning through context.
Busuu: Community and Feedback
Busuu combines structured lessons with community interaction. Users complete grammar and vocabulary exercises, then practice with native speakers who correct their writing and pronunciation.
Pros: Native speaker feedback, structured courses, and offline mode. Cons: Some features require premium access.
Busuu benefits those who value human feedback and want to practice real communication.
Pimsleur: Audio-Based Learning
Pimsleur focuses on spoken French through 30-minute audio lessons. Users listen, repeat, and respond to prompts that simulate real conversations.
The method builds listening comprehension and pronunciation skills over time. Lessons can be done hands-free, making them ideal for commuting or multitasking.
Pimsleur suits learners who prefer auditory learning and want to improve their conversational ability.
Tandem: Language Exchange with Native Speakers
Tandem connects learners with native French speakers for text, voice, or video chats. The app enables users to exchange languages—each person teaches their native tongue while learning another.
It includes built-in translation, correction tools, and topic suggestions. Users can search by language level and interests.
Tandem works best for learners who enjoy social interaction and want real-world speaking experience.
Drops: Visual Vocabulary Practice
Drops uses colorful visuals and fast-paced mini-games to teach French words and phrases. Lessons last only five minutes, focusing on vocabulary retention through repetition and imagery.
The app avoids long explanations, making it easy to use daily. It covers topics like food, travel, and everyday objects.
Pros: Quick sessions, strong visual design, fun interface. Cons: Limited grammar practice, subscription for full access.
Drops fits visual learners who want to expand their vocabulary in short bursts.
MosaLingua: Spaced Repetition System
MosaLingua uses a spaced repetition system (SRS) to help users remember vocabulary long-term. It reviews words just before they are likely to be forgotten.
Lessons include dialogues, flashcards, and audio recordings by native speakers. The app also offers grammar and culture notes.
Pros: Effective memory system, offline use, real-life content. Cons: The Interface feels dated, with less visual appeal.
MosaLingua is ideal for learners focused on vocabulary retention and practical usage.
Memrise: Engaging Flashcards
Memrise combines flashcards with video clips of native speakers. It teaches vocabulary and common phrases in context.
Users can choose from different levels and topics, and the app uses spaced repetition for review. Short quizzes and listening tasks reinforce learning.
Pros: Real-life videos, adaptive review, free version. Cons: Limited grammar coverage, some user-made courses vary in quality.
Memrise suits learners who enjoy visual and auditory input while learning everyday French.
LingQ: Reading and Listening Practice
LingQ centers on reading and listening to authentic French content. Users choose from articles, podcasts, and stories, then save new words for review.
The app tracks known and unknown words, creating personalized vocabulary lists. Learners can import their own materials to study.
Pros: Real content, flexible learning, useful tracking tools. Cons: Requires self-motivation, less structured lessons.
LingQ fits independent learners who prefer learning from real-world materials.
Beelinguapp: Bilingual Stories
Beelinguapp teaches French through side-by-side bilingual texts. Users read stories in French and their native language at the same time.
Audio narration helps improve pronunciation and listening skills. The library includes news, short stories, and children’s books.
Pros: Bilingual reading format, audio support, varied topics. Cons: Limited grammar instruction, smaller library for advanced users.
Beelinguapp is best for learners who enjoy reading and want to build comprehension through stories.
Anki and Brainscape: Advanced Flashcards
Anki and Brainscape use customizable flashcards based on spaced repetition. Users can create their own decks or download shared ones for French vocabulary and grammar.
Both apps adjust review timing to strengthen memory. Anki offers more flexibility, while Brainscape provides a cleaner interface and progress tracking.
Feature
Anki
Brainscape
Customization
High
Moderate
Interface
Basic
Modern
Price
Free
Freemium
These apps suit learners who want full control over their study material and efficient vocabulary review.
Rocket Languages: Comprehensive French Courses
Rocket Languages offers full French courses with lessons on speaking, grammar, culture, and writing. Each module includes interactive audio, quizzes, and pronunciation practice.
The app emphasizes practical conversation and cultural understanding. Speech recognition tools help users refine pronunciation.
Rocket Languages suits learners seeking a thorough, structured program that covers all language skills.
HelloTalk: Conversational Practice
HelloTalk connects learners with native French speakers for text, voice, and video exchanges. Built-in correction tools and translation features make communication easier.
Users can post updates or questions for the community to comment on. The app encourages daily conversation practice with real people.
Pros: Free interaction, cultural learning, and active community. Cons: Requires time to find good partners, can be distracting.
HelloTalk works well for learners who want practical conversation and cultural exposure.
Français Authentique: Real-Life French Content
Français Authentique offers podcasts, videos, and courses focused on natural spoken French. It helps learners understand everyday speech and expressions used by native speakers.
The content avoids translation, encouraging comprehension through context. Lessons often include cultural insights and pronunciation tips.
Pros: Authentic language, clear explanations, free materials available. Cons: Best for intermediate learners, limited structured grammar.
Français Authentique suits those who want to move beyond textbook French and understand how the language sounds in real life.
Key Features to Look for in French Learning Apps
Strong French learning apps combine interactive practice, spaced repetition systems, and clear grammar guidance. They also create chances to speak with native French speakers, helping learners build real-world communication skills.
Interactive Lessons and Practice
Interactive lessons keep users engaged by encouraging active participation instead of passive reading. Apps with listening, speaking, and writing exercises help learners use new words and phrases in context. This approach builds confidence and improves memory.
Good apps often include audio clips, quizzes, and short dialogues. These tools allow learners to test their understanding and receive instant feedback. Features like drag-and-drop activities or voice recognition make practice more dynamic.
Learners benefit most from lessons that adapt to their skill level. Adaptive learning paths adjust content difficulty based on performance, ensuring steady progress without frustration.
Useful Interactive Tools
Purpose
Audio dialogues
Improve listening and pronunciation
Quizzes and games
Reinforce vocabulary and grammar
Voice recognition
Practice speaking and get feedback
Spaced Repetition for Vocabulary Retention
Spaced repetition helps learners remember French vocabulary more effectively. It works by reviewing words at increasing intervals, which strengthens long-term memory. Apps that use this method reduce the need for constant repetition.
A spaced repetition system (SRS) tracks which words a learner struggles with and schedules them for review at the right time. This makes study sessions shorter but more efficient.
Some apps display progress charts or streaks to motivate consistent practice. Others allow users to create custom flashcards for specific topics, such as travel or food.
Key advantages include:
Better long-term recall
Less time spent reviewing known words
Personalized vocabulary lists
French Grammar and Pronunciation Support
Understanding French grammar and pronunciation is essential for clear communication. Apps that explain grammar rules in simple terms help learners form correct sentences. Many include examples showing how verbs, adjectives, and nouns change in different contexts.
Pronunciation tools often use speech recognition or phonetic guides to improve accuracy. Listening to native French audio and repeating words helps learners notice subtle sound differences.
Some apps provide short grammar lessons followed by quick practice tasks. This structure allows learners to apply rules immediately, reinforcing understanding through use rather than memorization.
Opportunities for Speaking with Native French Speakers
Speaking practice is vital for fluency. The best apps connect learners with native French speakers through chat, voice calls, or video sessions. This real interaction builds confidence and improves pronunciation naturally.
Language exchange apps pair users who want to learn each other’s languages. For example, a French speaker learning English can practice with an English speaker learning French. Both benefit from the exchange.
Apps that include guided conversation topics or teacher-led sessions make speaking practice easier for beginners. Regular interaction with native speakers helps learners understand real accents, slang, and everyday expressions.
Frequently Asked Questions
Different French learning apps fit various needs, from beginners to travelers. Some focus on grammar and vocabulary, while others help with speaking, listening, and cultural context.
What are the top-rated French learning apps for beginners?
Beginners often start with Duolingo, Babbel, or Busuu. These apps use short lessons and clear progress tracking to build basic vocabulary and grammar. They also include audio examples to help learners practice pronunciation early.
Which French learning app is best suited for intermediate learners?
Babbel and Lingvist work well for intermediate learners. They offer structured lessons that review previous material and introduce more complex sentence patterns. Users can focus on conversational skills and grammar accuracy.
Are there any comprehensive apps for learning French that are free?
Duolingo and Memrise provide free versions with solid language coverage. They include vocabulary drills, listening exercises, and reading practice. Some features, like offline access or advanced lessons, may require a paid upgrade.
What is the most effective app for learning French while traveling?
Pimsleur and Rosetta Stone are strong choices for travelers. They emphasize listening and speaking, which help users handle real-life conversations. Both apps work offline, making them practical during trips.
Can you recommend French learning apps that are popular among students?
Students often use Duolingo, Quizlet, and Busuu. These apps fit study schedules and include gamified elements that keep learning consistent. Teachers sometimes use them for class assignments or extra practice.
How does Duolingo compare with other French learning apps?
Duolingo offers an easy entry point with short, game-like lessons. It focuses more on vocabulary and reading than on speaking fluency. Other apps like Babbel or Pimsleur provide deeper grammar instruction and more natural conversation practice.
Rosetta Stone has been around for decades, but many people wonder if it’s actually worth the money. The language learning app uses immersion-based methods and costs more than most competitors.
Using Rosetta Stone can really work and be worth it if you prefer structured learning without translations, but it may not suit everyone’s learning style or budget. The program works well for visual learners who like repetition. However, it lacks explanations of grammar and conversation practice.
Your decision depends on your learning preferences, budget, and language goals. Some users love the method while others find it boring or incomplete, considering language fundamentals.
Key Takeaways
Rosetta Stone uses immersive learning without translations, which works better for some learners than others
The subscription costs more than most language apps, but it offers structured lessons across many languages
Success with Rosetta Stone depends on your learning style, with visual learners typically seeing better results
How Rosetta Stone Works
Rosetta Stone uses a method called dynamic immersion to teach languages without translation. The language app to learn offers courses in 25 languages with interactive lessons that build speaking, reading, and listening skills.
Dynamic Immersion Approach
Rosetta Stone’s dynamic immersive method teaches you a new language the same way you learned your first language. You won’t see any English translations or explanations during lessons.
The software shows you pictures paired with words and phrases in your target language. You make connections between images and sounds naturally. This helps your brain learn patterns without memorizing grammar rules.
Each lesson builds on what you learned before. You start with simple words like “boy” and “girl.” Then you move to phrases like “the boy is running.”
The software is good for learning as it uses speech recognition technology. You speak into your microphone and get instant feedback on your pronunciation. The app tells you if you need to try again.
Supported Languages
Rosetta Stone offers courses in 25 languages. Popular options include Spanish, French, Italian, and German. These are the most common choices for English speakers.
The language courses also cover Japanese, Korean, and Arabic. These languages use different writing systems from English.
Other available languages include:
Dutch
Greek
Hebrew
Hindi
Irish
Latin
Persian
Polish
Russian
Swedish
Turkish
Vietnamese
Each language course follows the same structure. The lessons adapt to the specific grammar and sounds of that language.
Learning Features and Course Structure
The Rosetta Stone app divides each language into units and lessons. Most courses have 20 units with 4 lessons each. Each lesson takes 30 minutes to complete.
Core lessons teach new vocabulary and grammar patterns. Focused activities let you practice specific skills like pronunciation or reading.
Key features include:
Speech recognition for pronunciation practice
Audio companion for listening on the go
Stories to practice reading comprehension
Live tutoring sessions with native speakers
Offline downloads for learning without internet
The language learning software tracks your progress. You can see which lessons you’ve finished and your accuracy scores. The app sends reminders to help you study every day.
Extended learning features include group classes and unlimited live tutoring sessions. These cost extra beyond the basic subscription.
User Experience and Learning Outcomes
Rosetta Stone delivers mixed results across different skill areas, with stronger performance in some areas than others. The platform works better for certain types of language learners depending on their starting level and learning goals.
Speaking Skills
Rosetta Stone’s speech recognition technology helps you practice pronunciation from day one. The system listens to your voice and gives feedback on how close you sound to native speakers.
The speech tool works well for basic pronunciation practice. You repeat words and phrases while the program checks your accuracy. Most users find this helpful for building confidence in speaking.
Strengths in speaking practice:
Real-time pronunciation feedback
No pressure from human instructors
Gradual difficulty increase
However, the speech recognition has limits. It focuses mainly on pronunciation accuracy rather than natural conversation flow. You won’t get practice with real back-and-forth conversations.
The program doesn’t teach you how to handle pauses, interruptions, or unclear responses. These are common parts of real conversations that Rosetta Stone can’t replicate.
Listening Skills
The listening component uses native speakers throughout all lessons. You hear authentic accents and natural speech patterns from the target language.
The audio quality is clear and professional. Speakers talk at normal speeds, which helps train your ear for real-world conversations. This approach works better than slowed-down or overly clear speech.
Audio features include:
Multiple native speaker voices
Natural speaking pace
Clear pronunciation examples
Your listening skills improve gradually through repeated exposure. The program starts with single words and builds up to full sentences and conversations.
The main weakness is limited variety in listening contexts. Most audio comes from lesson scripts rather than real conversations, news, or casual speech.
Progress for Beginners and Intermediate Learners
Beginners see the most success with Rosetta Stone. The visual learning method works well when you’re starting from zero knowledge. New language learners often feel less overwhelmed compared to traditional textbook methods.
The program builds vocabulary steadily in the first few months. Most beginners can handle basic conversations about everyday topics after 3-6 months of regular use.
Intermediate learners face bigger challenges. The lack of grammar explanations becomes more noticeable as language rules get complex. You may feel stuck when trying to move beyond basic conversations.
The program doesn’t adapt well to learners who already know some of the language. Intermediate users often find the pace too slow and the content too simple for their needs.
Progress timeline for different learners:
Complete beginners: Good foundation in 3-6 months
False beginners: May feel bored with early content
Intermediate users: Limited advancement beyond current level
Pricing, Value, and Subscription Options
Rosetta Stone offers monthly and yearly subscriptions with different access levels. You can also buy lifetime access to avoid recurring payments.
Subscription Costs and Lifetime Access
The Rosetta Stone app costs $11.99 per month for one language. A yearly plan drops the price to $5.99 per month when billed annually.
You get access to all 25 languages for $14.99 monthly. The annual unlimited plan costs $8.99 per month when paid upfront.
Lifetime access costs $179 for one language. The unlimited lifetime option is $299 for all languages.
Current Pricing Structure:
Single language: $11.99/month or $71.88/year
All languages: $14.99/month or $107.88/year
Lifetime single: $179 one-time
Lifetime unlimited: $299 one-time
The language learning software often runs sales. Discounts of 30-50% happen several times per year.
Payment Structure and Access Levels
All subscriptions give you full access to your chosen languages. You get the mobile app, web platform, and offline downloads.
Monthly plans let you cancel anytime. Annual subscriptions save money but require an upfront payment.
The basic subscription includes core lessons, pronunciation practice, and progress tracking. No premium tiers exist with extra features.
What’s Included:
Mobile and desktop access
Offline lesson downloads
Speech recognition technology
Progress syncing across devices
Lifetime purchases never expire. You keep access even if Rosetta Stone changes pricing or subscription models later.
Rosetta Stone Compared to Other Language Apps
Rosetta Stone costs more than most competitors but offers unique immersion-style learning. Popular alternatives like Duolingo, Babbel, and Pimsleur take different approaches to teaching languages.
Rosetta Stone vs. Duolingo
Duolingo is free with ads or $7 per month without ads. Rosetta Stone costs $36 per month or $179 per year.
Duolingo uses gamification with streaks, points, and levels. You complete short lessons that mix translation exercises with multiple-choice questions. The app explains grammar rules directly.
Rosetta Stone uses no translations or explanations. You learn by matching pictures with words and phrases. The method mimics how children learn their first language.
Duolingo covers more languages (40+) compared to Rosetta Stone’s 25 languages. Both apps work on phones and computers.
Duolingo’s free version includes all lessons but has ads and limited features. Rosetta Stone requires payment for full access.
Rosetta Stone vs. Babbel
Babbel costs $14 per month or $84 per year. This makes it cheaper than Rosetta Stone but more expensive than Duolingo.
Babbel focuses on practical conversations you might actually use. Lessons teach phrases for travel, work, and daily life. Grammar explanations appear in your native language.
Rosetta Stone avoids your native language completely. You must figure out meaning through context and images.
Rosetta Stone: 25 languages, immersion method, no translations
Babbel lessons last 10-15 minutes. Rosetta Stone sessions typically take 30 minutes or more.
Both apps include speech recognition technology. Babbel’s pronunciation practice is less intensive than Rosetta Stone’s speaking exercises.
Rosetta Stone vs. Mondly, Memrise, and Pimsleur
Mondly costs $10 per month and teaches through virtual reality and augmented reality features. Memrise offers a free version with paid premium features at $15 per month.
Pimsleur focuses entirely on audio learning. It costs $20 per month and emphasizes speaking from day one. Lessons are 30 minutes of pure listening and repeating.
Price Comparison:
Mondly: $10/month
Memrise: Free or $15/month
Pimsleur: $20/month
Rosetta Stone: $36/month
Memrise uses spaced repetition to help you remember vocabulary. Videos show native speakers using real phrases in natural settings.
Mondly includes chatbots and voice recognition. The language app covers 41 languages with interactive lessons.
Pimsleur builds speaking confidence faster than visual apps. Rosetta Stone combines visual and audio learning but costs significantly more than these alternatives.
All these apps offer mobile learning. Your choice depends on your budget, learning style, and time commitment preferences.
Frequently Asked Questions
Rosetta Stone users often ask about real-world effectiveness and whether the program delivers fluency. Cost comparisons with other language apps and learning outcomes are common concerns.
How effective is Rosetta Stone for learning a new language?
Rosetta Stone works well for building basic vocabulary and pronunciation skills. The immersion method helps you think in your target language without translating from English.
What advantages does Rosetta Stone offer over competitors like Duolingo or Babbel?
Rosetta Stone uses no English explanations during lessons. This forces you to learn through context and visual connections. Duolingo focuses more on gamification and short daily practice. Babbel explains grammar rules directly in English.
Can users become fluent with Rosetta Stone software on their own?
Rosetta Stone alone will not make you fluent in a language. No single program can replace real-world practice and conversation. You will reach a conversational level for basic topics. The program covers everyday situations like shopping, dining, and traveling. Advanced grammar concepts get limited coverage in the lessons. You will need additional resources for complex language structures.
What is the cost-benefit analysis of investing in Rosetta Stone for language learning?
A lifetime subscription costs around $200 during sales. Monthly plans cost $12 per month for one language. This price includes access to mobile apps and computer software. Live tutoring sessions add value but have limited availability.
When you look for a new way to study languages can you learn, you might wonder if Memrise is worth your time. A Memrise review shows that it offers simple tools, short lessons, and a wide range of languages to practice daily. You can see how it compares to other apps and decide if it fits your learning style.
You want to know if it actually helps you remember words, stays engaging over time, and feels worth the cost. This overview gives you the facts so you can make a clear choice without wasting effort.
Key Takeaways
Memrise uses short lessons and memory-focused tools
It covers many languages with flexible course options
Pricing and alternatives affect its overall value
Key Features and Learning Methods
You learn with tools that focus on memory, practice, and real-world language use. The platform combines repetition, visual aids, and progress tracking to help you stay consistent and improve step by step.
Spaced Repetition System
You review words and phrases at intervals designed to strengthen memory. This spaced repetition system schedules items just before you are likely to forget them, which makes recall stronger over time.
You don’t need to guess when to review because the system handles the timing. This reduces wasted study time and keeps your sessions efficient.
The platform also offers a Speed Review mode. In this mode, you answer quickly under time pressure, which forces you to recall words faster and with less hesitation. This helps you practice active recall instead of passive recognition.
By repeating content at the right moment, you build long-term memory instead of short-term cramming. This method works well for vocabulary because it balances review with new language learning.
Flashcards and Mnemonics
You learn new words with flashcards that display the word, translation, and sometimes an image. These cards make it easy to practice in short sessions.
The system also encourages you to use mnemonics. You can create your own memory aids or use ones added by other learners. For example, linking a word to a picture or phrase helps you remember it faster.
Flashcards are interactive, not static. You may see multiple-choice questions, typing exercises, or listening tasks. This variety prevents repetition from feeling dull and keeps you engaged.
Because you can revisit cards as often as needed, you control how much time you spend on each word. This flexibility makes it easier to focus on harder language.
Native Speaker Videos and Pronunciation Practice
You watch short clips of native speakers using words and phrases in everyday speech. These videos expose you to natural accents, tone, and rhythm.
You also get pronunciation practice by repeating after the speaker. Some exercises ask you to record your voice and compare it to the native version. This helps you notice mistakes in stress, intonation, or sound.
Hearing real people instead of computer voices makes listening practice more realistic. You adjust to different voices, speeds, and accents, which prepares you for real conversations.
This feature is especially useful if you want to improve speaking and listening, not just reading and writing. It connects word study to real-world usage.
Gamification and Learning Statistics
You track your progress through learning statistics such as words learned, review streaks, and accuracy rates. These numbers give you a clear picture of your improvement.
The app uses gamification to keep you motivated. You earn points, badges, and streaks for completing lessons. This rewards consistent practice and makes studying feel less like a chore.
You can also compare your progress with past sessions to see if your accuracy improves. This feedback helps you adjust your study habits and focus on weak areas.
By combining data with rewards, the platform encourages steady learning. You see both short-term achievements and long-term growth, which keeps you engaged over time.
Memrise Reviews: Course Selection and Language Coverage
You can choose from a wide range of languages, including popular global options and harder-to-find ones. The platform also offers both official courses and community-driven content, giving you flexibility in what and how you study.
Official Memrise Courses
Official Memrise courses cover many major foreign languages. You will find structured programs for English, Spanish, French, German, Italian, Chinese, Japanese, Korean, and Arabic. These courses are built by the Memrise team and usually include audio, video, and word lists.
Each official course often follows a clear sequence. You start with beginner levels and progress toward more advanced grammar and language learning. This makes it easier to track your learning and measure progress over time.
The lessons usually focus on practical phrases and everyday communication. For example, you might learn greetings, ordering food, or asking for directions before moving to more complex topics. This approach helps you use what you learn right away.
User-Created and Community Content
This also offers you access to user-created content made by the Memrise community. These courses cover many areas that the official ones do not. For instance, you can find vocabulary lists for exams, slang, or even niche topics like history or science terms in different languages.
The quality of these courses can vary. Some are well-structured and detailed, while others may lack consistency. Still, this wide selection gives you the chance to explore beyond the official catalog.
Community content is especially useful if you want to study less common languages. You might find courses for Finnish, Turkish, Vietnamese, Thai, or Dutch that may not be as developed in the official section. This flexibility makes the platform more adaptable to your needs.
Support for Less Common and Sign Languages
If you are interested in less common languages, Memrise includes options you might not find elsewhere. You can study Nordic languages, Bahasa, and even Native American languages through community-built courses. While the depth may vary, it gives you the chance to explore languages with fewer resources online.
Sign languages are also available through user-generated content. For example, you can find courses in American Sign Language (ASL) or British Sign Language (BSL). These courses often rely on community videos or images, which makes them different from text-heavy lessons.
This variety helps you learn languages that are often overlooked on other platforms. It also allows you to connect with communities that share cultural and linguistic interests.
Course Structure and Levels
Most Memrise courses follow a level-based system. Each level contains a set of words or phrases, often grouped by theme. For example, one level might focus on food vocabulary, while another covers travel expressions.
You move through levels in order, and the platform tracks your progress. This structure makes it easier to review words you struggle with while reinforcing what you already know.
Official courses tend to be more polished, with clear progression. Community courses may vary, but many still use the same level format. This consistency across the platform helps you adapt quickly, no matter which type of course you choose.
User Experience and Effectiveness
You can use Memrise in different ways depending on your learning goals. The platform gives you tools for mobile learning, practice for speaking and listening, and a community that supports your progress. It’s a great language learning experience.
Mobile App and Offline Learning
The Memrise mobile app works on both iOS and Android. You can study vocabulary, phrases, and short lessons directly from your phone. The interface is simple, with clear buttons and progress tracking that help you stay organized.
Offline mode lets you download lessons in advance. This feature is useful if you travel often or have limited internet access. You can continue learning without interruption, and your progress syncs once you reconnect online.
This language-learning app also includes spaced repetition. This system shows you words at the right time to improve memory. You can adjust daily goals, review sessions, and notifications to fit your schedule.
Key points about the app:
Available on iOS and Android
Offline mode for downloaded lessons
Spaced repetition for better recall
Customizable daily goals
Suitability for Beginners and Advanced Learners
If you are a beginner, Memrise gives you simple vocabulary lists and basic sentences. The lessons start with common words and phrases so you can build a foundation. The short quizzes and repetition make it easier to remember new terms.
For advanced learners, the platform offers more complex materials. Some courses include idioms, grammar points, and longer sentences. You may also find user-created courses that cover niche topics or specific dialects.
The structured paths suit beginners best, while advanced learners may need to combine Memrise with other resources. The app does not always provide deep grammar explanations, so you may need outside study for full understanding.
Comparison of focus levels:
Level
Focus Areas
Best Use Case
Beginners
Vocabulary, short phrases, basics
Building foundation and daily practice
Advanced
Idioms, complex phrases, user courses
Expanding vocabulary, refining skills
Speaking and Listening Skills
Memrise includes listening exercises with native speaker audio. These clips help you hear natural pronunciation and rhythm. You can replay audio as many times as needed, which supports better listening practice.
For speaking practice, the app uses short recording tasks. You repeat phrases into your microphone and compare your voice with the model. While this helps with pronunciation, it does not replace real conversation.
Some courses also include video clips of native speakers. These show natural expressions and tone, which add context to the words you learn. The chatbot feature gives you basic simulated conversations, but the range of responses is limited.
Strengths: clear audio, video examples, pronunciation practice Limitations: no live feedback, limited conversation depth
Memrise Community Engagement
The Memrise community adds another layer to your learning. You can join discussions, ask questions, and share tips with other learners. This interaction helps you stay motivated and connected.
Many courses are user-created. These allow you to study topics outside the official language courses, such as slang or regional vocabulary. The variety can be useful if you want to explore beyond standard lessons.
The community also supports leaderboards and progress comparisons. You can see how your study time and scores compare with others. While this may motivate some users, it may not appeal if you prefer private study.
Community features include:
User-created courses
Discussion forums
Leaderboards and progress tracking
Shared study tips and resources
Pricing, Subscriptions, and Alternatives
Memrise offers both free and paid options, with each tier unlocking different tools and features. You can choose between monthly, yearly, or lifetime plans, and compare them with other language learning apps to see which fits your needs best.
Free vs Paid Subscription Options
You can use Memrise for free, but the free version is limited. It gives you access to community-created courses, flashcards, and basic reviews. This is enough if you want to try out the platform or practice vocabulary without spending money.
The paid subscription, called Memrise Pro, adds more learning tools. You get grammar lessons, listening practice with native speakers, and personalized review sessions. These features aim to improve speaking and comprehension, not just vocabulary.
If you only want casual practice, the free tier works. If you want structured progress, the paid subscription is more useful.
Memrise Pro and Premium Features
Memrise Pro is the main paid option. You can subscribe monthly, yearly, or at a discounted multi-year rate. The features focus on helping you practice real-world language skills.
With Pro, you get “Learn with Locals” videos that show native speakers using everyday phrases. You also get listening skills practice, which helps you understand fast speech. The difficult words mode lets you review terms you often forget.
Another benefit is offline mode, so you can study without an internet connection. This makes it easier to use while traveling. You also gain access to more detailed progress tracking compared to the free version of Memrise.
When you pay for Pro plan, Memrise does not include live tutoring or one-on-one lessons. It is still focused on self-study, but the added features make it more complete than the free plan.
Lifetime Membership and Unlimited Access
If you do not want to pay every month, Memrise offers a lifetime membership. This is a one-time payment that grants unlimited access to all Pro features. You never need to renew or worry about subscription fees again.
This plan is most cost-effective if you plan to use Memrise for several years. For example, paying for three to four years of yearly Pro can cost more than the single lifetime fee.
The lifetime option includes everything in the premium subscription, such as offline mode, grammar practice, and native videos. It is the same as Pro but without time limits.
However, you should consider how long you plan to study with Memrise. If you only want to use it for a few months, a monthly plan is cheaper.
Comparison with Other Language Learning Apps
When comparing Memrise with other language apps, you will notice different strengths. Duolingo focuses on gamified lessons with a free model supported by ads. It has more structured grammar practice but fewer real-world videos.
Anki, on the other hand, is a flashcard app. It is powerful for memorization, but it requires more setup and does not include native video or listening tools. Memrise is easier to start with, while Anki is better for advanced learners who want full control.
Other apps like Babbel or Busuu offer conversation practice and grammar-focused lessons. These often cost more than Memrise but may include speaking practice with tutors.
Memrise stands out for its native speaker videos and focus on vocabulary in context. If you want a balance of structure and exposure to real speech, it offers something different from Duolingo or Anki.
Frequently Asked Questions
You can choose between free and paid features, compare them with other apps, and decide if it fits your learning style. The platform also raises questions about safety and how it stacks up against traditional study methods.
What are the main differences between Memrise’s free and paid versions?
With the free version, you get access to basic courses, vocabulary practice, and community-created content.
The paid version adds offline mode, grammar review exercises, listening practice, and more detailed learning statistics.
How does Memrise compare to Duolingo in terms of language learning journey effectiveness?
Memrise focuses heavily on vocabulary and real-world phrases, often using video clips of native speakers.
Duolingo emphasizes grammar and structured lessons with a game-like format. Your choice depends on whether you want more natural speech exposure or step-by-step grammar practice.
Is Memrise considered a safe platform for language learners?
Yes, Memrise is generally safe to use. It does not require sensitive personal information beyond a standard account setup.
You can use it on both the web and mobile without major security concerns.
What are the benefits of using the Memrise app over other language learning methods?
You get short, repeatable lessons that fit into a busy schedule. The app uses spaced repetition to help you remember words more effectively.
Hearing native speakers through video clips gives you more natural listening practice than many textbook-based methods.
Learning a new language isn’t easy, but the right app can make all the difference. Jumpspeak and Duolingo are both popular, yet their approaches couldn’t be more different.
Jumpspeak puts conversation and speaking skills front and center. Duolingo leans into vocabulary building with its signature game-like lessons.
Are you aiming to chat confidently, or do you want a solid base in reading and writing? That’s really what your choice boils down to.
Millions use both apps, but they cater to different learning styles and personalities. Knowing what sets them apart can help you figure out which one fits your goals.
Key Takeaways
Jumpspeak goes all-in on speaking, while Duolingo covers a broader range of language skills with games
Your goals should steer your choice between the two
Each platform brings something unique, depending on how you like to learn
Core Differences Between Jumpspeak and Duolingo
Jumpspeak leans heavily into AI-driven conversations and speaking drills. Duolingo, on the other hand, gamifies everything—reading, writing, listening, and some speaking—across bite-sized lessons.
Teaching Methodologies and Focus
Jumpspeak’s whole thing is conversation-based learning. From your first session, you’re chatting with an AI tutor that actually listens and corrects your pronunciation on the spot.
Duolingo keeps it more classic. You move through structured lessons that hit vocabulary, grammar, reading, and writing. Speaking comes in later, once you’ve leveled up a bit.
Jumpspeak’s method:
Jump right into conversations
Instant AI pronunciation feedback
Fluency comes first, not grammar drills
Duolingo’s method:
Build skills step by step
Plenty of multiple choice and fill-in-the-blank
Balanced focus across all language skills
Speaking Practice Features
Jumpspeak makes speaking its main event. You get unlimited chats with AI tutors on all sorts of topics, and the AI actually responds in a pretty natural way.
Your sessions get analyzed for pronunciation, fluency, and accuracy. The app spits out feedback right away and nudges you to fix any awkward sounds or phrasing.
Duolingo does have speaking exercises. You’ll repeat phrases, answer a few questions aloud, and work on pronunciation here and there.
But honestly, speaking is a small slice of the Duolingo pie. Most of the time, you’re reading sentences aloud or answering quick oral prompts, not having real conversations.
Gamification and Motivation Strategies
Duolingo is all about gamification. You rack up XP points, chase daily streaks, climb leagues, and unlock badges. The app loves to remind you to log in, sometimes a little too much.
Your progress shows up on a colorful map, with skill trees to conquer. There are stories and extra practice sessions, so it doesn’t get too repetitive.
Jumpspeak, though, doesn’t make a big deal out of gamification. You stay motivated by seeing your own real-world improvement—like actually being able to hold a conversation.
Instead of badges, you get to watch your fluency improve. The app keeps track of your speaking progress, not just your lesson completions.
Learning Outcomes and User Experience
JumpSpeak is all about speaking practice and uses advanced speech recognition. Duolingo, meanwhile, spreads its focus and keeps you coming back with gamified streaks. Both apps track your progress, but in pretty different ways.
Speech Recognition and Feedback
JumpSpeak’s speech recognition is pretty advanced. As you speak, it analyzes your pronunciation in real-time and gives you instant feedback—sometimes a little too honest, but that’s how you learn.
You can keep repeating exercises until you nail the pronunciation. The feedback is specific, so you know exactly where you’re tripping up.
Duolingo also has speech recognition, but it’s less detailed. You can even turn off speaking exercises if you want.
The feedback is simpler: basically, it tells you if you got it right or wrong. Don’t expect a breakdown of your accent or anything fancy.
If you’re serious about speaking, JumpSpeak’s recognition is just better. Duolingo’s tool is fine for basics, but it won’t catch every slip-up.
Vocabulary and Grammar Coverage
Duolingo covers a lot of ground—more grammar, more vocabulary. You’ll practice sentence structure, verb tenses, and all sorts of grammar patterns with a variety of exercises.
Vocabulary comes at you from all angles: reading, writing, listening, and speaking. You see new words in different contexts, which helps them stick.
JumpSpeak keeps it practical. You’ll pick up conversational vocabulary and phrases you actually need to speak, but don’t expect deep dives into grammar rules.
You learn by speaking, not by drilling grammar charts. It’s about sounding natural in conversation, not acing a written test.
Duolingo gives you a wider vocabulary and more grammar. JumpSpeak sticks to the essentials you need for real-life chats.
Progress Tracking and Daily Streaks
Duolingo keeps you coming back with daily streaks. The streak counter becomes weirdly addictive—miss a day, and you’ll probably feel a twinge of guilt.
The app pings you if you’re about to lose your streak. You can even freeze it with gems if you’re busy.
JumpSpeak tracks your progress differently. It measures your speaking time, which skills you’ve improved, and the conversation topics you’ve tackled.
Your progress is more about completed conversations and pronunciation scores. There’s no streak to maintain, which might be a relief for some folks.
Both apps show how much you’ve learned, but in their own way. Duolingo uses points and streaks; JumpSpeak highlights your speaking growth.
Frequently Asked Questions
Jumpspeak and Duolingo take pretty different paths to teaching languages. Jumpspeak is all about speaking practice, while Duolingo gamifies the whole learning process. The cost and language selection also vary quite a bit.
What are the differences in teaching methodologies between Jumpspeak and Duolingo?
Jumpspeak is built around conversational practice, using AI-powered speaking exercises. You jump into realistic dialogues right away and get instant feedback on pronunciation and fluency. Speech recognition analyzes your responses, so you’re practicing real conversations from day one—not slogging through grammar drills first. Duolingo gives you a mix of reading, writing, listening, and speaking.
Lessons are bite-sized, and new vocab or grammar rules show up gradually. Spaced repetition helps you remember stuff, and you rack up points, streaks, and levels as you go. It’s a bit like a game, just with more verbs.
How does the cost of Jumpspeak compare to a Duolingo subscription?
Jumpspeak charges $19.99 a month, or $119.99 for a year. That gets you unlimited access to all speaking exercises and every language they offer. You also get feedback on your pronunciation and conversation skills, plus some progress tracking and adaptive features.
Duolingo Plus is cheaper—$6.99 per month, or $83.99 for the year. There’s a free version, too, but you’ll see ads and have a few limits. With Plus, you lose the ads, get offline lessons, unlimited hearts, and more progress tracking. Either way, you can try all the languages they have.
Which platform, Jumpspeak or Duolingo, offers more language options for learners?
Duolingo has over 40 languages for English speakers. The big ones are there—Spanish, French, German, Italian, Portuguese, Japanese—you name it. There are even some quirky ones, like Welsh, Irish, and even Klingon. They keep adding new languages, so the list keeps growing. Jumpspeak sticks to the heavy hitters: Spanish, French, German, Italian, and Portuguese.
They focus on depth, not breadth. So, you’ll get more intense speaking practice, but only in a handful of languages. If you want to dabble in something obscure, Duolingo’s your best bet.
Can Jumpspeak’s conversational focus provide a more immersive learning experience than Duolingo?
Jumpspeak drops you into immersive scenarios right away, so you’re practicing speaking from the start. Its AI listens to how you talk and tweaks the difficulty as you go, which feels pretty dynamic. You get to have realistic conversations—ordering food, asking for directions, that sort of thing. The whole platform leans hard into practical communication, not just memorizing grammar rules.
Duolingo, on the other hand, leans into immersion with all sorts of exercise types and some storytelling thrown in. You bump into the language from all angles: visual, audio, and writing. There are podcast-style lessons and short stories, especially if you’re past the basics. So, you kind of build up immersion little by little, just by sticking with it every day.
Choosing between Babbel vs Rosetta Stone, vs Duolingo can feel overwhelming, but the differences are clear once you know what each offers. Duolingo works best for casual practice, Babbel focuses on real conversations, and Rosetta Stone builds strong foundations through immersion.
You want a tool that matches your goals, whether that’s learning a few phrases for travel, holding deeper conversations, or mastering grammar step by step. Each platform takes a different approach, so knowing how they compare saves you time and effort.
Key Takeaways
Each platform teaches languages in a different way
Your choice depends on whether you want casual, conversational, or immersive learning
Knowing the strengths of each makes it easier to pick the right one
Duolingo vs Babbel vs Rosetta Stone: Core Differences and Similarities
Each platform uses a different way to teach, offers different language options, and sets prices for different needs. The main differences come from how you practice, what languages you can learn, and how much you pay for access.
Learning Methodologies
Unlike Rosetta Stone and Babbel, Duolingo uses short lessons with gamified exercises. You earn points, unlock levels, and stay motivated with streaks. The focus is on repetition and quick practice, which helps you build habits but may not always give deep grammar explanations.
Babbel takes a more structured approach. Lessons follow a clear path with grammar notes and cultural context. You practice speaking, writing, and reading in a sequence that feels similar to a classroom. This makes Babbel better if you want more explanation and step-by-step progress.
Rosetta Stone uses an immersive method. Instead of translating, you match words with images and learn a language through context. You hear and repeat phrases to build pronunciation skills. This method is slower but can help you think directly in the new language instead of translating back to English.
Duolingo offers over 40 languages, including popular ones like Spanish and French, and less common ones like Hawaiian and Welsh. You can use it on mobile and desktop for free, though ads appear unless you pay for premium.
Babbel’s structured approach supports 14 languages, focusing on widely spoken ones such as Spanish, German, and Italian. It works best on mobile or web, and you must subscribe to unlock lessons. Unlike Duolingo, it does not offer free access beyond a short free trial.
Rosetta Stone covers 25 languages, including Arabic, Chinese, and Russian. It has apps, desktop access, and offline lessons. You pay for a subscription or a lifetime plan. Accessibility is strong, but it requires commitment since lessons are longer and less flexible than Duolingo’s.
Target Audience and Pricing
Duolingo works well if you want a free option or casual daily practice. Its premium plan, called Super Duolingo, removes ads and adds features like unlimited mistakes. It is the most affordable choice if cost is your main concern.
Babbel targets learners who want structured lessons with grammar support. Subscriptions range from monthly to yearly plans, with prices higher than Duolingo but lower than Rosetta Stone. It suits you if you want more depth without paying for a lifetime license.
Rosetta Stone is aimed at users who prefer full immersion and long-term study. It offers monthly subscriptions, but many choose the lifetime plan for access to all languages. Pricing is the highest of the three, making it best for serious learners who want a traditional and immersive program.
Practical Language Skills and User Experience
Each platform helps you practice in different ways, from how lessons are built to how you test your speaking. You will notice differences in how much focus is placed on grammar, pronunciation, and cultural context.
Lesson Structure and Progression
Duolingo uses short, gamified lessons that feel quick and repetitive. You unlock levels as you go, and the app pushes you to practice daily. This format works well if you prefer small study sessions and steady progress.
Babbel takes a more structured approach. Lessons are longer and build on each other in a clear order. You get grammar explanations alongside vocabulary, which helps you understand how sentences work rather than just memorizing words.
Rosetta Stone focuses on immersion. Rosetta Stone’s immersive lessons rely heavily on images and repetition without translations. This method encourages you to think in the new language, but it can feel slow if you prefer direct explanations.
Duolingo uses basic speech recognition. You repeat words or short phrases, and the app checks if your pronunciation matches. While useful for practice, it often accepts answers that are not fully accurate.
Babbel provides more detailed feedback. The system highlights pronunciation errors more clearly, which helps you adjust your speech. You practice both single words and full sentences, making it more practical for real conversations.
Rosetta Stone places the most emphasis on speaking. Its speech recognition tool is stricter and requires you to say words more precisely. This can be frustrating at times, but it pushes you to refine your pronunciation.
Duolingo exposes you to everyday words and phrases but offers little cultural context. You learn a new language vocabulary quickly, yet some sentences feel random and less useful in real-life situations.
Babbel includes cultural notes and dialogues that reflect real conversations. Lessons often explain how people actually speak in different countries. This makes it easier for you to use the language in practical settings.
Rosetta Stone avoids translations and culture notes, focusing instead on direct association with images. While this builds a strong base, it lacks clear explanations about cultural differences or social use.
Highlights:
Duolingo: Fast vocabulary, limited context
Babbel: Real conversations, cultural insights
Rosetta Stone: Immersion, less cultural detail
Frequently Asked Questions
Each platform uses different teaching styles, pricing structures, and language options. You will also notice differences in effectiveness for certain languages, ease of switching, and how users rate their experiences online.
What are the main differences in teaching methodologies among Duolingo, Babbel, and Rosetta Stone?
Duolingo uses short, game-like lessons with translation and repetition. Babbel focuses on grammar explanations, dialogues, and real-life conversation practice. Rosetta Stone uses an immersion method with no translations, relying on images and context.
How do the subscription models and lifetime access options compare between Babbel and Rosetta Stone?
Babbel offers monthly and yearly subscriptions but does not provide lifetime access. Rosetta Stone sells both subscriptions and a one-time lifetime purchase option.
Which language learning platform is more effective for learning Spanish: Duolingo, Babbel, or Rosetta Stone?
Duolingo helps you build vocabulary through frequent practice. Babbel gives you structured grammar lessons and conversational phrases. Rosetta Stone provides full immersion, which can help with pronunciation and listening skills.
What are the cost comparisons between Rosetta Stone vs Babbel, vs Duolingo??
Duolingo offers a free version with ads and a paid Plus plan. Babbel requires a paid subscription with no free tier. Rosetta Stone is usually the most expensive, with both subscription and lifetime payment options.
Can you switch languages easily on Duolingo, Babbel, or Rosetta Stone, and how many languages do each support?
Duolingo lets you switch between dozens of languages at any time. Babbel supports fewer languages, around 14, and allows switching, but with separate subscriptions. Rosetta Stone supports about 25 languages, and you can switch within your plan.
How do user experiences and satisfaction rates compare for Duolingo, Babbel, and Rosetta Stone according to online forums like Reddit?
Many users like Duolingo’s free access and fun style but say it lacks depth. Babbel often receives positive feedback for grammar explanations and practical use. Rosetta Stone gets mixed reviews, with some praising immersion and others finding it too repetitive.
Final Verdict
When comparing Duolingo vs Babbel vs Rosetta Stone, the best platform depends on your goals. Duolingo is the best free option for casual learning and vocabulary practice. Babbel is stronger for learners who want structured lessons and conversational skills. Rosetta Stone is best for immersion, pronunciation, and learners willing to invest more time and money.
Each platform has unique strengths, but pairing them with strong study strategies and additional tools can accelerate your progress. Whether you are preparing for a trip, an exam, or long-term mastery, the right mix of apps and study techniques will help you succeed.
Trying to decide between Babbel vs Rosetta Stone for learning a new language can be tough. Babbel is known for short, practical lessons, while Rosetta Stone focuses on full immersion and visuals.
You want to make the best choice for your learning style, budget, and goals. This guide compares their main features so you can pick the right fit.
Key Takeaways
Babbel and Rosetta Stone use different teaching methods
Each platform offers unique user experiences
Choosing depends on your goals, learning style, and budget
Core Differences Between Rosetta Stone vs Babbel
Rosetta Stone and Babbel are both well-known language learning platforms. Their teaching styles, lesson formats, and language options are not the same, which can make a big difference depending on your learning needs.
Overall Teaching Approach
Babbel uses real-life conversations and grammar explanations to help you understand how to speak and write. Its courses are designed to be practical, focusing on speaking skills, useful phrases, and how to use grammar in daily life. Babbel also uses the spaced repetition system to help you remember words and phrases over time.
Rosetta Stone teaches new languages using its “Dynamic Immersion” method. This approach tries to teach you as if you are picking up language in a natural setting, without translation. You see pictures, listen to words, repeat phrases, and match images, all within the new language. There is very little direct grammar instruction or speaking practice with real people. This method works best if you learn best by seeing and listening, not by memorizing rules.
If you want a learning style focused on communication, grammar, and practical use, you may find Babbel to be a better fit. If you prefer to learn by full immersion and repetition, Rosetta Stone might be more appealing.
Lesson Design and Structure
Babbel’s lessons are structured in short units that you can finish in about 10 to 15 minutes. Each lesson usually includes dialogue, listening, reading, writing, and speaking exercises. You get quick feedback and clear explanations, especially for grammar points. There are review sessions that recycle vocabulary using spaced repetition.
Rosetta Stone’s lessons have a set sequence. You move through levels by matching pictures to words and repeating sentences out loud. There is a heavy focus on listening and repeating, sometimes with speech recognition technology. The lessons are consistent in format, but do not have much detailed explanation or grammar guidance. There is little variation in the exercise types.
Here is a quick comparison:
Feature
Babbel
Rosetta Stone
Lesson Length
10-15 min
5-30 min
Explanation
Grammar included
Almost none
Interaction Type
Mixed
Picture & Audio
Babbel adapts more to your mistakes and tends to build up grammar and vocabulary step by step. Rosetta Stone sticks to the immersive method for every part of the course.
Supported Languages
Babbel focuses mainly on European languages. It offers around 14 languages, including Spanish, French, Italian, German, Dutch, and Portuguese. There are some exceptions, but you will not find languages like Japanese, Mandarin, or Arabic on Babbel.
Rosetta Stone covers a wider range of languages. You can choose from about 25 languages, including both European and non-European languages such as Japanese, Mandarin Chinese, Arabic, Korean, and Hindi. This makes it a better option if your target language is less common or not European.
For a quick overview, here are a few languages available on each platform:
Babbel:
Spanish
French
Italian
German
Dutch
Rosetta Stone:
Spanish
French
Italian
German
Arabic
Japanese
Chinese (Mandarin)
Korean
If you’re looking for a less widely taught language, Rosetta Stone will likely have more choices. If your focus is a popular European language, either tool could meet your needs.
Features and Methodologies
Babbel and Rosetta Stone take different approaches to teaching new languages. You will notice clear differences in how they focus on conversation, pronunciation tools, and ways to help you remember what you learn.
Conversational Skills and Real-Life Usage
Babbel uses dialogues and interactive conversations based on real-life scenarios you are likely to face. Lessons often include ordering food, booking a hotel, or meeting new people.
The platform tailors its content to your native language, helping you understand sentence structure and practical vocabulary quicker. Babbel Live offers live virtual classes with tutors, which improve your speaking skills through real-time feedback and group discussions.
Rosetta Stone mainly uses images and immersion techniques. You match pictures to words and sentences without English translations. This can help you learn through context, but it might feel less direct if you need specific conversational practice.
Pronunciation and Speech Recognition
Rosetta Stone features TruAccent speech recognition. It listens to your voice and checks if your pronunciation matches native speakers closely. On-screen waveforms and instant scores show you where to improve, giving clear and immediate feedback.
Babbel offers built-in speech recognition, but it is not as advanced as TruAccent. The feedback is simpler and focuses on basic pronunciation accuracy. Babbel Live provides extra practice with real people, which helps you get used to natural accents, speed, and tone as you speak.
Both programs support auditory learning. You hear native speakers during lessons, repeat words or phrases, and compare your voice to improve your language acquisition.
Spaced Repetition and Review Systems
Babbel uses spaced repetition to help you remember vocabulary and grammar. Words and phrases you find challenging repeat more often until you master them, then appear less as your memory improves. This system works automatically in the Review Manager.
Rosetta Stone includes review activities but does not use spaced repetition as deeply as Babbel. Practice often depends on repeating lessons or taking quizzes. If you want a structured review to reinforce long-term memory, Babbel’s system may suit your needs better.
Both platforms help you review, but the methods and how often content repeats can impact how quickly and strongly you build new language skills.
User Experience and Suitability
Babbel and Rosetta Stone offer different approaches depending on your starting skill level, personal goals, and preferred learning style. Both platforms focus on helping you make progress with a new language but use distinct methods and tools.
Learning Journey for Beginners and Advanced Learners
If you are a beginner, Rosetta Stone uses immersion techniques. All lessons are in the target language, which helps you get used to hearing and seeing new words right away. Some users find this method confusing at first, especially if you want more direct explanations.
Babbel, in contrast, provides instructions and grammar tips in your native language. This can make your first steps easier and less stressful. Both platforms use voice recognition, but Babbel’s feedback is often more detailed.
For advanced learners, Rosetta Stone can feel repetitive because it focuses on basic topics for longer. Babbel has more variety in its lessons, including podcasts and dialogues for higher levels. Many users report that Babbel’s content moves faster for those who already know some of the language.
Adapting to Individual Language Learning Goals
Your learning goals matter when picking a platform. Babbel lets you choose specific topics or situations, like travel, business, or daily conversation. You can skip around and focus on what you need most.
Rosetta Stone follows a strict path. You build up your knowledge slowly and do every lesson in order. This is best if you like structure and want to cover all basics step by step.
If you like short study sessions, Babbel’s lessons are about 10-15 minutes. Rosetta Stone lessons can be longer and sometimes require more focus. Some users learn best with Babbel’s customization and practical content, while others prefer Rosetta Stone’s repetitive practice to build skills gradually.
Here’s a comparison table:
Feature
Babbel
Rosetta Stone
Lesson length
10-15 minutes
20-30 minutes
Flexibility
High
Low
Custom topics
Yes
No
Structured path
Optional
Required
Immersive content
Some
Full immersion
Pricing and Alternatives
Languages apps can cost quite a bit, so it is important to look at what you pay for and if there are cheaper or better options. Each program uses a different subscription model, and there are several alternatives like Pimsleur that might fit your needs.
Subscription Models and Affordability
Babbel and Rosetta Stone both use tiered subscription plans. Babbel offers monthly, quarterly, yearly, and lifetime plans. Monthly access usually costs around $14 per month, with discounts for longer commitments. The lifetime plan is a one-time payment, unlocking all languages.
Rosetta Stone uses a similar approach, but its lifetime plan is more expensive. The monthly price is often about $12–$15, with better value if you pay for a year or more up front. Both regularly offer deals or seasonal sales.
Platform
Monthly
Yearly
Lifetime
Babbel
~$14
~$84
~$300
Rosetta Stone
~$15
~$96
~$300+
You can sometimes get free trials or money-back guarantees for both apps. No plan covers live tutor sessions in the base price.
Alternatives: Pimsleur and More
Pimsleur is another well-known app focusing on audio-based learning. It is usually priced at about $20 per month and is good if you want to learn by listening and speaking, rather than reading or typing.
Other alternatives include Duolingo (offers a free tier), Busuu, and Mango Languages. Duolingo’s paid version, Super Duolingo, costs about $7–$13 per month. Busuu charges around $7–$14 per month for Premium.
If you want lessons with real tutors, services like italki and Preply let you pay per session. These options can get expensive but offer live conversations.
If you’re torn between Rosetta Stone or Babbel, choose your app based on your budget and how you like to learn—audio, reading, or speaking with real people.
Frequently Asked Questions
Babbel and Rosetta Stone use different strategies to teach languages and vary in price, features, and flexibility. Many users have compared their experiences, with some looking at lifetime access and the ability to switch between languages.
What are the main differences in teaching methodology between Babbel and Rosetta Stone?
Babbel uses grammar explanations and conversations based on real-life situations. Lessons often include explanations in English. Rosetta Stone focuses on immersion and teaches with pictures, audio, and no translations. You learn by matching words to images.
Which offers a better price value for language learners: Babbel or Rosetta Stone?
Babbel usually has lower monthly costs and often runs discounts. The price for a yearly subscription is typically less than Rosetta Stone. Rosetta Stone has a higher price, but does offer a lifetime subscription option. Some users feel Babbel offers more value for short-term use, while Rosetta Stone costs more over time unless you choose lifetime access.
Can you switch languages easily with Babbel or Rosetta Stone, and how does each platform accommodate that?
With Babbel, you need a separate subscription for each language. Switching between languages is not included in one regular plan. Rosetta Stone allows you to access all available languages with one subscription. You can switch between languages at any time if you have an unlimited or lifetime plan.
Is there a significant difference in the effectiveness of language learning with Babbel versus Rosetta Stone?
Some learners say Babbel is better for grammar and useful conversations. It explains rules and builds up your practical skills. Rosetta Stone is said to help build strong pronunciation and listening. Some users find it less useful for grammar unless you learn by context.
How does the lifetime subscription offer compare between Babbel and Rosetta Stone?
Rosetta Stone’s lifetime subscription lets you access all its languages forever with a one-time payment. This can be good if you plan to use it for many years or want to learn more than one language. Babbel also has a lifetime option but usually only for one language. You pay once, but switching between languages costs extra.
What are the pros and cons of Babbel and Rosetta Stone from user reviews on Reddit?
Babbel users often like the clear grammar explanations and useful phrases. Some mention that the content feels more modern and is good for quick learners. Others wish they could get more languages for one price. Rosetta Stone receives praise for its immersive method, especially for people who learn well from context and repetition. Some reviews say it takes longer to see results, and the no-translation method can be frustrating for some users.
Choosing between Duolingo vs Rosetta Stone can be tricky when you want to learn a new language online. Duolingo is known for being fun, fast, and free, while Rosetta Stone focuses on deep immersion and clear lessons.
If you are unsure which one fits your learning style and budget, you are not alone. This quick guide will help you figure out which tool works best for your needs.
Key Takeaways
Each platform offers a unique way to learn a language.
Features, lesson style, and cost are main differences.
Picking the right one depends on how you like to learn.
Key Differences Between Duolingo and Rosetta Stone
Duolingo and Rosetta Stone both help you learn languages but they work in different ways. They use unique teaching methods, different approaches to immersion and translation, and offer distinct speech recognition tools.
Teaching Methods and Approaches
Duolingo uses short, game-like lessons. You earn points, level up, and get rewards as you learn. The app is fast-paced and encourages you to practice a little every day.
In contrast, Rosetta Stone follows a more traditional path. You see pictures, hear words, and match them without using your native language. The focus is on natural learning, similar to how children learn their first language.
Duolingo often teaches vocabulary using translation. Rosetta Stone avoids direct translation and works instead through repeated exposure and association. Your learning experience is more structured and controlled with Rosetta Stone. Duolingo gives you more flexibility and variety.
Immersion vs Translation-Based Learning
Rosetta Stone uses a full immersion method. All instructions, activities, and lessons are in the language you are learning. No English translations are provided. This can help you start thinking in the new language faster.
Duolingo takes a translation-based approach. Most exercises ask you to translate between languages, either to or from your own. You might see a sentence in English and type it in Spanish, for example.
Rosetta Stone’s immersion can feel confusing if you need clear explanations. Duolingo’s method is friendly for beginners who prefer to see direct translations and explanations. If you like learning by figuring things out, you may prefer Rosetta Stone. If you like clarity, Duolingo may feel easier.
Technology and Speech Recognition
Both apps use speech recognition, but the features are not the same. Duolingo lets you speak words and short phrases into your device’s microphone. The app tells you if your pronunciation is close enough, but feedback is basic.
Rosetta Stone uses its own speech recognition system called TruAccent. It analyzes your speech more deeply and helps you improve accuracy. TruAccent tells you which sounds you got right or wrong.
Duolingo’s speech tools work well for practice, but are simpler. Rosetta Stone’s tools are more advanced, especially for fine-tuning accent and pronunciation. If pronunciation is most important to you, Rosetta Stone gives you detailed feedback. If you just want to get started, Duolingo’s system is quicker to use.
Features and User Experience
Rosetta Stone and Duolingo offer different ways to help you learn a language. You will notice differences in their lesson formats, game-like elements, study paths, and extra tools.
Lesson Structure and Progression
Duolingo uses short, interactive lessons. These lessons focus on vocabulary, grammar, reading, speaking, and listening skills. The app’s structure is like a path with many small checkpoints. You unlock new topics as you make progress along the path.
Rosetta Stone organizes lessons around themed units, such as greetings or travel. Each unit is longer and works through only the target language. There are no translations or direct explanations in your native language. Instead, you get all instructions through pictures, audio, and context—an approach called “immersion.”
Duolingo lessons tend to be faster and easier to repeat in small bursts. If you learn best by repetition, Duolingo fits well. Rosetta Stone lessons are longer and often require more focus in each sitting.
Gamification Elements
Duolingo is well-known for its heavy use of gamification. You earn XP points, level up, and maintain “streaks” for completing daily lessons. There are also leaderboards where you compete with other users.
You can collect rewards, such as gems, to unlock bonus lessons or costumes for your Duolingo avatar. Motivational pop-ups and encouraging sounds help keep you involved. If you miss a day, the app reminds you to keep your streak alive.
Rosetta Stone keeps things more traditional. It doesn’t use game-like rewards, streaks, or leaderboards. Progress is mostly tracked by lesson completion. If you are motivated by scores or competition, you may find Duolingo’s system more engaging.
Learning Paths and Motivation
Duolingo lets you personalize your learning by choosing topics such as travel or business. The path is flexible, and you can try Duolingo Stories for extra practice in reading and listening. For those who pay for Duolingo Plus, you unlock extra features like offline lessons and progress tracking.
Rosetta Stone is more linear. You move through the course in a set order, without skipping ahead. This structure is designed to build vocabulary and grammar step by step. It may be better if you prefer a clear, guided path.
Duolingo’s reminders and rewards can keep you motivated longer. Rosetta Stone depends more on your self-discipline and routine.
Supplemental Resources
Duolingo includes podcasts, stories, and a forum where you can discuss questions. Stories add context by using real conversations with audio and quizzes afterward. Its podcasts (like the Duolingo Spanish Podcast) help build listening skills.
Rosetta Stone offers live tutoring sessions as an add-on. Certified tutors help you practice speaking. Some versions also offer phrasebooks and pronunciation guides using voice recognition.
Below is a quick comparison:
Feature
Duolingo
Rosetta Stone
Podcasts
Yes (for some languages)
No
Stories
Yes
No
Live tutoring
No
Yes (with extra cost)
User forums
Yes
No
Pronunciation tools
Yes (voice AI)
Yes (with speech recognition)
Both apps give extra tools, but in different ways. Duolingo leans on digital media and community, while Rosetta Stone focuses more on personalized support.
Language Coverage and Accessibility
Duolingo and Rosetta Stone both offer tools for language learning, but there are differences in how many languages you can learn and how you can access the lessons. If you need Spanish, French, or Japanese, both apps have them, but their options and how you use them are not always the same.
Available Languages and Course Options
Duolingo offers more than 40 languages, including Spanish, French, Japanese, Korean, and even fictional languages like Klingon and High Valyrian. The platform supports many popular choices as well as less common ones like Hawaiian and Navajo.
Rosetta Stone has around 25 language courses. It focuses on widely spoken languages such as Spanish, French, Italian, German, and Mandarin Chinese. You will not find fictional languages here, and the selection is more traditional.
Duolingo’s courses often include extra features like stories and podcasts in some languages. However, not all languages get the same amount of content. Rosetta Stone’s courses are more consistent in quality and structure, but some less-studied languages have less content.
Table: Number of Languages
App
Number of Languages
Includes Fictional Languages
Duolingo
40+
Yes
Rosetta Stone
25+
No
Mobile and Desktop Platforms
You can use Duolingo on iOS, Android, and any web browser. The interface is almost the same on both mobile and desktop, making it easy to switch between devices. Features like reminders and progress tracking also work across platforms.
Rosetta Stone is also available on iOS, Android, and web browsers. The desktop experience is important because some features, including pronunciation tools, work best on a larger screen. The mobile app supports most core lessons but sometimes limits advanced features.
Both apps let you sync your progress so you can change devices without losing your place. This helps if you want to practice on your phone during a commute and then switch to your computer at home.
Offline Learning Capabilities
Duolingo allows offline learning, but only if you use the mobile app. Free users can access a limited number of lessons while offline, but Duolingo Plus (the paid version) lets you download more courses.
Rosetta Stone supports full offline access to lessons if you use the mobile app. Once you download a unit, you can use all interactive activities and speech-recognition exercises without internet access.
If you expect to learn where Wi-Fi is limited, this feature is important. Both offer some type of offline access, but Rosetta Stone’s is less restricted for all users, while Duolingo keeps full offline access as a paid feature.
Pricing and Subscription Models
Both Duolingo and Rosetta Stone offer different pricing and access options. You will see clear differences in cost, what you get for free, and what premium upgrades unlock.
Free vs Paid Plans
Duolingo is free at its version with ads and basic features like daily lessons, practice exercises, and leaderboards. You can learn as much as you want without paying, but ads may appear between lessons. Progress tracking and reminders are included for free.
Duolingo Plus is its paid upgrade. It removes ads, adds offline access, enables unlimited mistakes, and gives progress reports. You can try it with a free trial before purchasing. The free and paid plans share the same core content.
Rosetta Stone does not have a true free tier. Instead, it offers a short free trial that gives you access to its lessons for a limited time—typically a few days. After the trial, you must pay to continue using the app and lessons.
Feature
Duolingo Free
Duolingo Plus
Rosetta Stone Trial
Rosetta Stone Paid
Lessons
Yes
Yes
Limited time
Yes
Ads
Yes
No
No
No
Offline access
No
Yes
No
Yes
Unlimited Mistakes
No
Yes
No
Yes
Speech Recognition
Yes
Yes
Yes
Yes
Cost Comparison and Value
Rosetta Stone vs Duolingo
Duolingo Plus costs about $7 to $12 per month, depending on your subscription length. There are discounts for yearly plans. You can also use family sharing to lower the cost per user. All language courses and features are included in the price.
Rosetta Stone has several pricing options. A three-month single language plan is around $36. The yearly plan is about $96 for one language. The “Lifetime” plan gives access to all languages for a one-time fee, usually about $199. Discounts are common during sales.
Duolingo is usually less expensive, especially if you use the free plan. Rosetta Stone has a bigger upfront cost but may be valuable if you will use it long-term or want access to all languages. Both offer some trial period to help you decide before paying.
Access to Premium Features
Duolingo Plus members get several upgrades:
No ads during lessons
Download lessons for use offline
Unlimited “hearts” so you can make mistakes without waiting
Progress tracking and quizzes
These features make it easier for you to practice without interruptions or time limits. Free users do not get these extras but can still learn every language.
Rosetta Stone’s paid users get:
Full access to all lessons for their chosen language
Speech recognition with TruAccent™ technology
Download lessons for offline use (with the app)
Access to live tutoring sessions (in higher-tier plans)
Phrasebooks and stories for deeper practice
You cannot access most of these premium features without a paid plan. Everything is unlocked at once so you can go at your own pace. The live sessions with tutors are unique to Rosetta Stone and require the highest plan.
Frequently Asked Questions
Costs, community opinions, features for children, and different learning levels matter when picking a language app. Understanding these differences can help you decide which option fits your needs best.
Which language learning app offers the best value for its cost?
Duolingo has a free version with ads and a paid version called Super Duolingo. The paid version adds more advanced features and removes ads. Rosetta Stone does not have a free version but offers a money-back guarantee and a one-time payment option.
Duolingo is often considered more affordable if you want to learn without spending money. Rosetta Stone’s pricing can be better for people who want a more traditional course with set lessons.
How do user experiences compare for language learning apps on online forums?
Many users say Duolingo is fun and easy to use because of its game-like style. People like earning points and keeping streaks. Some forum posts mention that Duolingo is good for reviewing or learning the basics, but not enough for fluency.
On forums, Rosetta Stone reviews often praise the app’s focus on immersion. Users say that lessons are clear and well-structured. Some users feel Rosetta Stone is better for people who want to practice speaking more, while Duolingo offers more languages to try.
What are the benefits of using language learning apps for children?
Language apps let children practice at their own pace and in small steps. Most apps use fun designs, cartoons, and positive feedback to keep kids interested. Parents can track their child’s progress or set daily goals.
Some apps, like Duolingo, have a special version called Duolingo Kids. It is made just for children and has simple language and bright colors. Rosetta Stone has lessons suited for younger language learners and uses lots of pictures.
How do language learning app features differ for beginner versus advanced learners?
Duolingo’s lessons for beginners use short, simple sentences, and lots of pictures. As you progress, exercises get harder, but many users say it is better for beginner and intermediate practice.
Rosetta Stone teaches using only the target language, even for beginners. Advanced learners on Rosetta Stone can do pronunciation practice and work on full conversations. Both apps offer review tools, but options for advanced content may be limited in comparison to formal classes or real conversations.
Every owner has at least once thought about what would happen if their pet suddenly got lost. In a modern city, there are too many risk factors: cars, noisy streets, open yards, and strangers. Even the most intelligent dog or cautious cat can get scared and run away.
Today, technology allows you to minimize the danger, and a reliable tool for this is the petloc8.com service, which offers innovative solutions for monitoring pets. Petloc8 is a company that produces GPS trackers for dogs and cats.
The brand’s devices help track the location in real time through a mobile application, create safe zones, and receive notifications when they are crossed. Such a device will be helpful to everyone, because it protects your animal.
How the Technology Bundle Works
Many people think that a GPS tracker works only thanks to satellites. The device combines several technologies at once:
GPS;
WiFi;
GSM.
Satellites determine coordinates with high accuracy. However, there are situations when the signal is lost: in dense urban development, underground, or inside a building. Then other channels come to the rescue.
The approximate location is determined by WiFi using nearby access points. GSM works based on data from cell towers. These elements in combination give good performance. Signal interruption is reduced to a minimum.
GPS — Accuracy and Global Coverage
The most common search tool is GPS. It works based on a network of satellites. This network operates globally. The device works on the following principle: one receives signals from several satellites simultaneously and uses algorithms to determine coordinates.
The more satellites available, the more accurate the result. The error is minimal in open areas. For the owner, this means the pet’s location can be seen exactly on the map.
However, GPS has its weaknesses. The signal weakens in megacities or under a dense roof. Therefore, additional support from other technologies is essential.
WiFi and Its Role
Many people are surprised: how can WiFi help find an animal if it is not connected to the network? It’s simple: the device detects the nearest routers and compares them with the coordinate database.
The approximate location can be understood in this way. This function is especially useful in apartments and shopping centers, where satellite reception is limited.
Of course, the accuracy of this option is lower than that of GPS, but for the first reference point, this is an indispensable assistant.
GSM — Universal Communication Channel
GSM is a mobile communication standard familiar to everyone. The tracker has a SIM card installed, which allows you to exchange data through the operator’s network. When other signals are unavailable, GSM helps determine the approximate radius of the location from the nearest tower.
In addition, it is thanks to GSM that the owner receives notifications about the pet’s movement. This technology provides constant communication, even in hard-to-reach conditions.
Why a Combination of Technologies Is Important
Each system has limitations. GPS can lose accuracy in buildings, WiFi works only in cities, and GSM gives significant errors. However, together these products form a complex that virtually eliminates complete signal loss.
The best channel for data transmission is automatically selected by the device. This guarantees that pet owners are consistently informed about their pets’ whereabouts.
Additional Features for Safety
More than just coordinates are displayed by modern trackers. They allow you to set virtual boundaries. You can receive alerts about going beyond them.
The animal’s movements can be tracked and its activity analyzed. This is useful not only for safety, but also for the health of the pet. After all, the owner sees how active the dog or cat is and can notice changes in behavior in time.
Advantages of Using GPS Trackers
Modern devices are designed to be convenient for both the animal and the owner. They are lightweight, waterproof, and easy to operate. Among the main advantages that are inherent in pet trackers, we can highlight the following:
precise determination of coordinates;
work in different conditions;
instant notifications to the phone;
creation of safe zones;
history of movements and activity;
ease of use and setup.
This combination makes the device a universal assistant. The owner gets confidence and peace of mind, and the pet remains protected even away from home.
Urban Environment and Challenges
Modern cities create a lot of difficulties for searching. High-rise buildings block the satellite signal. Underground parking is completely isolated from GPS. Crowds of people and transport distract the animal and prevent it from being noticed.
Technology becomes not just a convenience, but a real salvation in such conditions. The more data sources are involved, the faster the owner will find their pet.
Conclusion
GPS, WiFi, and GSM are the three pillars on which the safety of our pets is built. Together, they create a reliable network that helps you stay in touch with your pet even in the most challenging conditions.
You gain confidence, and the animal can move around the territory without any worries. Petloc8 products turn the pet’s walk into a whole protection system.
Choosing between Babbel vs Duolingo can be tricky when you want to learn a new language. Babbel is better if you want clear grammar lessons and structured courses, while Duolingo works well for those who prefer games and quick, daily practice.
Both apps help millions of users, but your best choice depends on how you like to study and what keeps you motivated.
Key Takeaways
Babbel and Duolingo have different teaching styles.
Babbel and Duolingo are popular online language learning apps, but they offer different ways to study foreign languages. These differences can affect how quickly you learn, how many languages you can choose, and how much you pay for each app.
Learning Approach and Structure
Babbel uses a lesson-based method. Each lesson has a clear focus on grammar, vocabulary, and practice. You follow a step-by-step path and every lesson builds on the last.
Lessons are designed by language learning experts. Babbel gives you helpful grammar tips and culture notes. You also get to practice speaking, listening, and writing.
Duolingo uses a game-like structure with short drills called “skills.” You earn points when you get answers right. The app uses repetition and encourages daily practice by sending reminders.
Duolingo focuses less on grammar rules and more on learning through practice with short phrases and sentences. It’s easy to jump around and try different topics, and you can use it for just a few minutes a day.
Supported Languages and Language Focus
Duolingo offers more than 40 languages, including popular ones like Spanish, French, and German, as well as less common ones like Hawaiian and Swahili.
Babbel focuses on about 14 languages, mostly European ones such as Spanish, French, Italian, and German. You won’t find languages like Japanese, Korean, or Arabic on Babbel.
If you want to learn a less common language, Duolingo has more choices. If you want a deeper study of European languages, Babbel has more in-depth lessons.
A quick look:
App
Number of Languages
Highlights
Duolingo
40+
Wide selection, unique picks
Babbel
14
Strong focus on Europe
Pricing and Access Options
Duolingo can be used for free. You can finish lessons and learn without paying. There is a paid plan called Duolingo Super. It removes ads and gives you extra features, like unlimited hearts (mistakes).
Babbel is mostly a paid service. You usually need a subscription to access all content, though there is sometimes a free lesson or trial to start.
Babbel subscriptions: Paid monthly, quarterly, yearly, or for a lifetime. Costs depend on the plan you choose.
Duolingo: Free forever, but the Super plan adds more features and removes ads. This table breaks it down:
App
Free Access
Paid Option
Duolingo
Yes
Super: Ad-free, extras
Babbel
Limited
Full course access
Babbel Features and User Experience
Babbel helps you learn new languages through structured courses, grammar lessons, and live instruction. You can pick from 14 languages and use different activities to improve your speaking, reading, and listening skills.
Course Design and Progression
Babbel courses start with simple words and phrases, then move step by step to more complex ideas. Courses are made by language experts. They follow a clear order, so you don’t miss important basics as you move on.
You can track your progress through each lesson. Each course is split into levels, so you always know where you stand. Babbel also lets you review past lessons to help reinforce what you’ve learned. The lessons usually last about 10-15 minutes, so they fit easily into your daily routine.
Key facts:
14 languages to choose from
Courses divided by topic and skill level
Short and focused lessons
Grammar Lessons and Cultural Context
Every Babbel language course includes grammar practice to help you understand how the language works. Lessons focus on sentence structure, verb forms, and word endings. You get clear examples to show you how to use grammar in real conversations.
Babbel also includes information about the culture where the language is spoken. You learn about customs, holidays, and real-life situations. This helps you use the language in context, not just memorize words.
What you’ll find:
Direct grammar instruction
Example sentences for real-life use
Cultural notes to give you practical knowledge
Interactive Exercises and Babbel Live
You can practice reading, writing, listening, and speaking through interactive exercises. These include fill-in-the-blank tasks, matching games, and pronunciation checks using voice recognition.
For extra practice, Babbel Live offers hour-long group classes with certified teachers. These classes let you speak with other learners and get feedback in real time. You can ask questions and practice conversations in a supportive setting.
Highlights:
Practice for all key language skills
Voice recognition to help with pronunciation
Live classes for extra speaking practice
Duolingo Features and User Experience
Duolingo uses interactive exercises and smart game features to help you practice a new language. Subscriptions like Super Duolingo offer extra tools, while the app is designed to be accessible and supportive for all language learners.
Gamification and Motivation
Duolingo uses game-like methods to keep you motivated. You earn XP points, win crowns, and unlock levels as you finish lessons. Bright colors and fun sounds make using the app feel like a game, not a chore.
You can also join daily and weekly leaderboards to compete with other learners. Earning streaks for studying each day gives you a small reward and makes you want to keep going. Badges and achievements highlight your progress and let you see how far you’ve come.
The lessons use short tasks and instant feedback, so you know right away if you got something right or wrong. Hints and tips pop up to help you, making learning feel less stressful.
Super Duolingo and Duolingo Plus
Duolingo offers paid subscriptions called Super Duolingo (formerly Duolingo Plus). With this service, you get an ad-free experience, so lessons go faster and are less distracting.
Super Duolingo also gives you unlimited hearts. This means you can make mistakes and keep learning, instead of waiting to try again. You get monthly progress reports and quizzes to track your improvement.
You can try Super Duolingo with a free trial before paying. If you choose not to upgrade, the regular free version still offers most key features. A quick comparison is below:
Feature
Free Version
Super Duolingo
Ads
Yes
No
Unlimited Hearts
No
Yes
Progress Tracker
Basic
Detailed
Monthly Quizzes
No
Yes
Accessibility and Community
Duolingo is available on both smartphones and computers. The app works for over 30 languages, including Spanish, French, German, and Japanese.
Simple, clean screens and easy navigation help you learn without feeling lost. Duolingo offers text-to-speech, adjustable font sizes, and color contrast options for better accessibility.
A strong online community is part of the experience. You can discuss language topics in Duolingo forums, ask questions, or share study tips with other learners. Many users join clubs or group challenges to keep motivated.
You can use Duolingo for free. Most features are very easy to use, even if you have never tried language learning apps before.
Choosing the Best Language Learning App for Your Goals
Each language learning app serves different needs, learning habits, and comfort levels with technology. Choosing Babbel or Duolingo will depend on how you learn best and what you want out of the experience.
Learning Styles and User Preferences
Language-learning apps use different approaches. Babbel is structured, gives clear lessons, and has a set path that builds language skills step-by-step. This works well if you like a classroom feel and want to see your progress.
Duolingo uses short lessons with lots of repetition and a playful style. The focus is more on keeping you motivated with streaks, rewards, and short daily goals. If you learn best through games or want to study at your own pace, this style will suit you.
Online language learning can also depend on your favorite device. Babbel works best on computers and tablets, while Duolingo is easy to use on smartphones. If you want to fit practice into small moments, a mobile-friendly platform like Duolingo can be useful.
Who Should Use Babbel
You should pick Babbel if you want clear lessons that teach grammar, vocabulary, and conversations in a logical order. Babbel is a good choice if you need more structure than other language-learning apps offer.
Babbel’s language learning platform is useful if you mainly want to read, write, and speak in real-life situations. The app’s bite-sized lessons take about 10–15 minutes, making it possible to fit into a busy schedule.
If you prefer a traditional learning method with explanations and examples, Babbel is the better option. People who are serious about using a language at work or while traveling may find Babbel extremely helpful.
Who Should Use Duolingo
Duolingo is useful if you want a free language learning app with game features. If a sense of fun and achievement helps you stick with online language learning, Duolingo will be a good fit.
Duolingo offers hundreds of short activities for reading, listening, writing, and speaking. Learners who get bored easily or who like to see quick points and rewards will enjoy using this platform.
If you want to explore many languages or learn at your own pace without a big commitment, Duolingo makes it easy. Duolingo is good for beginners or those who want to learn a little every day without feeling pressured.
Frequently Asked Questions
Babbel and Duolingo have different ways of teaching new languages and use different lesson types. Their pricing, language programs, user feedback, and lesson designs all vary in notable ways.
What are the main differences in teaching methodologies between Babbel and Duolingo?
Babbel uses a structured curriculum with lessons built by language experts. The lessons focus on grammar, vocabulary, and conversation for practical use. Duolingo uses short, game-like exercises. You move through lessons by earning points and leveling up. The learning is more focused on repetition and translation tasks.
How do subscription costs compare between Babbel and Duolingo?
Babbel is a paid service after its first lesson, with monthly, quarterly, and annual plans. Prices usually start around $14 per month, with savings for longer plans. Duolingo offers a free version with ads. Its paid version, Duolingo Super, removes ads and costs about $7 to $13 per month, depending on the plan you choose.
Which platform, Babbel or Duolingo, offers a more comprehensive Spanish learning program?
Babbel’s Spanish program includes grammar explanations, practice in real conversations, and cultural tips. The courses are arranged by topic and skill level. Duolingo covers vocabulary and basic grammar. The app uses repetition to help you remember new words, but grammar explanations are shorter and less detailed than Babbel’s.
Between Babbel and Duolingo, which language learning app is more effective for French?
Babbel’s French course includes more structured grammar exercises and conversation practice. This can help you learn how to use French in real life. Duolingo teaches French with shorter, quicker lessons. The app helps build vocabulary and review simple sentences.
How do Babbel and Duolingo compare in terms of their lesson structure and content progression?
Babbel’s lessons follow a set path built around real-life situations. Each lesson adds to your previous knowledge in a step-by-step way. Duolingo uses a tree or path that lets you repeat lessons as much as you want. You earn points as you progress and unlock new units by completing earlier ones.
A first grade reading level means your child can read simple words, short sentences, and easy books. At this stage, kids start to sound out words and understand what they read.
You may wonder how schools know if your child is reading at a 1st grade level or how you can support their progress. This guide explains what you need to look for and how to help your child feel confident with reading.
Key Takeaways
First grade reading level focuses on simple words and sentences
There are clear ways to check reading progress
Supporting at home helps kids become better readers
Understanding First Grade Reading Level
At a first grade reading level, you learn to read basic words, short sentences, and simple stories. These skills form the base for your reading journey and help you practice new words and grammar.
What Defines First Grade Reading Ability
A first grader’s ability to read means being able to read and understand simple words and sentences. You start by reading familiar words and using phonics skills to sound out new ones. Most books use short sentences with common sight words like “the,” “and,” or “is.”
At this level, you begin to use pictures to help you guess words you do not know. You also start to read with more confidence. You move from reading aloud to reading quietly sometimes. Comprehension is important, so you learn to answer questions about what you read.
Your reading skills at this stage grow quickly. You may recognize and understand basic punctuation such as periods, question marks, and exclamation points. Sight word lists and simple stories support your reading growth.
Common Milestones and Expectations
There are common milestones for first-grade readers. You often know at least 100 sight words by the end of the year. These are high-frequency words that you see all the time.
You are expected to read and understand simple sentences and short paragraphs. You start to retell stories in your own words. This helps you show that you understood the story.
Your teacher may use small books or “readers” with simple vocabulary and lots of pictures. Some skills you develop:
Recognizing rhyming words
Reading with some fluency
Answering basic questions (who, what, where)
Guessing words using context clues
These skills set you up for more complex reading later.
Simple Sentences and Story Structures
First-grade reading often uses simple sentences. Sentences are short, clear, and usually contain a subject and a verb. For example: “The dog runs.” Sentences often repeat patterns to help you learn.
Stories at this level have basic structures. They include a beginning, middle, and end. Events happen in order, making it easier for you to follow along.
Table: Story Elements
Part
What You Learn
Example
Beginning
Introduces characters
“Anna has a cat.”
Middle
Shows an event or action
“The cat runs away.”
End
Resolves the story
“Anna finds her cat.”
Simple stories use easy words and lots of repetition. This helps you practice reading and understand how stories work. You become comfortable with basics before moving on to harder books.
Methods for Assessing First Grade Reading Level
There are several tools used in schools to measure first grade reading levels. Each method uses a different way to check your child’s understanding, accuracy, and reading skills.
Guided Reading Levels Explained
Guided Reading Levels, often called GRL, place books and readers in different groups based on difficulty. Teachers assess how well your child reads a specific book and watch for word recognition, fluency, and comprehension. The most common GRL system uses letters from A to Z, with A being easiest and Z being hardest.
For first graders, you often see levels around C through J. Your child’s teacher will choose books that match the current level, then gradually move to harder books as skills improve. This helps make reading challenging, but not too hard.
Using guided reading levels helps teachers give support where your child needs it most. The main goal is to help your child gain confidence and read more complex books over time.
Lexile Framework and Lexile Measurement
The Lexile Framework for Reading matches your child with texts at the right challenge level. It gives both books and readers a Lexile score based on reading ability and text complexity. Lexile scores are numbers, usually from BR (beginning reader) up to above 1200L for advanced readers. First graders often have Lexile measures from BR to 400L.
Here’s a simple table showing typical first grade Lexile ranges:
Grade
Typical Lexile Range
First Grade
BR-400L
Teachers, parents, and librarians use Lexile scores to find books that are not too easy or too hard. Your child’s Lexile measure may come from a reading test or classroom assessment.
Developmental Reading Assessment
Developmental Reading Assessment, or DRA, looks closely at your child’s reading skills. The DRA is given one-on-one. Your child reads a book aloud and answers questions about it. The teacher reviews how your child reads words, understands what is connection between the text means, and retells the story.
DRA levels are numbers, starting at 1 for brand-new readers and going up as skills improve. First grade readers often have DRA levels between 3 and 16. The DRA helps teachers see exactly where your child might need help—for example, with sounding out words or understanding main ideas.
Teachers use DRA results to set goals and pick books that match your child’s reading skills.
Accelerated Reader and ATOS
Accelerated Reader (AR) is a popular program that uses quizzes to measure reading progress. After your child reads a book, they take a short quiz on the computer. Each book is assigned an ATOS level. The ATOS scale starts at about 0.5 for simple books and can go above 12.0 for high school books.
In first grade, books are usually in the 0.5 to 2.0 ATOS range. AR points are given based on the book’s length and difficulty, and your child can earn points by passing quizzes. Teachers use this information to encourage more reading and help students find just-right books.
Both the ATOS and AR systems aim to motivate your child to read and to help you know which books fit their reading level systems.
Key Components of First Grade Reading Proficiency
First grade reading focuses on developing basic reading skills that help you read words, understand stories, and use pictures to support your learning. These skills include sounding out words, reading with a steady speed, making sense of sentences, and using illustrations to get more meaning from the text.
Phonics and Decoding Skills
Phonics teaches you the way letters and letter groups stand for sounds. When you learn phonics, you understand that words can be broken into smaller parts, like cat becoming /c/ /a/ /t/. This helps you sound out words on your own.
Decoding skills let you use your phonics knowledge to read new words. If you see an unfamiliar word, you can decode it by sounding out each letter or group of letters.
Common phonics skills in first grade include:
Recognizing simple letter sounds (b, t, s)
Blending sounds (sl- in slide)
Noticing short and long vowel sounds
You use these skills often, especially when reading simple books or practicing with word lists in class. Strong decoding helps you read without stopping too much.
Reading Fluency and Accuracy
Reading fluency refers to the ability to read aloud smoothly and at the appropriate speed. You don’t have to stop for each word or sound choppy. You also use a clear voice and try to follow the punctuation, like commas and periods, as you read sentences.
Reading accuracy is about saying each word correctly as it is written. You should try to read most words correctly without making lots of mistakes or guessing.
To practice fluency and accuracy, you may:
Reread favorite stories
Use short poems or simple readers
Take turns reading out loud with someone
These activities help you gain confidence and make reading feel easier. Fluency lets you pay more attention to what a story is about instead of just figuring out the words.
Building Reading Comprehension
Reading comprehension means you understand what the text is saying. It is more than just reading the words; you think about what they mean. In first grade, you answer simple questions about stories and talk about what happened.
Some key skills you learn for comprehension include:
Retelling what you read in your own words
Naming the main idea of a book or a page
Identifying key details, like who, what, when, where, why, and how
You can use tools like story maps or lists to help you remember details. Sometimes, teachers may ask you to draw a picture of the story, which also helps you show what you understood.
The Role of Illustrations in Understanding
Illustrations are pictures that go with the text. They develop the importance of reading for first-grade readers because they help you figure out what is happening or what certain words mean.
You may use these pictures to:
Guess what a new word means based on the picture
See how a character feels by looking at their face in the drawing
Follow the order of events if you get confused by the words
Illustrations give extra clues when you are stuck or need help following the story. Some books for first graders have pictures on every page, making it easier for you to stay interested and comprehend the story better.
If you have trouble with a word, it’s helpful to look at the picture for hints. This can help you keep going without getting too frustrated.
Supporting and Enhancing First Grade Reading
Supporting first grade reading takes practice through carefully chosen activities, helpful environments, and routine checks on progress. It is important to make reading enjoyable while giving your child the help they need at their reading level.
Engaging Reading Activities for Growth
Hands-on reading activities keep first graders interested and let them practice new skills. You can use short, simple stories that match your child’s reading level. Pair these with picture books so your child can use images to understand words.
Try having your child read out loud each day. This helps boost their fluency and confidence. You can make a chart and track daily reading to show progress.
Listen to audiobooks together and talk about the story
Let your child act out favorite scenes from books
Mixing fun activities makes it easier for children to learn new words and enjoy books.
Creating a Positive Reading Environment
A good reading environment helps your child want to read more often. Find a quiet, well-lit spot at home for reading time. Keep a small shelf or box of books that are just right for your child’s reading skills.
Let your child choose their own books from the selection. Children are more motivated to read books they are interested in. Sit together and take turns reading to make the experience bonding and supportive.
Remove distractions like the TV during reading time. Display your child’s reading chart or favorite book covers on the wall to encourage pride in their reading journey.
Tracking Progress Along the Reading Journey
It is important to know how your child is growing as a reader. Keep a simple reading log or checklist. Write down story titles and the date each one is read.
You can meet with your child’s teacher to discuss strengths and where more help is needed. Many schools use reading level charts to check improvement. Look at how your child handles new words, follows along, and answers simple questions about the story.
If your child is struggling, ask the teacher for extra reading activities or resources. Celebrate new skills learned, even small ones, to show your child their progress is important.
Frequently Asked Questions
First-grade students benefit from books, activities, and worksheets that match their early reading skills. You can use different resources and strategies to help your child become a stronger reader.
What are some recommended books for first-grade reading levels?
Some good choices for first graders include “Henry and Mudge” by Cynthia Rylant and “Frog and Toad Are Friends” by Arnold Lobel. Other options are “Pete the Cat: Rocking in My School Shoes” by James Dean and “The Snowy Day” by Ezra Jack Keats.
How can I assess my child’s reading level in first grade?
You can listen to your child read out loud and notice if they can read most words easily. Try using leveled reading lists or quick online assessments from trusted education sites. Teachers often use tools like running records or leveled passages to measure a child’s reading skills.
What type of worksheets are effective for improving reading skills in first graders?
Worksheets with short stories and simple questions help build comprehension. Activities focusing on letter sounds, sight words, and matching pictures to words are also helpful. Look for worksheets that ask children to fill in missing words or sort words by sound.
How does the reading level expectation progress throughout the first grade?
At the start of first grade, most children read short, simple sentences with basic vocabulary. By the end of the year, they can usually read longer sentences and stories with more complex words. Their fluency and understanding of the text usually grow as the school year progresses.
Where can I find free reading materials suitable for first graders?
You can find free books and stories for first graders on websites like Storyline Online or Unite for Literacy. Local public libraries often have digital collections with books at different reading levels for children.
What examples illustrate texts that are appropriate for first-grade reading abilities?
A simple book like “Go, Dog. Go!” by P.D. Eastman uses easy words and short sentences. Early readers such as “Green Eggs and Ham” by Dr. Seuss or “Little Bear” by Else Holmelund Minarik are also examples. These books have lots of repetition and pictures to support the words.
If you’re looking to launch your career in holistic health, an online acupuncture certification program can provide accredited training and clinical readiness. This list highlights six accessible options—from AIAM’s self-paced diploma to programs backed by Chinese medicine experts—each offering flexible learning paired with real-world practice.
The acupuncture profession continues to grow stronger, generating more than $3 billion annually in the United States.
With 5 in 6 of the over 30,000 licensed acupuncturists currently running their own clinics, and others working in physical therapy offices, hospitals, and educational institutions, the field shows remarkable resilience and increasing demand for qualified practitioners.
What to Look for in the Best Online Acupuncture Certification Programs
When selecting an online acupuncture certification program, prioritize accreditation by the Accreditation Commission for Acupuncture and Herbal Medicine (ACAHM) and eligibility for National Certification Commission for Acupuncture and Oriental Medicine (NCCAOM) examinations.
The NCCAOM is the only national organization that validates entry-level competency in acupuncture and Oriental medicine through professional certification.
Key evaluation criteria include hands-on clinical practicum requirements, qualified faculty with extensive practice experience, comprehensive curriculum covering both Eastern and Western medicine approaches, and clear pathways to state licensure.
Currently, forty-seven states plus the District of Columbia use NCCAOM examinations as part of the licensure process, making NCCAOM eligibility essential for professional practice.
Top 6 Best Online Acupuncture Certification Programs
1. AIAM – Online Acupuncture Certification Program – Best for Flexible, Accredited Training with Live Support
AIAM’s Master of Acupuncture (MAc) program prepares graduates to sit for the National Certification Commission for Acupuncture and Oriental Medicine (NCCAOM) exam. The program can be completed within 27 months, making it one of the more efficient pathways to professional certification.
Students receive quality education at an affordable cost, with interactive modules, live faculty webinars, and local clinical practicum placements. The curriculum emphasizes both traditional acupuncture techniques and modern biomedical understanding, preparing practitioners to function as independent healthcare providers.
Graduates report successful integration into the modern healthcare system with strong foundational knowledge in both Eastern and Western medicine approaches.
2. Pacific College of Health and Science – Online Acupuncture Certificate – Trusted for Combining Hybrid Learning with Hands-On Clinical Labs
Pacific College has been the largest acupuncture school in the US since 1986, offering programs accredited by both WASC and the Accreditation Commission for Acupuncture and Herbal Medicine (ACAHM).
Their programs include hybrid models combining online classes with hands-on lab intensives at regional campuses in San Diego, New York City, and Chicago. Students can choose between Doctor of Acupuncture (DAc) and Master of Science program, with specializations available in Chinese Herbal Medicine.
The college boasts over 350 highly credentialed faculty members and maintains busy clinics open to the public at each campus location.
3. American College of Traditional Chinese Medicine (ACTCM) – Certificate in Acupuncture – Top-Rated for ACAHM-Accreditation and Exam Eligibility
ACTCM’s certificate program blends online coursework with required on-site clinical rotations, maintaining full accreditation by ACAHM and meeting all NCCAOM prerequisites. The program emphasizes traditional Chinese medicine principles while incorporating modern clinical practice standards.
Students gain a comprehensive understanding of acupuncture theory, point location, and clinical application through both didactic learning and supervised practical experience. The curriculum is designed to prepare graduates for successful performance on national certification examinations.
4. World Federation of Acupuncture-Moxibustion Societies – Online Introductory Courses – Best Non-Commercial, Expert-Led Global Education Resource
WFAS provides online training modules focused on acupuncture principles and traditional techniques, offering an international perspective on acupuncture education. These courses serve as excellent continuing education resources for current practitioners or foundational knowledge for those exploring the field.
The program emphasizes traditional methods and global best practices in acupuncture application, making it particularly valuable for practitioners seeking to deepen their understanding of classical techniques.
While NCCAOM doesn’t provide initial certification training, they offer comprehensive online continuing education courses that maintain professional certification and deepen clinical acupuncture knowledge.
These programs are essential for licensed practitioners seeking to fulfill recertification requirements and stay current with evolving clinical standards. The courses cover advanced techniques, research updates, and regulatory changes affecting the profession, ensuring practitioners maintain the highest professional standards.
6. Open-Source Option: Coursera – Foundations of Acupuncture – Best Open-Source Pathway for Foundational Learning
Coursera hosts introductory courses on Traditional Chinese Medicine and acupuncture fundamentals, providing free access to basic concepts ideal for newcomers to the field. These courses offer a foundational understanding of acupuncture principles, history, and basic techniques.
While not suitable for professional certification, they provide valuable preliminary education for those considering formal acupuncture training or seeking to understand the theoretical foundations before committing to comprehensive programs.
Preparing for Your Acupuncture Certification Journey
Success in acupuncture certification requires dedication to both theoretical study and practical skill development. Most programs require a minimum of 1,490 hours of education for acupuncture certification, with additional requirements for Chinese herbology specializations.
The journey typically involves three to four years of intensive study, combining online coursework with hands-on clinical experience.
Before beginning your certification program, ensure you meet the prerequisite requirements, which typically include a college degree in any subject and some background in medical sciences such as physiology and biology.
Just as students preparing for standardized tests benefit from comprehensive study guides and practice materials, acupuncture students should utilize all available learning resources and structured study approaches to master the extensive curriculum. Using an online testing platform can provide realistic practice exams, adaptive feedback, and progress tracking to better prepare for the NCCAOM certification process.
Just as students preparing for standardized tests benefit from comprehensive study guides and practice materials, acupuncture students should utilize all available learning resources and structured study approaches to master the extensive curriculum.
The NCCAOM examination process includes multiple components: Foundations of Oriental Medicine, Acupuncture with Point Locations, and Biomedicine examinations for basic certification.
Students pursuing Chinese herbology certification must also complete the Chinese Herbology examination. Effective preparation strategies mirror those used for other professional examinations, requiring consistent study schedulesand systematic review of complex material.
Launch Your Acupuncture Career with Confidence
The acupuncture profession offers rewarding opportunities for healthcare practitioners committed to holistic healing approaches.
With the World Health Organization citing acupuncture as an effective treatment for over 43 different disorders, including back pain, headaches, insomnia, and stress, qualified acupuncturists find diverse employment opportunities in integrative health centers, hospitals, private practice, and wellness facilities.
Whether you choose AIAM’s comprehensive master’s program, Pacific College’s established hybrid approach, or begin with foundational courses through open-source options, the key is selecting accredited training that prepares you for NCCAOM certification and state licensure requirements.
Research program requirements carefully, connect with admissions representatives, and ensure your chosen path aligns with your state’s specific licensing regulations.
Start your journey toward becoming a licensed acupuncturist by exploring these certification options and taking the first step toward a fulfilling career in holistic healthcare. With proper preparation and accredited training, you can join the growing community of professional acupuncturists making a positive impact on patients’ health and well-being.
The bar exam usually lasts two to three days, with testing hours that can total up to 12 hours or more. How long the bar exam is can depend on the state, the format, and the specific subjects tested.
Some states offer one-day exams, but most have a two-day test or longer, which can be exhausting and stressful. Knowing what to expect can help you plan and prepare for exam day.
The bar exam lasts for several hours each day, usually spanning two or three days in total. Your test experience will depend on your state’s format, the division of topics, and the way breaks are scheduled.
Total Test Length by State
Most states use the Uniform Bar Exam (UBE), which is taken over two full days. On Day 1, you have six Multistate Essay Examination (MEE) essays and two Multistate Performance Test (MPT) tasks. Day 2 is the Multistate Bar Examination (MBE) with 200 multiple-choice questions.
In states like California, the bar exam lasts for two days. Texas and Florida have similar two-day formats. Some states, such as Louisiana, may have a three-day exam. Timing by state is shown below:
State
Days
Typical Daily Hours
Format
New York bar exam
2
~6
UBE
California bar exam
2
~7
State-specific
Texas bar exam
2
~6
UBE
Louisiana bar exam
3
~5
State-specific
Exam Structure and Time Allocation
The bar exam is split into several parts. The MBE is a six-hour, 200-question test taken in two three-hour sessions. The MEE usually gives you three hours for six essays. The MPT portion gives you three hours for two performance tasks.
Each section has set time limits. For example, you have thirty minutes for each essay question on the MEE. On the MPT, you get ninety minutes per task. Time management is important because you cannot carry over time between sections.
Some states may have extra parts like state and constitutional law essays or practical tests, which add to the total test time. You should check your state’s rules for any unique sections or requirements.
Breaks and Scheduling
During testing days, you get scheduled breaks between sessions. A common break is a lunch break lasting about one hour. Short breaks of ten to fifteen minutes may be offered between morning and afternoon sessions.
You need to follow strict schedules. If you return late from breaks, you may not get extra time. Personal breaks (bathroom, stretch) can be taken, but the timer does not stop.
Each testing location may have slightly different rules for breaks, so review your test center’s instructions before exam day. Having a clear idea of when you can rest helps manage your energy during the long exam hours.
Factors Influencing Bar Exam Length
The total time you spend taking the bar exam depends on where you take it and the way it is given. Different states have different rules, and the structure of the test can also change how long you will be sitting for it.
Uniform Bar Exam vs. State Bar Exams
The Uniform Bar Exam (UBE) lasts two days. It is used in many states. On Day 1, you take the Multistate Performance Test (MPT) and the Multistate Essay Examination (MEE). Day 2 features the Multistate Bar Exam (MBE), which is a 200-question multiple-choice test.
State-specific exams may be shorter or longer. For example, California’s bar exam is two days but has a unique setup with five essays, a performance test, and the MBE. Florida’s exam takes two days and mixes state and MBE questions. Some states, like those in the jurisdiction of Louisiana, have three-day exams with both local law and general law sections. Because of these differences, it is important to check your jurisdiction’s exam schedule before planning how to study.
Testing Formats and Administration
Bar exams can be given in person or on a computer, and this choice can change the test experience. Most exams are still held at big testing centers. You will often have set times for each section, with short breaks between parts and a longer lunch break in the middle of each day.
Here’s an example of a typical bar exam day:
Time
Component
9:00-12:00
MBE or Essays (morning)
12:00-1:30
Lunch Break
1:30-4:30
Essays, MBE, or MPT (afternoon)
Remote exams, when available, sometimes require strict check-ins and live monitoring. The format and administration rules can also shape how much time you’ll spend testing and how tired you might feel by the end of the process.
Frequently Asked Questions
You may have questions about the Bar Exam’s timing, content, and requirements. Each answer is based on typical information from recent Bar Exams.
What is the duration of the Bar Exam over consecutive days?
Most Bar Exams take two days to finish. Some states require a third day for extra sections. Each day usually lasts six to seven hours. You get breaks for lunch and short rests.
How many questions does the Bar Exam typically comprise?
You will answer around 200 multiple-choice questions in the Multistate Bar Examination (MBE) section. There are also essays and performance tests, which add more questions. The number of essay questions and performance tasks can vary by state.
What is the difficulty level of the Bar Exam?
The Bar Exam is considered a very challenging test. It covers many legal topics and takes hours to complete. Most people study for months in advance to prepare.
What is the average pass rate for the Bar Exam?
Pass rates for the Bar Exam are usually between 60% and 80% for first-time test-takers. The rate can be lower for repeat test-takers. Each state has its statistics for pass rates every year.
When in one’s legal education timeline is it typical to take the Bar Exam?
You usually take the Bar Exam after finishing law school. Most people sit for the exam soon after they graduate. You may sign up in your final year, but you must graduate before your final scores are released.
What are the prerequisites for sitting for the Bar Exam?
To sit for the Bar Exam, you must have a law degree from an accredited school. Some states also require extra paperwork, such as a character and fitness review. A few states allow foreign-trained lawyers to take the exam if they meet certain rules.
A BA in International Hospitality Business Management provides future leaders with essential skills in service excellence, operations management, and global business strategies.
These six programs offer comprehensive training through mandatory internships, worldwide exposure, top-tier accreditation, and proven alumni success records.
Whether you’re seeking Swiss precision, global mobility, or specialized industry connections, these programs deliver the foundation you need to thrive in the dynamic hospitality sector.
What to Look for in the Best BA International Hospitality Business Management Programs
Before diving into specific programs, prospective students should evaluate several key factors when choosing their hospitality education path.
Look for schools with strong industry partnerships that guarantee internship placements, internationally recognized accreditation that opens global doors, and curricula that balance practical operational skills with strategic business acumen.
The best programs also offer multicultural learning environments and access to extensive alumni networks across major hospitality brands worldwide.
Top 6 Best Bachelor’s Programs in International Hospitality Business Management
1. SHMS – BA in International Hospitality Business Management
SHMS offers a three-year BA dual-accredited by the Swiss government and the University of Derby (UK), ranked 3rd in QS 2025 rankings and achieving 2nd place for employer reputation in the 2025 QS Rankings.
During the SHMS hospitality degree journey, students complete two mandatory industry internships alongside leadership modules and multilingual learning opportunities across stunning campuses in Caux and Leysin.
The program combines traditional Swiss hospitality excellence with modern business trends, preparing graduates with cross-cultural skills and real-world experience for international careers.
The dual accreditation ensures graduates receive recognition from both Swiss educational authorities and the UK higher education system, providing exceptional flexibility for career advancement.
Students also have the option to earn a Swiss Advanced Federal Diploma of Higher Education, adding another layer of professional qualification to their academic credentials.
Key Differentiator: Best Swiss dual accreditation with compulsory international internships and exceptional employer reputation rankings.
2. École hôtelière de Lausanne (EHL) – BSc International Hospitality Management
EHL has been ranked the world’s best hotel management school by QS World University Rankings for Hospitality and Leisure Management for seven consecutive years through 2025, achieving a perfect 100/100 score in employer reputation.
This four-year BSc program features two six-month internships and maintains Swiss federal educational standards while operating from campuses in Lausanne, Singapore, and Chur-Passugg.
The curriculum emphasizes both academic rigor and hands-on experience, with students managing their own Michelin-starred restaurant on campus. EHL welcomes over 3,400 students representing approximately 120 nationalities, creating an exceptionally diverse learning environment.
Key Differentiator: Trusted global leader with seven consecutive years as #1 worldwide and unmatched employer reputation.
3. Glion Institute of Higher Education – BBA International Hospitality Business
Glion ranks #6 globally in QS World University Rankings by Subject 2025 for Hospitality & Leisure Management, with a Top 3 ranking specifically for Employer Reputation.
This four-year program spans Switzerland and the UK, offering students exceptional global campus experiences with five academic semesters combined with two six-month professional internships.
Students engage in practical arts training, simulated hotel development projects, and applied business coursework, with 98% of job-seeking graduates receiving one or more employment offers on graduation day. The program includes three career-focused specializations in the final year, allowing students to tailor their education to specific industry interests.
Key Differentiator: Top-rated for applied global campus experiences with exceptional graduate employability rates.
4. Les Roches – BA in Global Hospitality Management
Les Roches ranks #2 in QS World University Rankings for Hospitality & Leisure Management 2025, with 94% of career-seeking students receiving one or more job offers on graduation day.
This comprehensive program includes two professional internships, English instruction across multiple campus locations, and strong employer engagement initiatives. Students can study in Switzerland, Spain, or the UAE with international campus transfer opportunities.
The curriculum covers core operational areas including Guest Relations, Food & Beverage, and Hotel Operations, with students creating and operating real restaurant concepts during their studies.
Key Differentiator: Best for immediate industry readiness with exceptional employer connections and multi-campus flexibility.
5. César Ritz Colleges – BSc Hospitality Business Management
César Ritz Colleges ranks 5th in the 2025 QS rankings and holds federal accreditation from the Swiss Accreditation Council (SAC) as a University of Applied Science Institute. This four-year Swiss BSc features two global internships, comprehensive Swiss accreditation, and leadership training with extensive alumni network support.
The school maintains small class sizes with 90% of faculty holding PhD degrees, and 92% of alumni hold management positions or start their own businesses within five years of graduation. Students benefit from partnerships with prestigious organizations, including Ritz Paris, Evian Resort, and Switzerland Tourism.
Key Differentiator: Trusted Swiss BA with robust global internship placements and exceptional alumni career advancement rates.
Cornell University’s eCommons platform provides free access to extensive hospitality management resources, including case studies, operational guides, and industry research papers.
While not a degree program, these materials serve as valuable supplementary resources for bachelor’s-level coursework across all hospitality disciplines. The collection includes peer-reviewed research, industry best practices, and theoretical frameworks that complement formal education programs.
Students pursuing formal degrees can leverage these resources to deepen their understanding of hospitality management principles and stay current with industry developments.
Key Differentiator: Best open-source supplement for foundational hospitality business knowledge and ongoing professional development.
Making Your Choice: Next Steps for Hospitality Education Success
Selecting the right BA in International Hospitality Business Management program requires careful consideration of your career goals, financial resources, and preferred learning environment.
Each of these programs offers unique advantages, from SHMS’s dual accreditation and EHL’s global reputation to Glion’s employability focus and Les Roches’ industry connections.
Start by researching application deadlines for September 2025 intake periods, as many top programs have limited enrollment capacity. Consider visiting campus open days to experience the learning environment firsthand and connect with current students and faculty.
For students focused on academic preparation and test-taking strategies, developing strong study habits early will serve you well throughout these intensive programs. Additionally, exploring effective study techniques can help you excel in the demanding academic and practical components of hospitality education.
The global hospitality industry offers tremendous opportunities for passionate, well-trained professionals. Whether you choose Swiss excellence, international mobility, or specialized focus areas, these bachelor’s programs provide the foundation for a rewarding career in one of the world’s most dynamic industries.
Take the first step toward your hospitality leadership journey by researching these programs in detail and connecting with their admissions teams today.
A Bachelor’s in Hospitality Business Management combines service quality with leadership and operational expertise—ideal for aspiring hospitality professionals.
This list introduces six leading programs—including César Ritz’s Swiss-based BA—comparing internships, accreditation, career outcomes, and global exposure to empower students in choosing their ideal path.
The hospitality industry demands professionals who understand both business fundamentals and exceptional service delivery. Modern hospitality careers span luxury hotels, international resorts, event management, cruise operations, and hospitality technology.
Understanding college and career planning strategies becomes crucial when preparing for higher education programs that open doors to global opportunities.
What Distinguishes Premier Hospitality Business Programs
Leading hospitality business management programs combine rigorous academic training with extensive practical experience. These programs feature mandatory industry internships, multicultural learning environments, global campus options, and strong alumni networks within international hospitality companies.
The best programs offer comprehensive business education while maintaining strong connections to industry leaders and luxury hospitality operations.
Students should prioritize programs with international accreditation, hands-on operational training, and comprehensive educational preparation that builds both analytical and interpersonal skills essential for hospitality leadership roles.
Top 6 Bachelor’s Programs in Hospitality Business Management
1. César Ritz Colleges – BSc in Hospitality Business Management
César Ritz Colleges delivers a comprehensive four-year hotel business management Swiss program ranked 5th globally in the 2025 QS World University Rankings for Hospitality and Leisure Management, featuring two mandatory international internships, Swiss federal accreditation as a University of Applied Sciences, and robust alumni support with 92% of graduates holding management positions within five years.
The program combines the pioneering legacy of César Ritz with innovative educational methodology that emphasizes experiential learning, entrepreneurship, and leadership development in global settings.
Students receive dual qualifications through partnerships with Washington State University, offering both a Bachelor of International Business in Hotel and Tourism Management and a Bachelor of Arts in Hospitality Business Management.
The curriculum includes business plan competitions, innovation weeks, and Management-in-Training placements that prepare graduates for executive leadership careers across diverse industries while maintaining strong industry partnerships with organizations like Ritz Paris, Evian Resort, and Switzerland Tourism.
2. École hôtelière de Lausanne (EHL) – BSc International Hospitality Management
EHL maintains its position as the world’s #1 hospitality management school according to QS World University Rankings for the seventh consecutive year through 2025, offering a four-year BSc program that combines theoretical excellence with practical internships under rigorous Swiss educational standards.
Founded in 1893 as the world’s first hotel school, EHL provides unparalleled industry heritage with cutting-edge business education across campuses in Switzerland and Singapore.
Students benefit from world-class facilities including a Michelin-starred student-operated restaurant, extensive industry partnerships, and a global alumni network of over 25,000 hospitality executives.
The program emphasizes people-first thinking while providing a deep understanding of core business concepts applicable across industries, preparing graduates for leadership roles in hospitality and beyond.
3. Glion Institute of Higher Education – BBA International Hospitality Business
Glion offers a four-year BBA program delivered across Swiss and UK campuses with dual degree options, comprehensive internships, and applied learning experiences that emphasize real-world business applications.
The program provides exceptional global exposure through multi-campus immersive training and strong industry partnerships with leading hospitality brands. Students gain diverse cultural perspectives and operational experience essential for international hospitality careers while maintaining NECHE accreditation for academic credibility and global recognition.
4. SHMS – BSc in Hospitality Management
SHMS provides a Swiss-accredited bachelor’s program featuring two comprehensive work-term internships, specialized tracks in areas like event management and design, and renowned industry partnerships that facilitate career placement.
The program ranks highly for employer reputation and offers students hands-on training in campus facilities that operate like actual luxury hotels and restaurants.
Students benefit from Switzerland’s hospitality education tradition while gaining practical skills through operational management of campus dining establishments, event planning, and guest services.
5. Les Roches – BA in Global Hospitality Management
Les Roches’ bachelor’s program distinguishes itself through two professional internships, English-language instruction, strong employer placement rates, and consistent QS rankings for graduate employment outcomes.
The curriculum balances theoretical knowledge with practical application, ensuring graduates possess immediately applicable skills valued by international hospitality employers.
Strong industry partnerships provide access to prestigious internships and career opportunities at leading global hospitality brands, while the program’s international focus prepares graduates for leadership roles in an interconnected industry.
6. Cornell School of Hotel Administration – Online Resources (Alternative Learning Support)
Cornell’s eCommons digital library provides free access to extensive hospitality management resources, including lectures and case studies covering revenue management, service excellence, and leadership fundamentals essential for bachelor’s-level foundation building.
While not a formal degree program, these materials offer valuable supplementary education for students in other programs or as preparation for formal hospitality degrees. Cornell’s content covers foundational concepts in financial management, operations, and strategic planning that complement hands-on training received in international programs.
Strategic Program Selection: Key Considerations
When evaluating hospitality business management programs, prioritize those offering mandatory internships, as practical experience remains the most valued credential in hospitality recruitment.
Consider program duration, location, and industry partnerships, as these factors significantly impact career opportunities and professional network development.
Swiss programs benefit from Switzerland’s unparalleled reputation for hospitality excellence and provide access to luxury operations and international business environments. Programs with multiple campus options offer broader cultural exposure and diverse market understanding essential for global hospitality careers.
The hospitality industry continues evolving toward personalized experiences, sustainable operations, and technology integration, making programs that emphasize innovation, cultural awareness, and adaptability particularly valuable for long-term career success.
Launching Your Global Hospitality Career
With fall 2025 enrollment deadlines approaching for Swiss programs, prospective students should begin the application process immediately.
The combination of business acumen, cultural awareness, and service excellence provided by these programs creates strong foundations for diverse career paths, including luxury hotel management, resort operations, event planning, cruise management, and hospitality consulting.
Success in hospitality business management, as well as finding a high-paying job, requires both analytical skills and emotional intelligence, making these specialized programs essential preparation for leadership roles in one of the world’s most dynamic and culturally significant industries.
An MA in Culinary Business Management equips chefs and food innovators with the strategic and financial skills needed to launch or scale a culinary venture. From Swiss craftsmanship to global leadership, here are six standout programs offering real-world business training, innovative concepts, and regional expertise.
The culinary industry has evolved into a sophisticated business landscape requiring professionals who understand both culinary excellence and strategic management.
Modern food entrepreneurs need comprehensive training that bridges the gap between kitchen expertise and business acumen. Understanding career preparation and standardized testing becomes crucial when pursuing advanced degrees that often require entrance examinations for international programs.
What Sets Elite Culinary Business Programs Apart
Leading culinary business management master’s programs combine hands-on culinary training with comprehensive business education. These programs feature industry partnerships, real-world project work, and mentorship from successful food entrepreneurs.
The best programs offer practical experience through internships, business plan development, and direct access to industry networks that facilitate career advancement.
Students should prioritize programs that emphasize innovation, sustainability, and global market understanding, as these factors increasingly drive success in the modern food industry. Educational preparation and career planning strategies become essential when transitioning from culinary arts to business management roles.
Top 6 Master’s Programs in Culinary Business Management
1. Culinary Arts Academy Switzerland – MA in Culinary Business Management
Culinary Arts Academy Switzerland offers a comprehensive one-year culinary MA program designed specifically for career changers, food and beverage entrepreneurs, and culinary enthusiasts seeking to transition into business management roles.
The program combines over 250 hours of hands-on kitchen experience with strategic business training, allowing students to develop food concepts, create recipe books, and formulate viable business plans.
Students receive dual qualifications: a Master of International Business in Culinary Business Management from Culinary Arts Academy Switzerland and a Master of Arts in Culinary Business Management from the University of Derby, UK. The curriculum includes worldwide internship opportunities, consultancy projects, and direct mentorship from industry professionals, preparing graduates for leadership roles in global food service operations.
Located in Switzerland’s renowned hospitality education hub, students benefit from the country’s reputation for culinary excellence while gaining practical entrepreneurial skills.
2. Le Cordon Bleu (London/Birkbeck) – MSc Culinary Innovation Management
This unique master’s degree, jointly delivered by Birkbeck University of London and Le Cordon Bleu London, combines business and management content with specialized modules in culinary arts and hospitality.
The program emphasizes innovation, sustainability, customer experience, and entrepreneurship as key success factors in the global culinary industry. Students complete eight modules of 15 credits each, combining compulsory modules from both institutions, plus a 60-credit research project jointly supervised by academic and culinary professionals.
The curriculum includes restaurant simulation software training, allowing students to apply analytical skills and strategic decision-making in real food business scenarios. This program attracts both experienced professionals and recent graduates, providing comprehensive preparation for leadership roles in the evolving culinary landscape.
3. Le Cordon Bleu (Adelaide) – Master of International Hospitality and Culinary Management
Le Cordon Bleu Adelaide’s master’s program cultivates senior leadership skills in hospitality and culinary management with global foodservice strategy at its core.
The program combines Le Cordon Bleu’s world-renowned culinary heritage with comprehensive business management training suitable for experienced professionals seeking executive-level advancement.
Students develop expertise in international hospitality operations, strategic planning, and cross-cultural management essential for global food service leadership.
The program emphasizes practical application through industry partnerships and real-world case studies that prepare graduates for senior management positions in international hospitality and culinary enterprises.
4. Culinary Institute of America (CIA) – Online Culinary Business Strategy Certificate
CIA’s flexible, executive-level certificate program offers specialized modules in financial planning, menu development, sustainability practices, and strategic business operations.
Designed for experienced chefs and culinary professionals seeking management credentials, this program provides practical tools for career advancement without requiring full-time study commitments. The curriculum covers essential business fundamentals, including cost control, revenue optimization, brand development, and operational efficiency.
While shorter than traditional master’s programs, this certificate provides immediate applicability for professionals ready to transition into management roles or enhance their existing business skills.
5. EHL Hospitality Business School – MSc in Global Hospitality Leadership
EHL’s master’s program integrates hospitality management with specialized food and beverage leadership training, including dedicated culinary business modules and real-world assignments.
Students benefit from EHL’s #1 global ranking in hospitality education and extensive industry connections throughout the international hospitality sector. The program emphasizes strategic leadership, sustainable operations, and innovation management within hospitality contexts.
Graduates develop a comprehensive understanding of global hospitality markets while gaining specialized expertise in culinary operations management, making them valuable candidates for senior positions in luxury hospitality, resort operations, and international food service companies.
6. Cornell School of Hotel Administration – Online Resources (Alternative Learning Support)
Cornell’s eCommons digital library provides free access to extensive hospitality management resources, including case studies, lectures, and analytical tools covering revenue management, operations optimization, and culinary business fundamentals.
While not a formal degree program, these materials offer valuable supplementary education for students in other programs or professionals seeking to expand their knowledge base.
Cornell’s content covers foundational concepts in financial management, marketing strategy, and operational excellence that complement formal culinary business education. These resources serve as excellent preparation for admission to formal programs or as continuing education for working professionals.
Strategic Program Selection: Key Considerations
When evaluating culinary business management programs, prioritize those offering hands-on business experience through internships, consultancy projects, or business plan development.
Consider program duration, location, and industry partnerships, as these factors significantly impact career opportunities and network development.
International programs like those in Switzerland offer exposure to global hospitality standards and diverse cultural perspectives valuable in international food service careers. However, programs in major culinary centers like London provide access to vibrant food scenes and extensive industry networks.
The culinary business landscape continues evolving toward sustainability, technology integration, and personalized customer experiences, making programs that emphasize innovation and adaptability particularly valuable for long-term career success.
The combination of culinary expertise and business acumen provided by these programs creates strong foundations for diverse career paths, including restaurant ownership, food product development, culinary consulting, and executive positions in hospitality companies.
Success in culinary business management requires both creative vision and analytical skills, making these specialized programs essential preparation for leadership roles in one of the world’s most dynamic and culturally significant industries.
Preparing for the SAT can feel overwhelming, but one-on-one SAT tutoring gives you personalized support and guidance for your test prep. With focused attention from a knowledgeable tutor, you can work through your strengths and weaknesses at your own pace.
Whether you need help with tricky math problems or want to improve your reading skills, you’ll get targeted practice that matches your needs. One-on-one SAT tutoring can help you build confidence and boost your scores.
Key Takeaways
One-on-one tutoring offers a personalized SAT prep experience.
Choosing the right tutor can make a big difference in your learning.
You can improve results by following a plan tailored to your needs.
Benefits of One-on-One SAT Tutoring
One-on-one SAT tutoring can help you focus on your unique strengths and areas that need improvement. You gain a personalized learning experience, more confidence, and a learning pace tailored to your needs.
Personalized Learning Strategies
When you work with a private SAT tutor, lessons are designed just for you. Your tutor can see where you make mistakes and help you understand why. This means you spend more time on the topics that challenge you and less time on what you already know.
You get a plan that fits your learning style. For example:
Learning Style
Strategy Used
Visual Learner
Diagrams, charts, maps
Auditory Learner
Talking through problems
Kinesthetic
Interactive activities
If you do well with practice tests, your tutor may give you extra practice. If you learn by explanation, your tutor will go over step-by-step solutions until you feel comfortable.
Increased Confidence and Motivation
Working one-on-one means you can ask questions without feeling nervous. Tutors often explain things in ways that make them easier to understand. This helps you feel more confident about the material and your test-taking abilities.
Seeing your improvement over time can boost your motivation. As you start getting better scores on practice tests, you may notice you’re less anxious about the real SAT. Your tutor also helps set small, clear goals so you can stay on track and feel a sense of achievement.
A tutor supports your progress and encourages you when you face challenges. This support helps keep your spirits up, even if studying gets tough.
Faster Academic Progress
With focused attention from your tutor, it’s easier to see results in a shorter time. You don’t have to wait for others to catch up or slow down for group lessons. Your questions are answered right away.
Tutors can spot your mistakes quickly and show you how to fix them. You get feedback after each practice problem. This helps you learn from errors and avoid repeating them.
Progress often feels faster because you can skip past topics you already know. More time is spent on areas that really need work. This makes your study sessions more efficient and productive.
How One-on-One SAT Tutoring Works
One on one SAT tutoring gives you personalized guidance before your test. The main steps include checking your skill level, creating a study plan just for you, and giving you regular, focused feedback.
Assessment and Goal Setting
You start by taking a practice SAT so the tutor can see which areas you know well and which ones need more work. This first assessment usually includes official SAT sample questions that cover reading, math, and writing.
Next, you and your tutor talk about your target SAT score and what colleges you want to apply to. You set clear goals for each section of the test. The tutor explains which skills you need to improve most and helps you see a clear path forward.
Some tutors use charts to track your progress during each session. They may ask for your past scores if you’ve taken the PSAT or SAT before. The key steps are:
Review your past test results
Set a target score for each section
List personal strengths and weaknesses
Customized Study Plans
Your tutor creates a study plan just for you. This plan is based on your assessment results and your goals. It breaks down what you will study each week, including practice problems, review topics, and timed quizzes.
Most tutors focus on your weak areas first, but they also help you keep up with your strengths. Some study plans include worksheets, flashcards, or practice SATs. Your plan may use tools like calendars or checklists to show what you need to study each day.
A customized study plan often includes:
Week
Main Focus
Tasks
1
Math basics
Practice algebra, quizzes
2
Reading passages
Timed reading
3
Writing and grammar
Fix common errors
Your tutor adjusts the plan as you improve. Each plan is built around your schedule and learning style.
Individualized Feedback
After each session, your tutor gives direct feedback on your progress. They point out both your improvements and your mistakes. You see where you lost points and how you can fix your errors next time.
Tutors write notes on your completed practice tests and explain answers in a way that makes sense. They offer test-taking tips, such as how to manage your time or avoid common traps. If you struggle with a topic, your tutor spends more time explaining it or gives extra exercises for you to try.
You can ask questions and get honest answers about what you need to focus on. Detailed, personal feedback guides your improvement each week and helps you feel more prepared for test day.
Selecting the Right SAT Tutor
Finding the right SAT prep tutor means looking at their credentials, teaching approach, and track record. Each of these factors can affect your SAT test prep and results.
Qualifications and Experience
You should check your tutor’s education and training first. Many strong SAT tutors have degrees in subjects like English or Math and have scored well on the SAT themselves. Some may also have teaching certificates or special test-prep training.
Look for tutors who have been working with high school students for at least a year or two. The more experience a tutor has with the SAT, the more likely they are to know the test inside and out. It helps if they understand the current SAT format and common mistakes that students make.
Make sure your tutor is reliable and keeps up with any changes in the SAT. These details show that the tutor is both skilled and up to date.
Teaching Style and Communication
The way a tutor teaches should match how you learn best. Some tutors focus on practice problems, while others might spend more time on strategies or building confidence.
Good tutors thoroughly explain ideas and are patient when you need extra help. It helps if you feel comfortable asking questions and getting feedback right away.
A tutor who listens to your needs and adjusts their lessons can make studying less stressful. Try to find a tutor willing to set clear goals with you and give honest tips on how to improve.
Success Rates and Student Results
One way to judge a tutor is by looking at their past results. Experienced tutors often keep track of students score improvements and college admissions.
Ask for real examples, such as:
Student
Starting Score
Final Score
Time Spent
Anna K.
1150
1340
10 weeks
James T.
1230
1430
8 weeks
Mia L.
1020
1290
12 weeks
You can also read student reviews or talk to former students to get honest feedback. Strong tutors will be happy to share this information. Their results should show steady and realistic improvements, not promises of perfect scores.
Maximizing Results with One-on-One SAT Tutoring
Working with a tutor can help you focus on your specific needs and track your progress closely. Success depends on setting clear goals and having support at home.
Setting Realistic Targets
Setting goals for the SAT is important for staying motivated and seeing progress. Your tutor should help you measure your starting score with a full-length practice test. Look at college score requirements and your current abilities to pick a target score that makes sense.
It helps to split your main goal into smaller steps, like improving your math score by 50 points or mastering certain grammar rules. Your tutor can create a lesson plan to hit each of these small goals. Tracking every practice test and homework result also shows where you are improving and where more focus is needed.
Features of Effective Goal Setting:
Uses actual data, like practice test scores
Matches your long-term college plans
Breaks up the process into weekly tasks
Goals should be challenging but also possible. This helps keep you motivated without feeling too much pressure. Regularly talking about your goals with your tutor helps keep you on track.
Parental Involvement
Parents have a strong role in your SAT journey. They can help by making sure you have a quiet study space and a regular schedule. Parents should ask about your progress and talk to your tutor to understand where you are doing well and where you need more help.
A weekly check-in with your parents can keep you accountable. It’s important for your parents to encourage you, but also let you own your learning. They should support your mental health by making sure you get enough sleep and take breaks when you need them.
Ways parents can help:
Keep communication open with your tutor
Help you make and stick to a study plan
Celebrate your progress, not just the final score
When your parents, tutor, and you all work together, you are more likely to stay on track and do your best on the SAT.
Frequently Asked Questions
One-on-one SAT tutoring can offer tailored instruction and focused feedback. Many students and parents have questions about how tutoring works, costs, and choosing the right tutor.
What are the benefits of personalized SAT tutoring compared to group classes?
Personalized SAT tutoring gives you individual attention. Your tutor can focus on the topics you find most challenging. Lessons move at your pace, so you spend more time where it helps most. Group classes have a fixed schedule and cover the same material for everyone. One-on-one tutoring adjusts lessons to your learning style and goals.
How can I find a reputable SAT tutor in my area?
Ask your school counselor or teachers for recommendations. You can also search online for tutors with strong reviews or check local learning centers. Always look for tutors who have experience, strong references, and a track record of improving student scores.
What is the average cost of one-on-one SAT tutoring services?
The cost of SAT tutoring depends on where you live and the tutor’s qualifications. On average, you can expect to pay between $50 and $150 per hour. Some tutors may charge more if they have special credentials or proven results.
Are there effective free online resources for SAT preparation?
Yes, several free resources are available. Khan Academy offers official SAT practice in partnership with the College Board. You can also find free practice questions and tests on the College Board website.
What qualifications should I look for in a potential SAT tutor?
Look for tutors with high SAT scores, teaching experience, and positive reviews. Some tutors have college degrees or additional certifications in education. Clear communication and a patient teaching style are important, too.
How do I evaluate the effectiveness of my current SAT tutoring sessions?
Check if your practice scores are improving over time. Think about whether you understand difficult topics better after your sessions. You should also feel comfortable asking questions and getting clear answers from your tutor. If you do not see progress or feel supported, you might need to try a different tutor.
The transition from physician assistant to medical doctor represents one of the most significant career pivots in healthcare.
MD programs for PAs offer a direct pathway to evolve from clinical practice into full physician roles, complete with diagnostic authority, independent practice rights, and expanded career opportunities.
This comprehensive guide examines six top-rated international medical programs that understand the unique background PAs bring to medical education and have streamlined their admissions processes accordingly.
The Financial Reality Check
Before diving into specific programs, it’s worth noting the substantial financial implications of this career transition. PAs currently earn a median salary of $134,000 annually, while physicians average $376,000 across all specialties.
This significant income differential—nearly $240,000 per year—helps justify the investment in medical education, though the path requires considerable financial commitment and years of additional training.
What to Look for in the Best MD Programs for PAs
When evaluating MD programs for physician assistants, several key factors distinguish PA-friendly institutions from traditional medical schools.
The most important considerations include holistic admissions processes that value clinical experience over strict MCAT cutoffs, flexible prerequisite requirements that recognize prior healthcare education, and robust clinical rotation networks that facilitate smooth transitions into residency programs.
International medical schools, particularly those in the Caribbean, have emerged as practical options for PAs seeking career advancement. These institutions typically offer multiple start dates throughout the year, accept students with diverse educational backgrounds, and maintain strong relationships with US hospitals for clinical training.
Top 6 Best MD Programs for Physician Assistants
1. AUA (American University of Antigua) – Holistic Admissions & MCAT Flexibility
AUA employs a holistic approach to student selection, believing that hard work, deep interest in science and medicine, and demonstrated compassion deserve opportunities even when standardized test scores aren’t exceptional. This philosophy makes AUA particularly appealing to PAs transitioning into medicine.
The school’s admission requirements are notably PA-friendly. While MCAT scores are required from US applicants, AUA processes applications before scores are submitted and doesn’t weigh MCAT performance as heavily as traditional medical schools.
The program requires 90+ undergraduate credits and values healthcare experience extensively during the selection process.
AUA’s curriculum follows the proven US medical education model, with preclinical sciences completed on its Antigua campus, followed by clinical rotations at affiliated US hospitals.
The school maintains strong clinical partnerships, including arrangements with Florida International University Herbert Wertheim College of Medicine for core clinical rotations in the Greater Miami Area.
Key Differentiator: PA-friendly holistic admissions combined with extensive US clinical placement networks and flexible MCAT policies.
2. St. George’s University (SGU) – Trusted MD Pipeline for Experienced Clinicians
SGU stands as the largest provider of doctors to US residencies, with over 45 years of experience training physicians. The school’s admissions process specifically welcomes healthcare professionals with diverse backgrounds, including PAs seeking career advancement.
SGU’s Faculty Student Selection Committee considers each applicant’s academic strengths alongside their experiences and attributes, evaluating how individuals might contribute value as both medical students and future physicians.
This comprehensive approach recognizes the substantial clinical experience PAs bring to medical education.
The program offers exceptional flexibility with three start dates annually (January, April, and August), allowing PAs to begin their medical education when timing aligns with their career transition plans. SGU’s clinical training spans over 75 hospitals and health systems in the US and UK, providing extensive opportunities for hands-on experience.
Key Differentiator: Proven track record as the largest provider of doctors into US residencies, with experience-focused admissions and flexible start dates.
3. Aureus University (Aruba) – Accelerated Entry for Allied Health Professionals
Aureus University offers both 4-year and 5-year MD programs, with the 4-year program designed for students with pre-medical qualifications. This structure particularly benefits PAs who already possess substantial medical knowledge and clinical experience.
The school’s mission focuses on providing students with solid medical foundations necessary to overcome challenges during their medical careers. Notably, MCAT scores are recommended but not required, though they may impact admission decisions—a policy that removes barriers for PAs transitioning into medicine.
Aureus’s clinical training consists of 72-80 weeks of clinical study, including 48 weeks of core rotations and 24 weeks of electives, completed at affiliated hospitals in the United States and Canada. The program includes integrated USMLE preparation, helping students transition smoothly into residency matching.
Key Differentiator: Accelerated entry options for healthcare professionals with integrated USMLE preparation and optional MCAT requirements.
4. American University of the Caribbean (AUC) – Flexible Admission for PAs
AUC operates under a rolling admissions policy with three start dates—January, May, and September—providing flexibility for career changers. The school’s mission emphasizes training physicians whose service is enhanced by diverse learning experiences and international perspectives.
AUC takes a holistic approach to admissions, considering academics, drive, and potential to succeed as a physician. All US and Canadian applicants must submit MCAT scores, though the school encourages applicants to discuss their competitiveness with admissions counselors.
AUC is approved by the New York State Education Department to allow students to complete more than 12 weeks of clinical clerkships in New York State, making it one of only eight Caribbean medical schools with this approval.
This access to New York clinical sites provides valuable training opportunities for students planning to practice in the Northeast.
Key Differentiator: New York State approval for clinical rotations with rolling admissions and holistic evaluation processes.
5. Saba University School of Medicine – High USMLE Pass Rates & PA Advantage
Saba University boasts impressive USMLE performance, with students averaging 99% Step 1 and 99% Step 2 CK first-time pass rates from 2021-2023. This exceptional performance demonstrates the school’s commitment to preparing students for successful medical careers.
The school’s admissions committee takes a holistic view of each candidate, considering life experience, MCAT scores, and direct medical volunteer experience alongside GPA. Applicants are encouraged to have 50 hours or more of direct patient care experience—a requirement PAs easily exceed.
Saba maintains a 97% residency placement rate over four consecutive years, clearly demonstrating shared commitment to helping MD program students achieve their goals. The school’s intentionally small class sizes (40-60 students) allow for personalized attention and individualized support.
Key Differentiator: Industry-leading USMLE pass rates (99%) with exceptional residency placement success and personalized attention.
6. SGU’s PA-to-MD Guidance Resources – Career-Alignment Support
While not a formal program, SGU provides extensive resources comparing PA versus MD career paths, including insights from professionals who have made the transition. This guidance helps PAs understand the practical implications of pursuing medical school.
SGU’s materials emphasize that both PAs and MDs collaborate closely in patient care, with considerable overlap in duties, particularly in primary care settings. The school’s blog and educational resources provide valuable insights into the transition process, including MCAT preparation strategies and residency planning.
The institution’s commitment to supporting career changers extends beyond admissions through their Office of Career Guidance, which provides expert guidance and resources from basic science years through residency and postgraduate opportunities.
Key Differentiator: Comprehensive career transition guidance and resources specifically designed for healthcare professionals considering the PA-to-MD pathway.
Making the Financial Investment Work
The career transition from PA to MD requires significant financial planning. The US Department of Education reported median student loan debt of $331,634 for AUC graduates as of 2019, representing a substantial investment. However, the long-term earning potential justifies this expense for many healthcare professionals.
Consider that PAs earn a median of $134,000 annually, while physicians average $376,000 across all specialties. Even accounting for the additional years of training and increased debt load, the lifetime earning differential typically exceeds $2 million over a career.
Your Path Forward: Next Steps for PAs Considering Medical School
The transition from physician assistant to medical doctor represents a significant professional evolution with substantial rewards, one of them being the fact that it is one of the highest paying jobs. Each of the programs outlined above offers unique advantages for PAs seeking to advance their careers, from AUA’s holistic admissions approach to Saba’s exceptional USMLE performance.
Take Action Today:
Research each program’s specific admission requirements and prerequisites
Connect with admissions counselors to discuss your PA background and career goals
Consider taking the MCAT or exploring programs with flexible testing requirements
Plan your financial strategy, including federal loan options and scholarship opportunities
The healthcare system needs more physicians, and your existing clinical experience as a PA provides an exceptional foundation for medical school success. Start your application process today and take the next step toward independent practice and expanded career opportunities.
Ready to Begin? Contact the admissions offices of these programs to schedule interviews and learn more about their specific offerings for healthcare professionals. Your experience as a PA isn’t just valuable—it’s exactly what these programs are looking for in their next class of future physicians.
There is a famous quote by George Evans that says, “Every student can learn, just not on the same day or in the same way.” This quote effectively summarizes all that special education entails: helping a child adapt to the education system based on their unique needs.
It’s not easy to get this right. That’s why teachers have to prove that they are capable by acing the Praxis Special Education test. Here’s everything you need to know about this assessment and how to prepare for it.
What is the Praxis Special Education Test?
The Praxis Special Education test is proof on paper that you’ve got what it takes to teach students with special needs. There are several versions of the Praxis, but the most common one most people take is Praxis 5354. You’ll often find it titled: Special Education: Core Knowledge and Applications.
There are about 120 questions in this multiple-choice exam, and you have 2 hours to get it done. The set questions spans the following areas:
Development and Characteristics of Learners
This section will focus on how kids grow, learn, and behave, especially in the context of disability. You’ll need to know things like the difference between a cognitive delay and a learning disability, how autism may affect communication and behavior, what “atypical development” looks like at different ages, etc.
Planning and the Learning Environment
You’ll see questions about writing and interpreting IEPs (Individualized Education Programs), creating a safe learning environment that’s full of positivity, and using visuals, schedules, and routines to support your students.
Instruction
The questions coming from this point in the test will be around differentiated instruction, co-teaching strategies, and using assistive tech like text-to-speech tools or math manipulatives.
Assessment
Here, you’ll need to prove to the examiners that you know the difference between formal and informal assessments, how to interpret assessment data, and when and how to modify tests.
Foundations and Professional Responsibilities
How familiar are you with special education laws? How about your ethical responsibilities, and how to collaborate with families and gen-ed teachers? That’s something you’ll encounter in the test.
Your success in this career path rests on how well you do in the Praxis Special Education Test. Resources like the Praxis 5354 digital guide or others you know can help you get there.
The experts behind these guides have packaged their years of experience into resources that are not only helpful in preparing you but also come in convenient formats. Do your research and settle for the best tools that can suit your needs.
How to Prepare for the Praxis Special Education Test
The right way to kick off your preparation is by creating a study plan. Here’s how one could look:
Week 1: Get Familiar
You can download the free ETS Study Companion to set the stage for you. This official study guide walks you step-by-step through everything you need to set you up. It includes sample test questions and problems with detailed explanations.
You can then take a diagnostic test to establish where you stand. The results of this assessment will show you the topics you’re shaky on.
Week 2–3: Focus on the Shaky Topics
Say, you found out that content categories like laws and definitions give you trouble. Create flashcards for the full definitions of IDEA, FAPE, and so on. You can also check out YouTube explainer videos on IEP writing and disability types.
Week 4: Apply What You’ve Learned
Once you’ve gone through the resources, feel free to mimic real classroom situations you’ll face as a teacher. They help you apply what you’ve studied in a more practical, hands-on way.
Also, go through full-length Praxis test prep exams. They can help you simulate the real experience. If you’ve ever worked with students before, draw from that experience. Use it to answer the scenario questions.
What Score Do You Need to Pass?
It depends on your state. Most states require test scores between 145 and 160. You’ll get an unofficial score immediately after the test. The official score report will land a few days later via your ETS account.
If you pass, your results will be automatically sent to the state licensing agency you selected when registering. That’s a step closer to becoming a certified special education teacher.
If, unfortunately, you didn’t make it this time, you can retake the test after 28 days. There’s no limit on how many times, but you’ll have to pay for each repeated attempt.
Closing Thoughts
The Praxis Special Education Test can open the door to a successful career as a tutor for students with special educational needs. This blog has given you a few tips you can use to get ready. Combine these tips with resources geared towards helping you get the process right, and you may just set yourself up for success in this endeavor.
Graduating from high school through an online school is not only possible, but it’s becoming an increasingly popular choice. Virtual education offers a flexible and personalized way for students to meet academic requirements, earn a diploma, and prepare for life beyond high school.
Whether a student is transitioning from a traditional classroom, completing their education remotely due to personal needs, or simply looking for a different learning experience, the process of graduating through an online high school is structured and achievable with the right plan.
Meeting State Graduation Requirements
Just like brick-and-mortar schools, online high school courses are required to follow state graduation guidelines. This typically includes earning a specific number of credits in core subjects such as English, math, science, and social studies, along with elective courses, physical education, and sometimes a senior project or community service hours.
Each state has its own set of rules, so students must ensure their online program is accredited and aligned with their state’s education standards. Accredited programs provide transcripts that colleges and employers recognize and ensure that students are on track for a legitimate high school diploma, not just a certificate of completion.
Setting a Clear Academic Plan
To stay on course for graduation, students in online high school programs should begin with a clearly defined academic plan. This usually happens in partnership with a guidance counselor or academic advisor, who helps map out the required courses over the next few years.
This roadmap outlines which classes need to be completed each semester, when to take standardized tests (if applicable), and what options are available for electives or advanced coursework. Students who stay in close communication with their advisors are more likely to stay on track and graduate on time.
Maintaining Motivation and Self-Discipline
One of the biggest differences between online and traditional high school is the level of independence required. Without in-person teacher reminders, students need to manage their time, stick to a routine, and stay accountable.
That doesn’t mean they’re completely on their own. Quality online programs offer plenty of support, including live classes, tutoring, regular check-ins, and email communication with instructors. Still, students who are proactive and self-motivated tend to thrive in a virtual environment.
Creating a dedicated workspace at home, setting daily or weekly goals, and using digital tools like calendars or task lists can help keep students focused and organized.
Staying Connected with Teachers and Peers
Even though the learning environment is virtual, staying engaged with teachers and classmates is key. Most online programs offer live sessions, discussion boards, and group projects that encourage interaction and collaboration. Students should take advantage of these opportunities to ask questions, get feedback, and build relationships.
These interactions not only support academic success but also help students develop communication skills they’ll need in college or the workforce.
Transferring Credits and Previous School Records
For students who are entering an online high school from a different program, whether that’s a public, private, or charter school, it’s important to ensure that any previously earned credits will transfer. Most online schools have a registrar or admissions team that can help evaluate transcripts and incorporate past credits into the student’s graduation plan.
This is especially relevant for students who began their education through programs like a West Virginia online middle school, as those early academic records may influence course placement and graduation timelines.
Choosing the Right Virtual School
Not all online schools are created equal. When choosing a school, look for accreditation, experienced teachers, robust student support, and a curriculum that aligns with your goals, whether that’s college, vocational training, or entering the workforce.
Programs developed by trusted education providers like Virtual Prep Academy offer a balanced approach to online learning. They prioritize academic integrity, student engagement, and real-world readiness, ensuring students graduate not only with a diploma but with the skills and confidence to take the next step.
Finishing Strong
Graduating from an online high school requires the same commitment and effort as any traditional program, but with added flexibility and independence. By staying organized, actively engaging with teachers, and following a structured plan, students can achieve their educational goals and enjoy a meaningful high school experience on their own terms.
Whether you’re just starting high school or already working toward your final credits, the path to graduation in an online setting is clear and fully within reach.
Have you ever stared at your notes for an hour and then realized you remember absolutely nothing? You might think that reading and rereading pages of text is productive, but more often than not, your brain needs more. This is especially the case for subjects like biology or history, where you have to memorize a lot of facts.
Most people can’t learn well if all they do is read. Your brain loves visuals, plus on top of that, it’s built to recognize patterns, process images, and link information to what it can see. That’s why you can remember how a meme from 2 years ago looked, but the formula you reviewed 10 minutes ago is hazy.
Luckily, studying visually is not something you can’t do on your own.
Keep reading, and you’ll find 6 study techniques that become way more effective as soon as you add a visual element to them.
Study Strategies That Get More Effective with Visuals
Some students use AI to generate videos, others draw diagrams, and mind map topics. But that’s not all!
Here are study strategies that get better with visuals.
1. Mind Mapping Complicated Topics
Mind mapping lets you take big, messy topics and turn them into something your brain can follow. Instead of writing long lists or paragraphs of notes, you build a sort of visual web. You start with a central idea and branch out into subtopics, examples, and definitions.
This format helps your brain organize information the way it naturally works – by connecting ideas. It’s particularly helpful for subjects like science and planning essays. When everything is laid out, it’s easier to understand and remember.
2. Learning Based on Timelines
When you’re dealing with things like historical wars, story plots, or scientific processes, a timeline can be just what the doctor ordered. Putting events in order helps you spot cause-and-effect relationships, patterns, and turning points.
It’s one thing to memorize dates and a whole other thing to see how one moment led to another. If you make your own timeline (or even study using someone else’s), it will help you lock that sequence into your brain. And the more visual you make it (colors, symbols, images…), the better it will stick.
3. Drawing Your Own Diagrams
Even if you can’t draw, that’s okay; you can still do this. Diagrams are especially useful when you’re trying to figure out systems such as the human body, an electric circuit, or how a cell divides. Even if all you do is copy a diagram from your textbook, the act of drawing forces you to slow down and notice how everything connects.
It’s active learning, not passive. You aren’t just looking at the parts, but you’re getting a sense of how they work together. And when the exam comes, you’ll probably be able to picture that diagram in your head. It’s easier to remember something you actually understand.
4. Using Color-Coded Notes
You’re more likely to remember something in color than in black and white. When you use different colors for different categories (like terms, definitions, and examples), your brain creates a visual map of what goes where. This will help you remember details faster and more accurately, especially when you’re under pressure.
For example, if you make all the formulas in blue, your brain will start to associate that color with math rules. All of a sudden, your notes are no longer just text; they’re a visual memory tool.
5. Watching or Creating Explainer Videos
Explainer videos are a great way to break down difficult ideas in a short, focused format. You can watch ones that already exist or make your own if you want the concept to really stick.
You can record a quick video explaining the topic to yourself (even with just your phone) to help reinforce the material through speaking, hearing, and seeing. You’re teaching yourself, and that’s one of the most effective ways to learn.
6. Flashcards with Images Instead of Just Text
Flashcards are a classic when it comes to study tools, but they work even better when you add visuals. Instead of writing the word “mitochondria” on one side and the definition on the other, include an image of what it looks like. This also works for vocabulary, math symbols, flags, historical figures… You name it.
Visual cues give your brain something to hook the meaning onto. Quizlet makes it super easy to add pictures to your flashcards, and once you get used to seeing those images, your memory speeds up naturally.
Conclusion
Studying isn’t that exciting, but if you turn your notes into something your brain will want to look at, it will be much easier and quicker. The best part about this is that you don’t need fancy tools or the ability to draw perfectly to make it work for you.
You just need the will to do it and maybe a couple of colored markers.
Looking to save money on your OAT Booster study tools? An OAT Booster discount code can help you get the prep you need at a lower price. This quick guide will show you the best ways to find and use these promo codes for your OAT Booster purchase.
OAT Booster discount codes make test prep more affordable
Simple steps let you find and use current promo deals
Check offers and FAQs to get the most out of your purchase
How to Use OAT Booster Discount Codes
OAT Booster discount codes help you save money when you sign up for OAT Booster’s test prep services. Using these codes is easy, but it’s important to know exactly where and how to apply them during checkout.
Where to Enter Discount Codes
You need to enter your OAT Booster discount code at the checkout page. After you pick your subscription or package, go to your shopping cart.
Look for a box or field labeled “Promo Code,” “Discount Code,” or something similar. This box is usually just before you enter payment details.
Make sure you copy and paste your code exactly as it appears. Most codes are case-sensitive, so pay attention to capital or lowercase letters.
You may see a button next to the box that says “Apply” or “Redeem.” Press this button after you enter your code. If the code is valid, the new price and discount amount will show up right away in your order summary.
Step-by-Step Redemption Process
Follow these steps to use your OAT Booster discount code:
Go to the OAT Booster website and select your preferred subscription.
Click “Get Started,” “Buy Now,” or add the package to your cart.
On the checkout page, find the “Promo Code” or “Discount Code” field.
Carefully enter or paste your code in the box.
Click “Apply” to activate the discount.
The order summary will update to show the discounted total.
Enter your payment information and finish checking out.
Double-check your final price before you complete the payment. Sometimes, you may see a message or green check mark confirming that the code worked.
Troubleshooting Common Issues
If your OAT Booster discount code does not work, check for simple mistakes first. Confirm you entered the code exactly as shown, with no extra spaces.
The code may be expired or only work for certain plans. Re-read any instructions or terms that came with your code.
If you see an error message, it may say “code not valid” or “expired.” Try clearing your browser’s cache and reloading the page.
Some codes are single-use or limited to first-time users. If none of these tips work, reach out to OAT Booster’s support team for help. Most companies have live chat or an email support option.
Best OAT Booster Discount Code Offers
You can find special deals that lower the cost of OAT Booster. Discounts range from exclusive codes given out by the company, to seasonal sales, to rates for students and groups.
Current Exclusive Discounts
OAT Booster sometimes releases unique discount codes for new users. These codes are often found on their official website, email newsletters, or through popular OAT prep blogs. Most exclusive discounts take a percentage off your total price or offer a set amount of savings, like $20 off.
Some coupon websites list codes, but always check the source because not all codes work. You may need to enter the code at checkout to redeem the offer.
Here’s a quick look at how discounts usually work:
Code Type
Savings
Where to Find
First-time User
10%–20% off
Official website
Referral
$15–$20 off
Email/promo partners
You should always check the expiration date before using any code.
Seasonal and Promotional Codes
Seasonal sales often happen around holidays or at the start of a new school term. Black Friday, Cyber Monday, and Back-to-School are popular times for larger discounts. These codes can offer the largest savings, sometimes up to 25% off.
You can usually find these deals on the OAT Booster homepage or through their social media pages. Promotional codes may be limited to a certain number of uses, or only available for a short time.
Mark your calendar and check for these codes before making a purchase. Signing up for email alerts is a good way to stay updated.
Student and Group Rates
OAT Booster offers lower rates for students and larger groups. If you are part of a pre-dental club or school organization, you may qualify for these savings. To get a group discount, contact OAT Booster directly or through your club advisor.
Student discounts usually require your school email address to verify your status. Group rates can reduce the cost per person, especially if five or more people sign up together.
Key benefits include:
Lower cost for individuals and clubs
Simple verification process
Savings of 10% or more per user
These options are best for those who plan to study with friends or classmates.
Tips for Finding OAT Booster Promo Deals
You can save on your OAT Booster subscription with a few smart steps. Checking trusted sources and signing up for updates can help you spot new offers right away.
Official Partnerships
Look for OAT Booster discount codes on the company’s official partners’ websites. Many educational blogs, student organizations, and pre-dental societies work with OAT Booster to offer exclusive promo codes.
A good example is student groups at universities. They often post discount codes on their resources page or send them out to members by email. Before making a purchase, check if your school or club has a connection with OAT Booster.
Here’s a quick reminder:
Visit known education partner sites
Check your student group’s email lists
Ask your pre-dental advisor if any codes are available
Always double-check the code’s expiration date before using it at checkout.
Newsletter Subscriptions
OAT Booster often shares special deals through their official newsletter. Signing up for their email updates is one of the fastest ways to hear about upcoming sales or limited-time promo codes.
Subscribing only takes a minute. On the OAT Booster website, scroll down to the bottom and look for the newsletter box. Enter your email and confirm. Sometimes, you get a welcome discount just for joining the list.
Benefits of newsletter subscription include:
First access to sales or new products
Promo codes released during holidays or exam seasons
Important platform updates
This method helps you avoid missing short-term deals that aren’t widely posted elsewhere.
Social Media Announcements
OAT Booster posts regular updates on social media platforms like Instagram, X (Twitter), and Facebook. They use these channels to announce flash sales, giveaways, and unique promo codes for followers.
Turn on post notifications for their social media accounts. When a deal is live, you’ll know immediately. This is helpful during test prep season when OAT Booster may offer extra discounts.
You’ll also see posts about partner campaigns, so you don’t have to visit every website to check for new codes. Stay active by checking weekly stories or pinned posts for recent announcements.
Following can give you access to time-sensitive offers not repeated elsewhere.
Frequently Asked Questions
You can find OAT Booster discount codes and promotions through several channels. Customer support, study tools, and comparison with other prep options are also common concerns.
How can I get a promotional code for an OAT preparation course?
Promotional codes are often shared through OAT Booster’s official website and email newsletters. You can also find them on partner educational websites and forums dedicated to OAT exam prep.
Are there any Black Friday deals available for OAT study materials?
OAT Booster has provided Black Friday sales in the past. These deals are usually announced a few days before Black Friday through their website and email list.
What is the best way to contact OAT Booster for customer support?
You can contact OAT Booster by using the contact form on their website. They also reply to messages sent through their official email address and social media pages.
How does OAT Booster compare to OAT Bootcamp for exam preparation?
OAT Booster and OAT Bootcamp both provide practice questions, videos, and study guides. OAT Booster is known for offering a large question bank and frequent updates, while OAT Bootcamp may include more interactive features and different pricing options.
Does OAT Booster offer any Anki flashcard decks for study aids?
OAT Booster provides Anki flashcard decks as part of their study resources. These decks are created to match the topics and concepts found on the OAT.
Are there exclusive discounts offered to followers on OAT Booster’s Instagram?
OAT Booster sometimes shares exclusive discount codes on their Instagram page. You should follow their account and check posts and stories for current offers.
Choosing between DAT Booster vs DAT Bootcamp can be tough when you want the best prep for the Dental Admission Test. DAT Booster usually offers more affordable rates and a larger question bank, while DAT Bootcamp is known for its detailed explanations and strong support tools. Your decision depends on your study style, budget, and which platform fits your learning needs.
Key Takeaways
Both platforms offer different features and study tools.
Your study habits and budget will help guide your choice.
Many students see good results from both programs.
Overview of DAT Booster and DAT Bootcamp
DAT Booster and DAT Bootcamp are two of the most popular online study tools for the Dental Admission Test. Both offer practice questions, study schedules, and detailed solutions, but they differ in company background, features, and who may benefit most.
Background and Company Information
DAT Booster is a newer program created by dental students who recently took the DAT. Their team focuses on updated question banks and resources based on current test trends. The company has quickly grown in the last few years and is known for being responsive to student feedback.
DAT Bootcamp has been around longer and was founded by Dr. Ari Rezaei, a dentist who wanted to help students succeed. Bootcamp is recognized for its established reputation and larger user base. It is often updated with new content and has a team of experienced educators and professionals.
Key Differences:
Program
Founded By
Launched
Team
DAT Booster
Dental students
2020s
Recent test-takers
DAT Bootcamp
Dentist (Dr. Ari)
Mid-2010s
Doctors, educators
Core Features and Tools
DAT Booster includes:
Over 8,000 practice questions
HD video lessons and image-rich explanations
Study schedule templates
PAT Generators and 3D Cube Tools
Mobile-friendly interface
DAT Bootcamp offers:
Over 8,800 practice questions
Detailed video solutions
Customizable study schedules
PAT generators and Reaction Drills
Biology and General Chemistry notes
Progress tracking and analytics
Both programs allow you to take full-length practice tests. They also have strong online communities and offer live support.
The main difference is that Booster’s content often reflects the most recent DAT trends. Bootcamp stands out for its video explanations and detailed written guides.
Target Audience
DAT Booster is often chosen by students who want a cost-effective, focused study plan with tools designed by recent test-takers. You might find it useful if you prefer studying with the latest material and want a user-friendly platform.
DAT Bootcamp tends to attract students who want a more traditional, comprehensive package. If you benefit from extra video content, extensive guides, and in-depth analytics, Bootcamp might better suit your needs.
Both are used by pre-dental students seeking a competitive DAT score. Your choice will depend on your learning preferences, budget, and confidence in the specific features each platform provides.
Comparison of Practice Materials
When choosing between DAT Booster and DAT Bootcamp, it’s important to look at how their practice materials match the real exam. The differences in question banks, test realism, and explanations can affect your learning, preparation, and confidence.
Question Bank Quality and Quantity
DAT Bootcamp offers over 8,000 practice questions. These questions are divided by subject and section. The interface lets you sort and review questions by difficulty and topic.
DAT Booster has over 7,000 questions, focusing on high-yield topics often seen on the exam. Their questions are updated more frequently based on student feedback. Booster’s question bank is known for covering difficult topics in more detail, especially for science sections.
Here’s a short comparison table:
Feature
DAT Bootcamp
DAT Booster
Total Questions
8,000+
7,000+
Subject Coverage
Broad
Focused on high-yield
Updates
Seasonal
Frequent
Realism of Practice Tests
DAT Bootcamp provides 10 full-length tests that closely resemble the real exam in format and timing. The visual interface is designed to match what you see on test day. Many users report that the science and PAT sections on Bootcamp are slightly harder than the actual exam, which can help you feel better prepared.
DAT Booster has 8 full-length tests with questions modeled directly after released DAT questions. Their biology and QR sections are praised for being especially realistic. Booster’s practice tests include options for simulated timing and break schedules to mimic the real test environment closely.
Both platforms have their strengths, but you may find Bootcamp’s full-length tests a bit more challenging while Booster’s are a near match to the actual exam in question style and timing.
Access to Explanations
On DAT Bootcamp, every question comes with a written explanation. Many answers also include diagrams, video walkthroughs, or step-by-step solutions. These resources are easy to access after each test, which helps reinforce concepts and fix mistakes.
DAT Booster also gives detailed written explanations for each question. Booster tends to use shorter, to-the-point language in their explanations. They have fewer video explanations but include many illustrated solutions, especially in biology and PAT.
If you prefer concise reading and visuals, Booster might fit better. If you want more video content and deeper breakdowns, Bootcamp offers greater variety. Both platforms allow you to review missed questions and explanations as often as you like.
User Interface and Learning Experience
Both DAT Booster and DAT Bootcamp focus on helping you study efficiently. The way you interact with the dashboards and apps can change how you learn and improve your results.
Dashboard Usability
DAT Booster has a simple dashboard that lists all your subjects, progress bars, and recent activity. You can quickly see which sections you need to review. There are clear buttons for practice tests and flashcards.
DAT Bootcamp also gives you an overview of your study schedule, progress, and upcoming tasks. You can sort questions by difficulty or topic. The interface uses color coding to let you know what is complete, in progress, or needs revision.
Main features comparison:
Feature
DAT Booster
DAT Bootcamp
Study Progress Bar
Yes
Yes
Customizable Schedule
No
Yes
Quick Links
Yes
Yes
Subject Breakdown
Basic
Detailed
You may find DAT Bootcamp’s dashboard feels more detailed, while DAT Booster’s is easier to use if you want something straightforward. Both are user-friendly and avoid clutter.
Mobile Compatibility
DAT Booster offers a mobile-optimized website. You can use all features from a mobile browser. There is no official app, but you can practice questions or review flashcards on your phone or tablet.
DAT Bootcamp also works on mobile web browsers, and most features are available on mobile. However, some interactive tools or charts can look better on a computer screen. Like Booster, there is not a dedicated app, but the main tools load well on iOS and Android.
Pros and cons:
DAT Booster: Easy to use on mobile, but not all interactive diagrams resize perfectly.
DAT Bootcamp: Reliable mobile site, but some detailed explanations are easier to view on a larger display.
Both programs allow you to study on the go, but you’ll get the best experience from your laptop or desktop for full features and readability.
Pricing and Subscription Options
Both DAT Booster and DAT Bootcamp offer a range of plans and refund policies. The cost, length of access, and what is included in your purchase can affect your decision.
Available Plans
DAT Booster
Standard 90-Day Access: $199
Premium 180-Day Access: $299
Additional upgrades: Add-ons like physical flashcards or extended access are available at extra cost
DAT Bootcamp
Pro 90-Day Access: $497
Pro 180-Day Access: $897
Lite 60-Day Access: $299
Extra services: Some features, like personalized coaching, may cost more
Product
Basic Plan Price
Access Period
Upgrades Available
DAT Booster
$199
90 days
Yes
DAT Bootcamp
$299
60 days
Yes
Pricing can change and discounts may be offered during sales. Most plans include full access to practice questions, tests, and learning tools. Only some plans include extra features, so review the details before buying.
Refund and Guarantee Policies
DAT Booster does not offer a refund after you make a purchase. All sales are final. They do not advertise a score guarantee or money-back policy.
DAT Bootcamp offers a 7-day refund window if you have not used more than a set number of questions or practice tests. After a certain level of use, refunds are no longer available. DAT Bootcamp also offers a “Higher Score Guarantee” for some plans. If you meet all conditions and do not improve, you may qualify for a refund or extended access.
Carefully read both companies’ policies before you buy. If you want the option to get your money back, check the exact rules on each site.
Student Performance and Success Rates
DAT Booster and DAT Bootcamp both provide features designed to help you improve your scores. Many students report higher performance after using these programs, and user feedback highlights strengths and areas for improvement.
Reported Score Improvements
Users of DAT Booster often mention improvements of 4 to 6 points on their DAT scores after using the program for at least two months. Booster is known for realistic practice tests, especially in Biology and PAT. Some users found score gains larger in Biology and PAT than in other subjects.
DAT Bootcamp users also report significant score gains, typically in the 3 to 5 point range. Many say Bootcamp’s timed practice tests are close to the real DAT. Students using Bootcamp highlight Chemistry and Reading as strong points.
Program
Avg. Score Gain
Best Subjects
DAT Booster
4-6 points
Biology, PAT
DAT Bootcamp
3-5 points
Chemistry, Reading
Improvements can depend on your baseline knowledge and study habits. Neither program guarantees a certain number of points, but most users see measurable progress.
User Testimonials
Students who use DAT Booster often praise the detailed explanations and up-to-date content. One user wrote, “I scored a 22 after scoring 17 on my first mock test. The PAT videos and practice were extremely helpful.”
DAT Bootcamp receives positive feedback for its organized study schedule and active question banks. A common comment is, “The practice tests were the closest to the real thing. Chemistry and reading were spot on.”
Many students like the community support offered by both platforms, including forums and group study features. Some users mention response times for support are faster on Bootcamp.
Each program has both positive and critical reviews, so personal experience may be different. Reading several testimonials can help you understand what to expect from each choice.
Additional Resources and Support
When choosing between DAT Booster and DAT Bootcamp, study materials and customer support can make a big difference. What you get with each program can affect how you study or get help if you have problems.
Extra Study Materials
Both DAT Booster and DAT Bootcamp include flashcards, question banks, and practice tests. However, the way they arrange and update their content is not the same. DAT Booster is known for including free, printable cheat sheets and interactive question explanations. You also get access to detailed video walkthroughs for every subject.
DAT Bootcamp offers unique resources like the PAT Generator tool and HD science videos. You can use personalized study schedules to keep your studying organized. Both platforms update their questions and materials regularly, but DAT Bootcamp may offer more niche practice resources, such as Simulated Full-Length Exams and specific biology practice sets.
Below is a comparison of some noteworthy study materials:
Feature
DAT Booster
DAT Bootcamp
Flashcards
Yes
Yes
Printable Cheat Sheets
Yes
No
PAT Generator
No
Yes
Custom Study Scheduler
Yes
Yes
Simulated Full-Length Exam
Yes
Yes
Video Explanations
Yes
Yes
Customer Service
Customer support gives you help if you face any issues with your account or materials. DAT Booster provides support mainly by email and responds quickly—usually within one business day. There is no live chat, but the FAQ section covers most common concerns. You can also request technical help directly through their site.
DAT Bootcamp offers both email support and a live chat feature during business hours for faster answers. The support team assists with billing, technical issues, or content questions. DAT Bootcamp also maintains a private Facebook group, where you can post questions to other users or moderators and get peer feedback.
Both platforms have support guides that answer common user questions, but DAT Bootcamp’s options may help if you prefer live conversations or group help instead of just email.
Frequently Asked Questions
You can find details here on features, costs, study plans, and support options for both DAT Booster and DAT Bootcamp. Each question covers a key difference or common concern users often have.
What are the main differences between DAT Booster and DAT Bootcamp?
DAT Booster focuses on recent DAT exam trends and high-yield practice questions. DAT Bootcamp offers a wide variety of video lessons and study tools. DAT Bootcamp is known for its larger question banks and practice exams. DAT Booster is often picked for its focus on visual learning and updated material.
Are there any discount codes available for either DAT Booster or DAT Bootcamp?
Both DAT Booster and DAT Bootcamp sometimes offer discount codes. These codes can usually be found on their official websites or through social media channels. Check for student group deals or special promotions if you want to save money.
Does DAT Booster offer a free trial or a free version?
DAT Booster does not offer a full free trial. However, you can access some sample content or preview questions before buying. Full access requires a paid membership.
How does the study schedule compare between DAT Booster and DAT Bootcamp?
Both platforms provide a study schedule you can follow. DAT Bootcamp includes a more detailed and guided daily schedule. DAT Booster offers flexible plans so you can set your own pace.
What membership options are available for DAT Booster?
DAT Booster has multiple plans, usually based on the length of access you want. You can choose from options like 1 month, 3 months, or longer. Longer plans usually come with a lower monthly price.
Can customer support be easily reached for issues with DAT Booster?
You can contact DAT Booster support through email or their website chat feature. Most users report that support responds within one business day. There is also a help center with answers to common issues.
If you are preparing for your exams, you have probably heard about Archer vs UWorld. Uworld is known for its detailed questions and explanations, while Archer is popular for its affordability and large bank of practice questions. Choosing between them can significantly impact your study results.
You want a resource that fits your learning style and helps you feel confident on test day. Knowing how each platform stacks up will help you make the best decision for your needs.
Key Takeaways
Uworld and Archer offer different approaches for exam prep.
Question quality and study features vary between the two.
Feedback from students helps highlight the strengths of each.
Overview of Uworld and Archer Review
https://youtube.com/watch?v=zV_Ae92Z13w
Archer and UWorld Review are both test prep platforms designed for students preparing for major exams like the NCLEX and USMLE Step 3. Each offers a different style of practice questions, explanations, and tools to help you study.
Key Features and Offerings
Uworld for NCLEX is known for its high-quality question banks and detailed answer explanations. You get thousands of practice questions that are similar in style and difficulty to the real exams.
Uworld also offers performance tracking, flashcards, and self-assessment exams. The rationales explain why each answer is right or wrong, helping you learn more with each question.
Archer Review provides a large question bank focused on NCLEX bootcamp. It offers computer adaptive tests, rationales, and live sessions. Some features include readiness assessments and performance analytics that help measure your progress.
Both platforms support multiple devices, so you can study on your phone, laptop, or tablet. The main differences are in the depth of explanations and extra tools like flashcards or live reviews.
Target Audiences and Test Coverage
Uworld mainly targets nursing students, medical students, and graduates preparing for the NCLEX and USMLE Step 3. It often gets recommended by nursing programs and medical schools.
Archer Review focuses mainly on nursing students taking the NCLEX exam, but also offers review tools for nursing school tests. It is popular with students who need extra practice after finishing their regular classes.
The following table compares examination coverage:
Platform
NCLEX
USMLE Step 3
Nursing School Exams
Uworld
Yes
Yes
Sometimes
Archer
Yes
No
Yes
This focus affects question style and depth of content, so your choice might depend on which tests you plan to take.
Differences in Platform Design
Uworld uses a clean, organized platform that closely mimics the look and feel of the real test screens. The design lets you flag questions, review rationales, and track your stats in a simple dashboard.
Archer Review’s interface is simpler but still includes necessary features, like test timers and query flagging. It may look less polished, but it is easy to understand for new users.
You might notice that Uworld puts more detail into answer explanations and extra study tools, while Archer highlights affordability and quick access. Both provide online support, but Uworld often provides more robust user help resources.
Question Quality and Exam Relevance
The quality of practice questions and how closely they match real exam content matters when preparing for major nursing and medical examinations. Differences in format, subject coverage, and test alignment can impact your study results.
Practice Question Format and Rigor
UWorld is known for detailed and realistic multiple-choice queries. Each query type comes with clear explanations, diagrams, and rationales, helping you understand both correct and incorrect answers. The phrasing and complexity of UWorld’s questions often mimic what you see on actual exams, especially NCLEX and USMLE.
Archer provides a large question bank with simpler, straightforward questions. Some users find the challenge level lower than UWorld. The explanations may be shorter, but Archer does offer select queries covering advanced scenarios and prioritization, important for NCLEX prep.
If you want questions that feel like the actual test, UWorld is closer in difficulty and style. For extra practice or a softer entry, Archer offers a wide range.
Content Areas: Med Surg, Pharmacology, and Community Health
UWorld covers broad clinical content, including Med Surg, Pharmacology, and Community Health. Each topic is broken down clearly. For Pharmacology, you’ll see drug interactions and side effects. For Med Surg, you get realistic patient care scenarios. Community Health questions focus on public health, prevention, and teaching.
Archer also covers these areas, but sometimes with less depth. While Med Surg and Pharmacology questions are frequent, you might notice that explanations may not go as deep as UWorld. Archer adds some community health content, but it is less detailed than UWorld’s.
Here’s a comparison table:
Content Area
UWorld Detail
Archer Detail
Med Surg
High
Moderate
Pharmacology
High
Moderate
Community Health
High
Lower
Aligning with NCLEX and USMLE Requirements
UWorld closely matches the blueprint and style of the NCLEX and USMLE exams. It uses updated question formats, including SATA (select all that apply), case scenarios, and some CCS (clinical case simulation) components for USMLE. UWorld’s self-assessment tools (like UWSA for USMLE) use real test scoring scales and simulate real test timing.
Archer also aligns with the NCLEX, offering many new-style questions like prioritization and delegation, which are critical for nursing tests. However, Archer does not offer NBME-style or detailed CCS cases for the USMLE. If you are studying for the NCLEX, both platforms include most question types, but for USMLE prep, UWorld includes more official formats and practice exams.
User Experience and Learning Tools
Both Uworld and Archer are widely used for medical test preparation. Each offers its interface features, performance tracking, explanation quality, and options for supplementing your learning.
Test Interface and Performance Analytics
Uworld uses a clean, simple interface that is easy to navigate. You can highlight text, strike out answer choices, and use an on-screen calculator. Tests closely mimic the real examination setting, which helps you get comfortable before test day.
Archer’s interface is straightforward but less polished than Uworld’s. Navigation is quick, but some users report slower loading times. Archer tracks your accuracy by subject, such as fundamentals or health assessment. Uworld offers similar analytics with deeper breakdowns and performance graphs.
Both platforms let you review your weakest areas and compare your results to other users. Performance analytics on both include tables and charts that show progress in topics like social sciences and patient safety.
Rationales, Explanations, and Study Resources
Uworld is known for its detailed, well-organized rationales. Explanations break down each answer, cover key topics, and often reference clinical guidelines. Diagrams and charts clarify main points, making it easier to understand why an answer is right or wrong.
Archer provides concise rationales with some diagrams and simple language. The explanations are less in-depth than Uworld’s, but still cover the basics. Both platforms have question banks with thousands of practice questions covering a full medical curriculum, from patient safety to fundamentals.
Uworld’s study resources are broader, sometimes referencing external guides like AMBOSS, though these are not built-in. Archer focuses on core content, while UWorld offers more comprehensive explanations and extra learning tools.
Integration with Supplemental Platforms
Uworld allows exporting notes and performance data, making it easy to combine your study process with other platforms. While it does not offer direct integration with apps like AMBOSS or MKSAP, its format syncs well with most digital note-keeping tools.
Archer is more limited in this area. You can review reports and export some results, but there’s less support for integration with tools outside the platform. Archer does not directly link with resources like CCS cases or other popular review platforms.
If using multiple resources, UWorld is more compatible with third-party study aids. Archer tends to be more self-contained, with fewer options for expanding your workflow or connecting to supplemental content.
Student Outcomes and Community Feedback
Many students choose their NCLEX review prep tools based on improvement in pass rates, ethical standards, and what peers report about various platforms. Direct comparison, specific user feedback, and ethical concerns shape how useful and trustworthy these resources feel to you.
Improvements in Pass Rates and Testimony
Uworld reports a high success rate among users, especially those who complete most practice questions.
Many students claim their NCLEX pass rates improved after using Uworld’s detailed rationales and question banks. These testimonies often mention feeling more confident and prepared.
Archer users also report improved scores, but some mention the explanations aren’t as deep as Uworld’s. Testimony from Archer users sometimes highlights affordability and live review sessions as positives.
A few students use both Uworld and Archer. They say this combination helps target weaknesses and boost confidence. You may find that your improvement depends on your study habits and which format fits your learning style.
Ethics and Professionalism in Test Prep
Ethics in test prep includes responsible question writing and transparency about sources. Uworld has faced fewer complaints about ethics and is known for maintaining strict standards for its practice questions.
Archer’s banks have been questioned about the originality of content online, though the company has publicly denied improper practices. You should look for up-to-date policies on privacy and question creation if ethics is important in your choice.
Kaplan is mentioned by some students for its long-standing professional reputation. Kaplan’s staff includes many experienced educators who can provide peace of mind when ethical standards matter to you.
Comparing Peer Reviews of Uworld, Archer, and Kaplan
Many online forums and study groups discuss differences among UWorld, Archer, and Kaplan. Students often rate UWorld highest for question quality and rationales.
Table: Peer Ratings (1 = Poor, 5 = Excellent)
Platform
Question Quality
Affordability
Test-Like Experience
Uworld
5
3
5
Archer
4
5
4
Kaplan
3
2
4
Archer is praised for low cost and easy access, but some users say its interface or explanations are less robust.
Kaplan is respected for structure and rigorous content, but students note it can be expensive and less engaging. User reports suggest you may benefit by trying free trials or sample questions to find what works best for your needs.
Frequently Asked Questions
UWorld and Archer are two popular online resources for NCLEX preparation. Each offers different features, pricing, and study approaches.
What are the main differences between UWorld and Archer for NCLEX preparation?
UWorld offers detailed rationales, a large question bank, and a realistic test interface. The explanations in UWorld are often longer and more in-depth. Archer provides a big set of practice questions and is known for its affordability. Archer’s interface is simpler, and its question explanations are shorter.
How do UWorld and Archer compare in terms of pass rates for the NCLEX?
UWorld reports high user pass rates, often above national averages, and has published feedback from successful students. Archer shares positive reviews, but its official pass rate statistics are not as widely published or independently verified. Your results may depend on how thoroughly you use the resources.
Which preparation platform is more cost-effective: UWorld or Archer?
Archer is less expensive than UWorld and offers monthly subscriptions with a lower starting price. UWorld is more costly but sometimes includes extra study tools like self-assessments and flashcards. If you are on a tight budget, Archer may be the more affordable option.
What are the benefits of choosing Archer over UWorld for the NCLEX?
Archer’s main benefits are its lower price and the availability of rapid review sessions. It also releases new practice questions frequently. You can access live review classes with Archer, which some students find helpful for last-minute preparation.
Can Archer’s NCLEX prep services compete with the established reputation of UWorld?
UWorld has been a trusted resource for many years and is recommended by many instructors. Archer is newer but is gaining popularity, especially among students looking for affordable options. While Archer is growing quickly, UWorld still has a longer track record and more established feedback from test-takers.
The DAT Bootcamp price starts at around $497 for full access, giving you the tools you need to get ready for the DAT exam. Many students want to know if the cost is worth it and how it compares to other test prep options.
You might wonder what is included in your purchase, how to get possible discounts, and if DAT Bootcamp fits your study needs.
Key Takeaways
DAT Bootcamp course price is about $497 for full access.
It includes many study materials and practice tests.
Discounts and payment plans may be available.
DAT Bootcamp Price Overview
DAT Bootcamp offers a clear pricing structure for its test preparation services. You can choose a plan based on your study needs and the amount of time you want access to the material.
Current Pricing Structure
DAT Bootcamp’s main plan is called Bootcamp Pro. As of June 2025, the cost is $497 for 90 days of access. This is a one-time payment, not a recurring fee.
There are sometimes sales or discounts, but the listed price is usually what most students pay. There is a payment plan option for those who can’t pay all at once. You can pay in four installments, making the cost more manageable.
No extra fees are required for full access, and there are no hidden charges. All main features are part of the standard package.
Included Services
Your DAT Bootcamp Pro subscription includes all the main services the program offers. You get full-length practice tests, over 8,000 practice problems, video explanations, and detailed answer solutions.
You can use all study materials for all DAT sections: Biology, General Chemistry, Organic Chemistry, Reading Comprehension, Quantitative Reasoning, and Perceptual Ability.
The platform also provides study schedules, performance tracking, and progress reports. You have access to a mobile app, so you can study on the go.
Live support from tutors and access to a large user community are included at no extra cost. There are no additional fees for updates to questions or software during your access period.
Duration and Access Period
When you buy Bootcamp Pro, you get 90 days of continuous access from the day you sign up. You can use the program any time, day or night, for the entire period.
If you need more time, you can extend your access for a fee. Extensions are usually priced by the number of extra days you choose.
You will not lose your study progress or notes during an extension. All resources and practice problems remain available for the full access period, and you can review your answers whenever you need to.
Comparing DAT Bootcamp With Other Test Preparation Options
Choosing the right DAT test prep can impact your score and your readiness for dental school. Price, features, and learning style all matter when comparing your options.
DAT Bootcamp vs. The Princeton Review
DAT Bootcamp and The Princeton Review are two of the most popular platforms for the DAT prep program. DAT Bootcamp offers an online, self-paced program with hundreds of practice questions, video lessons and explanations, and detailed science review notes. Its price is typically between $500 and $600 for a 90-day subscription.
The Princeton Review provides live crash courses, private tutoring, or self-paced online study plans. Its full DAT Ultimate course often costs over $1,000, but it includes classroom instruction, print materials, and personal support.
Feature
DAT Bootcamp
The Princeton Review
Price
~$500-$600
~$1,000+
Format
Self-paced online
Live, self-paced, tutoring
Practice Questions
8,000+
2,500+
Video Content
Yes
Yes
Instructor Access
Limited
Extensive
DAT Bootcamp is best if you prefer learning at your own pace and want lots of practice tests for a lower cost. The Princeton Review may be better if you prefer guided learning and direct access to instructors.
Test Preparation Value for Dental School Applicants
When choosing a DAT prep course, think about what dental schools want to see. High DAT scores can help your application stand out. Both DAT Bootcamp and The Princeton Review have strengths, but your needs as a pre-dental student can help you decide.
DAT Bootcamp has a reputation for realistic practice exams and clear explanations. Many users report improved test performance and confidence. The self-study format works well for students comfortable with independent learning.
The Princeton Review includes more structure. You get scheduled classes, personalized feedback, and access to instructors. This can help if you need extra support or want to build better study habits.
Look for a prep course that fits your schedule, learning style, and budget. The right choice can boost your chance of scoring well and meeting dental school requirements.
What’s Included With DAT Bootcamp
DAT Bootcamp gives you a structured way to prepare for the Dental Admission Test. You receive resources for all the main sciences, realistic practice tests, and support to help you stay on track.
Biology, Chemistry, and Related Subjects
You get detailed study materials and lessons for biology, general chemistry, and organic chemistry. Each section covers major topics tested on the DAT. For biology, you find content on biochemistry, genetics, microbiology, and physiology.
Materials include review notes, high-yield question banks, and walkthrough videos. These tools are designed to match the level and style of real DAT questions.
The platform also gives you charts and tables that highlight key concepts. You can track your progress through quizzes for each subject area.
Practice Exams and Study Materials
Practice exams on DAT Bootcamp closely match the actual test format and level of difficulty. You can take full-length, timed tests that include all DAT subjects, not just science.
Features:
Over 60 practice tests for various topics
Thousands of practice questions
Detailed explanations for every answer
You also receive study calendars, flashcards, and cheat sheets. These tools help you break down information into manageable parts and focus on weak areas.
DAT Guidance and Support Features
The Bootcamp offers guidance to help you through your study plan. You can join study groups and access discussion forums for help from peers.
The platform also provides direct expert support for questions or technical issues. Some plans include coaching from experienced mentors.
While it doesn’t give a committee letter, it does provide resources to help with application steps and advice about next actions after you finish studying. Support features aim to keep you organized and motivated throughout your prep.
Discounts, Payment Plans, and Access Alternatives
The Bootcamp offers different ways to lower your costs or make payments easier. Some discounts are available for students, and there are flexible payment plans you can use to access the training.
Student Discounts and Promotions
It sometimes offers special discounts for students. You may find seasonal discounts or limited-time promotions around holidays or back-to-school periods.
To get a lower price, check the official website for current deals. Some university pre-dental clubs also share exclusive promo codes with their members. These codes can save you up to 20% off your program fee.
Bootcamp does not have an ongoing student discount like some other education programs, but they do run flash sales. Signing up for their email newsletter is the best way to find out about new promotions. These deals apply to most training plans, but they may not include extra tutoring or add-ons.
Flexible Payment Options
DAT Bootcamp provides payment plans for those who might not want to pay the full price at once. When you sign up, you can choose to split your fee into smaller monthly payments. Depending on the offer, you might see options like four payments over two months or monthly subscriptions.
Most payment plans do not charge interest, but it’s important to read the policy before choosing. The company accepts major credit cards, debit cards, and some digital payment methods.
These payment options cover access to the main study program. Some extra features, like private tutoring or extended access, may need to be paid for up front. You cannot always use discount codes with payment plans, as some promotions only work with single-payment purchases.
Who Should Consider The Dental Admission Test Bootcamp (DAT)
DAT Bootcamp is designed to help you get ready for the Dental Admission Test if you want to apply for a DMD degree. The platform is used by many pre-dental students who want to attend a school of dentistry and need a high score on the DAT.
Ideal Candidates
If you plan to apply for dental school in the United States, especially through ADEA AADSAS, DAT Bootcamp might be a strong option for you.
You may be an ideal candidate if you:
Need a structured study plan to stay organized.
Prefer detailed video explanations and practice questions.
Want to see progress through metrics and analytics offered in the program.
Are seeking practice tests that are similar to the real Dental Admission Test.
The Bootcamp is also well-suited for people who:
Have busy schedules and need to study at their own pace.
Prefer learning through a mix of reading, practice, and videos.
They are aiming for a DMD degree and want their application to stand out with a good DAT score.
These features help you work toward admission into a school of dentistry more efficiently.
Preparing for the DAT (Dental Admission Test)
Getting a high score on the DAT is important for your dental school application. The test covers subjects such as biology, general chemistry, organic chemistry, perceptual ability, reading comprehension, and quantitative reasoning.
It offers resources that match the DAT format. These include:
Full-length practice tests
Subject-specific question banks
Guided study schedules
Video explanations for each question and concept
You will find the content updated to match the standards required for the admission test. The tools are meant to improve your test-taking skills with realistic questions and explanations.
Using DAT Bootcamp can help you identify areas you need to strengthen before you apply through ADEA AADSAS to a school of dentistry for your DMD degree.
Trademark and Registration Information
DAT Camp is a protected trademark with official registration. These details matter if you want to confirm its authenticity or understand its legal standing.
Trademark Details
DAT Bootcamp is a registered trademark in the United States. The trademark is officially listed under the name “DAT Bootcamp,” and it is identified as a standard character mark. This means the trademark covers the words themselves, not a logo or image.
The registration applies to International Class 041. This class includes services such as education, training, entertainment, and cultural activities. DAT Bootcamp mainly focuses on online education and test preparation for the Dental Admission Test (DAT).
The mark drawing is listed as “4 – STANDARD CHARACTER MARK,” showing protection for the word mark itself. This status prevents other companies from using the same name for similar services.
Registration and Legal Status
Its trademark registration comes with a unique registration number assigned by the United States Patent and Trademark Office (USPTO). The status is “registered,” which grants legal rights to the owner.
The registration date is a key detail. It shows when legal protection started. The class status for International Class 041 is “active,” meaning you can trust that DAT Bootcamp controls its brand name in the education and training space.
You can verify the trademark’s current status and registration details through the USPTO database. This helps ensure you are dealing with the official, registered provider of DAT Bootcamp services.
Frequently Asked Questions
DAT Bootcamp has a set price for its main plan and sometimes provides discounts or special deals. You may also have extra costs if you want to extend your access.
What are the current pricing plans for DAT Bootcamp?
You can buy a standard 90-day DAT Bootcamp Pro membership for around $497. This plan gives you access to all study materials, question banks, and full-length practice tests.
Does DAT Bootcamp offer any discounts or promo codes?
DAT Bootcamp sometimes offers promo codes, usually during special events or holidays. You may find these codes on their website, social media, or through email sign-ups.
How does the cost of DAT Booster and DAT Bootcamp compare?
DAT Booster is often less expensive than DAT Bootcamp. As of early 2025, DAT Booster’s main package is about $349, while DAT Bootcamp’s package is $497. Prices can change, so always check the official websites for the most up-to-date information.
What is the cost to extend access to DAT Bootcamp materials?
You can extend your access to DAT Bootcamp if you need more time. An extension of 30 days usually costs around $99. Longer extensions may cost more.
Are there any fee waivers available for DAT Bootcamp?
DAT Bootcamp does not offer a formal fee waiver program right now. However, you can look for scholarships or ask your school advisor about possible financial support options.
Is there a specific price reduction for DAT Bootcamp on Black Friday?
DAT Bootcamp sometimes has a Black Friday sale, with savings ranging from 10% to 20% off the regular price. The exact discount can change each year, so it is best to check their website in late November for the latest offer.
Many students wonder, is UWorld harder than MCAT? Most people find that UWorld questions seem more detailed and challenging than the real MCAT, but they are great for learning and practicing test-taking skills. If you want to understand how UWorld and the MCAT compare and how to use UWorld effectively, keep reading.
Learning how to use each resource helps you prepare better.
Comparing UWorld Difficulty to the MCAT
Understanding whether UWorld questions are harder than the MCAT can help you plan your study approach. This section looks at how UWorld practice compares to the real exam in question style, difficulty, and how it can affect your test-day experience.
How UWorld Practice Questions Differ from MCAT Questions
UWorld practice questions are often more detailed and focused on learning concepts. Many questions explain why each answer choice is right or wrong, which can help you learn faster.
MCAT questions tend to be broad and test your ability to apply science in new situations. You may find that UWorld questions feel more direct, while MCAT questions often include longer passages and more reasoning.
UWorld practice often drills you on specific topics. In contrast, MCAT questions include several science subjects in one passage. Medical students sometimes say UWorld teaches you details, but the MCAT tests big-picture thinking.
Difficulty Level Analysis: UWorld vs. MCAT
Many test-takers believe UWorld is harder than the MCAT in terms of question complexity. UWorld often includes tricky questions to challenge your understanding, while the MCAT uses moderate difficulty but combines questions in confusing ways.
You may notice UWorld has a higher percentage of difficult or multi-step questions than a real MCAT test. However, some students find that MCAT passages can be harder because of time pressure and unfamiliar scenarios.
UWorld’s explanations allow you to review mistakes and get used to challenging material. The MCAT does not give you this feedback, which makes test-day feel different even if the content seems easier.
Question Banks and Real Exam Experience
When you use UWorld’s question banks, you answer questions by topic or subject. Real MCAT practice tests combine all subjects and question types in one long sitting, which makes time management harder.
UWorld allows you to learn at your own pace and review explanations. The MCAT is a timed exam with no breaks for feedback. This change in structure can make the real exam feel more stressful.
Practice passages on UWorld are written to help you find your weak spots. Practice exams for the MCAT are designed to match the length, structure, and timing of the official test. Both can help, but they mimic the real experience in different ways.
Factors That Contribute to Perceived Exam Difficulty
Several things can make UWorld seem harder than the MCAT. These factors include the level of detail in questions, immediate feedback, and the order you do practice questions.
The MCAT’s challenge is more about the speed and the variety of topics in one long exam. For most students, mental fatigue and test anxiety add to the difficulty of the actual MCAT.
Some students feel UWorld is harder because they do not always know a topic before practicing. The MCAT, on the other hand, tests what you have learned across all subjects, making you rely on both memory and reasoning under pressure.
Your personal study habits, strengths, and comfort with test strategies make a difference, too. UWorld and the MCAT each challenge you in ways that depend on how prepared you are and how you study.
Effective Preparation Strategies Using UWorld and MCAT Resources
To do well on the MCAT, you need a smart plan, good study tools, and strong test habits. Using UWorld, along with other trusted resources, can help you cover all key areas for the exam.
Optimizing Your Study Schedule and Time Management
Start by making a detailed study schedule. List topics and assign them to specific days or weeks. Set clear goals for each study session, such as finishing a set number of practice questions or reviewing a chapter.
Use a planner or digital calendar to track your progress. Break study time into small chunks, like 45-minute blocks, to prevent burnout and stay focused. Include short breaks to help your mind rest.
It’s important to review both strong and weak areas often. Schedule regular practice tests to measure your improvement. This helps you manage your time better while answering questions and adjust your study priorities as needed.
Leveraging Multiple Resources: Kaplan, Anki, and Princeton Review
Combining different study resources gives you a more complete review. UWorld provides detailed explanations and practice problems that are similar to what you might see on the MCAT.
Use Kaplan books for in-depth content review. They include practice questions at the end of each section. Pair these with Anki, a flashcard app, to help memorize key facts and formulas. Making your own Anki decks based on practice questions can boost recall.
Princeton Review resources offer extra practice and practice tests to build your confidence. Mixing these tools in your study routine means you cover the content in different ways, making sure you remember it better.
Building Test-Taking Stamina and Reducing Test Anxiety
Regular practice under exam-like conditions helps build test-taking stamina. Try taking full-length practice tests from UWorld or Princeton Review every few weeks. Use a timer and remove distractions to mimic the real testing environment.
Prepare a strategy for handling tough questions, such as skipping and coming back if you’re stuck. Focus on developing calm breathing techniques and positive self-talk to manage anxiety.
Track patterns in your incorrect answers to spot and fix weak areas. Building these habits helps you feel more in control and less anxious when facing the actual MCAT.
Frequently Asked Questions
UWorld’s MCAT questions are often talked about for their specific style and level of detail. Many students use UWorld because it offers in-depth explanations and covers a wide range of topics.
How does the difficulty of UWorld compare to the actual MCAT exam?
Many students say UWorld feels harder than the actual MCAT. UWorld questions often go deeper into details and can have more complex wording. Some people find that this extra challenge helps them feel more prepared on test day.
Are UWorld MCAT practice questions reflective of the exam’s difficulty level?
UWorld questions are similar but are sometimes seen as more detailed or slightly harder. The passages and question style look a lot like those on the real MCAT. They can help you get used to thinking the way the MCAT wants you to.
Can UWorld alone sufficiently prepare you for the MCAT?
UWorld is a strong tool, but it is best used with other study materials. You should also review the AAMC official practice tests and content guides. Relying only on UWorld might cause you to miss some question types or topics.
How do UWorld biochemistry questions compare in difficulty to those on the MCAT?
UWorld biochemistry questions are usually seen as a bit harder and more specific than those on the MCAT. They often cover certain pathways or details that help deepen your understanding. Most users feel well-prepared for MCAT biochemistry sections after using UWorld.
What is the correlation between UWorld MCAT scores and actual MCAT scores?
There is no official equation between UWorld and MCAT scores. Many people report that they see similar percentages on UWorld and their real MCAT. Doing well on UWorld can be a good sign, but it does not guarantee a specific MCAT score.
Is the physics material in UWorld more challenging than what is found on the MCAT?
UWorld’s physics questions tend to be more detailed and sometimes feel trickier than those on the MCAT. The explanations help you understand where you might have gaps. If you use UWorld for physics, you may find the MCAT’s physics section a little more manageable.
If you’re planning to take the GRE and want to boost your score, you might have come across TTP GRE. TTP GRE is an online prep course designed to help you study more effectively and understand the exam’s key topics. The program includes step-by-step lessons, practice questions, and tools to track your progress.
You may wonder if TTP GRE fits your learning style or if it covers everything you need for the test. This article will explain what to expect from the course, how it works, and why many students choose it over other prep options.
Key Takeaways
TTP GRE is an online study platform for GRE prep.
The course offers structured lessons and practice tools.
Many users find TTP GRE helpful for focusing their study plan.
Overview of TTP GRE
Target Test Prep (TTP) is an online platform focused on GRE study, providing clear lessons and features tailored to help you prepare effectively. TTP GRE is often compared with other test prep options and offers several specific advantages for test takers.
What Is Target Test Prep GRE?
Target Test Prep GRE is a full online course designed mainly for the GRE, but similar methods are used for the GMAT. Unlike some SAT and GRE prep sites, TTP focuses on teaching math and verbal concepts step by step.
You get more than 4000 practice problems and detailed written solutions. The platform tracks your progress in real time, so you know what you need to work on. This helps if you like having a clear plan and want to see your strengths and weaknesses.
TTP offers a self-paced study plan, which is useful if your schedule is busy. The lessons mix short readings, practice sets, and quizzes. All content is created for the edges of what appears on the GRE, to focus your time on material that matters most.
Comparing TTP GRE With Other Test Prep Platforms
Target Test Prep GRE stands out because it gives in-depth explanations, especially for math. Many platforms for GRE, SAT, and GMAT prep use large video libraries, but TTP uses detailed written steps and logic.
The way TTP personalizes study plans sets it apart. Some prep services provide general advice, but TTP changes your study schedule based on your quiz and practice test results.
This focused structure is not always found with other platforms. TTP also offers custom difficulty levels, unlike many SAT and GRE prep resources that may have static practice sets.
Here’s a quick comparison:
Feature
TTP GRE
Other Platforms
Custom Study Plans
Yes
Sometimes
Problem Explanations
Written & Step-by-Step
Mostly Video or Brief
Real-Time Analytics
Yes
Often Limited
Focused on Math
Yes
Variable
Benefits of Using TTP for GRE Preparation
TTP’s step-by-step system helps you break down hard concepts into easy-to-understand parts. If you struggle with GRE math, TTP has clear, detailed guides and lots of practice.
The course updates to match the current GRE format, so you are not studying old material. You will find nearly every question type you need to practice before exam day.
Many users report higher scores after following TTP’s study plans. You get clear goals each week, and the platform keeps track of areas you should review.
Extra resources like live support, vocabulary tools, and study reminders add value for users who want structure and feedback while preparing for the GRE.
TTP GRE Course Structure and Features
TTP GRE is organized to help you study smarter and stay on track. You get lots of learning materials, focused daily practice, and useful tools to check your progress.
Comprehensive GRE Prep Material
You receive access to a large set of GRE study resources covering all test sections: Quantitative Reasoning, Verbal Reasoning, and Analytical Writing Assessment (AWA). Each topic is explained in detail with step-by-step methods. Lessons start from the basics and build up to harder questions.
Key features include:
Over 100 GRE topics with video and written lessons
Detailed solution guides for every practice problem
Integrated vocabulary lists and flashcards
You learn strategies designed for real GRE questions. Everything is clearly organized, so you can focus on one subject at a time.
Practice Questions and Daily Prep
You practice with thousands of GRE-style questions filtered by type and difficulty. The course offers daily prep questions so you build strong study habits.
Practice modes:
Mode
Use Case
Untimed
Learn new concepts
Timed
Practice under GRE conditions
Review
Check detailed answer explanations
Every question comes with a full solution and explanation. You can repeat tricky problems to fix mistakes. Daily question sets are sent to you so you don’t lose momentum.
Timer and Progress Tracking Tools
You get built-in timers for each practice set. This helps you get used to the GRE’s time limits and keep a steady pace.
Progress tracking features:
Personalized dashboards show your strengths and weak spots
Charts track your score changes and time spent on each topic
Instant feedback on your results after each session
The timer teaches you to balance speed and accuracy, and the dashboards let you monitor how much you improve with each study session.
GRE Self-Study Plan Options
You can pick from several self-study plans or customize your own based on your schedule and goal score. Each plan breaks down study tasks by week and day.
Typical options:
1-month, 2-month, and 3-month plans
Plans designed for beginners or advanced test-takers
Adjustable deadlines and reminders to keep you on track
Checklists, progress bars, and email notifications help you keep your studies organized. These options let you fit GRE prep into your routine while making sure you cover all test topics.
Core GRE Sections and Strategies With TTP
The GRE includes quantitative and verbal sections, and each demands specific study methods. TTP offers detailed strategies to help you build confidence and reach your best GRE score.
Quantitative Strategies and Resources
The quant section tests math skills, problem-solving, and understanding of concepts. With TTP, you follow a structured study plan that makes the math more manageable.
TTP breaks down topics like arithmetic, algebra, geometry, and data analysis. You get step-by-step lessons for each concept. Practice questions are organized by difficulty, so you can target your weak areas.
You have access to detailed explanations for every answer. If you get something wrong, you see exactly how to solve it next time. TTP also lets you track your progress, which helps you focus your time on topics that need the most review.
TTP’s timed quizzes and full-length practice exams build your test-taking endurance. This helps you manage the time pressure of the real GRE quant section.
Verbal Preparation and Techniques
The verbal section measures your ability to understand written material, reason with words, and analyze texts. TTP divides verbal prep into vocabulary, reading comprehension, and critical reasoning.
You study commonly tested words with interactive lists and quizzes. This helps you memorize definitions and use them in sentences. TTP teaches you how to break down complex passages, find main ideas, and answer inference questions.
The program covers question types like Text Completion and Sentence Equivalence, teaching you to look for clue words and eliminate wrong choices. Short explanations are provided for every answer so you can see where mistakes were made.
Daily practice sets keep your skills sharp and make reviewing easy. TTP’s analytic tools show which verbal topics you master and which need more work.
Maximizing Your GRE Score With TTP
Consistent use of TTP’s system can significantly increase your GRE score. TTP gives you a personalized study calendar based on your target test date and the score you need.
You set clear goals for both quant and verbal. The dashboard tracks your accuracy and speed, letting you see improvement over time. With handy progress charts, you can adjust your study plan if any area of your GRE prep falls behind.
TTP includes EA and GRE practice questions, helping you compare your performance against real test standards. The review system saves missed questions for later, so you do not repeat the same errors.
Official test-day strategies, such as pacing guidelines and guessing tactics, are included. This helps you stay calm and confident, so you can focus on getting your best GRE score.
User Experience and Technical Access
You can access TTP GRE through a secure web portal with an easy sign-in. The platform supports a wide range of networking protocols to meet your technical needs.
Sign In and Registration Process
To use TTP GRE, you first need to create an account. The registration form asks for your email, a password, and sometimes a verification code. The platform uses two-factor authentication (2FA) to add extra security.
After registering, you must sign in using your email and password. If you forget your password, you can reset it through an email link. Businesses can also register multiple users under one account for team access.
Here is a summary of access steps:
Step
Description
Registration
Email, password, 2FA
Sign In
Secure password entry
Password Help
Email-based reset option
Multi-User
Team and group access
Your information is encrypted during both registration and sign-in.
Platform Navigation and User Interface
TTP GRE’s interface is clean and simple. The main dashboard lets you access key tools like protocol analysers and connection monitors. Large buttons and clear icons make it easy to find features.
Menus are organized by category, such as traffic analysis, settings, and reports. The search function helps you quickly locate items like IPv6, TCP, or UDP monitoring tools.
You can customize your dashboard to highlight networking protocols that matter most to you, including IGMP, ICMP, or IPsec. Drag-and-drop panels let you organize data views for fast access. Tutorial pop-ups offer help if you get stuck.
Navigation is designed to reduce steps. You can go from login to launching protocol checks within minutes.
Support for Networking Protocols and Security
TTP GRE supports a wide variety of networking protocols to fit many technical uses. You have tools for both basic and advanced needs:
Core IP protocols: IPv4, IPv6, TCP, UDP, ICMP, IGMP, IP-in-IP, ICMP6, and IP6 Destination Options.
Security protocols: IPsec, IPsec ESP, and TLS. You can enable encryption and monitor secure tunnels.
Special protocols: RSVP, NetBLT, IRTP, DDP, ISO TP4, NARP, TLSP, XNS IDP, MFE NSP, and more.
Older and rare protocols: EGP, PUP, SAT EXPAK, BBN RCC MON, CFTP, Kryptolan, and Chaos.
Firewalls and routing features help protect your data. Logging tools keep records of protocol activity, which you can export as reports. The platform is updated to handle new protocol standards and security patches for safer use.
Frequently Asked Questions
TTP GRE offers different resources such as practice tests and skill-building tools for GRE preparation. You will also find information on technical requirements and the effectiveness of the program for English learners.
What type of practice tests does TTP GRE offer?
You can use full-length GRE practice tests, section-specific tests, and question banks through the TTP GRE platform. Each practice test is designed to match the format and timing of the real GRE exam.
How can TTP GRE help in improving my quantitative skills?
TTP GRE provides step-by-step lessons, guided practice problems, and detailed explanations for math questions. You will get targeted practice in areas such as algebra, geometry, arithmetic, and data analysis to help strengthen your quantitative skills.
Are the study strategies from TTP GRE effective for non-native English speakers?
TTP GRE organizes study plans and explanations in clear, simple English. This can help non-native English speakers understand complex topics more easily and improve their test-taking strategies.
What are the system requirements for accessing the TTP GRE online platform?
You need an updated web browser like Chrome, Firefox, or Safari. A stable internet connection is required. TTP GRE can be used on most computers, tablets, or smartphones.
Many people wonder what the average LSAT score without studying looks like before they start their prep. Most test-takers who take the LSAT without studying score around 150, which is right in the middle of the 120-180 scale.
Knowing the average LSAT score without studying helps you understand what to expect and how much you may need to prepare. This can also help you decide if skipping prep is a risk worth taking for your law school goals.
Key Takeaways
Most people score about 150 on the LSAT without studying.
Understanding LSAT scoring can set realistic expectations.
Law schools expect higher scores than the average score without prep.
What Is The Average LSAT Score Without Studying?
Most people who take the LSAT without any preparation receive results close to the national average, but their scores can vary based on several factors. Research data and score conversion tables give a clearer picture of what to expect if you attempt the Law School Admission Test without studying.
Typical Raw Scores for Unprepared Test Takers
If you take the LSAT without studying, your score will likely fall between 140 and 148. The LSAT is scored from 120 to 180, with 120 being the lowest possible score. The national mean LSAT score usually sits near 151-152.
A raw score is simply the number of questions you answer correctly out of about 75-76 graded questions (excluding the experimental section). With random guessing, you might get about 50% correct, which is around 38 out of 75. That converts to a scaled score in the mid-to-high 140s using the LSAT scoring table.
Factors That Influence Baseline LSAT Performance
Your baseline LSAT performance without prep can depend on several variables. Reading comprehension skills, ability to analyze logic, and comfort with standardized test formats all affect your raw score. Test anxiety or unfamiliarity with timing can also lower your results.
Some people naturally understand the test’s logic games or reading passages better than others. If you have a strong academic background, especially in reading and logical thinking, you may score slightly higher even without studying. Still, scoring much above 150 without prior exposure is rare.
Statistical Insights From National Research
Data collected by the Law School Admission Council (LSAC) shows a clear pattern. Most test takers’ scores cluster near the average even if they don’t prepare, with very few unprepared takers exceeding 155.
A national research study found the following results:
Score Range
Percent of Unprepared Takers
140-145
40%
146-150
35%
151-155
20%
156+
5%
These findings suggest you should expect a score in the mid-140s if you take the LSAT cold. Preparing is the most effective way to increase your score above this typical range.
Understanding LSAT Scoring and Test Sections
The LSAT test uses a scaled scoring system from 120 to 180. Each multiple choice section measures a different skill, such as logic or reading. There is also an unscored experimental section, and a separate writing section.
Multiple Choice Sections Overview
The LSAT test has four main sections that count toward your score. These include one Reading Comprehension, one Analytical Reasoning (also called Logic Games), and two Logical Reasoning sections. Each section is multiple choice.
You will also face a fifth section that doesn’t count toward your score. This is the experimental section. It can be any one of the multiple choice section types, but you won’t know which one is experimental.
You get about 35 minutes for each of these sections. All questions have the same value, so each correct answer helps your total score.
The Role of Analytical Reasoning and Logic Games
The Analytical Reasoning section, often called Logic Games, tests your ability to make deductions and organize information. You’ll get short puzzles with rules and a set of questions for each. An example might involve seating people in a row with certain restrictions.
Skills tested here:
Making deductions
Identifying relationships
Working through complex setups
Logic Games can look complicated at first but reward clear thinking and organization. The section usually contains four games, each with 5–7 questions.
Logical Reasoning and Reading Comprehension Challenges
Logical Reasoning sections measure your ability to analyze arguments, spot flaws, and conclude. These sections make up about half of your total score. You’ll read short passages and answer questions about what’s being argued and how it’s being supported.
Reading Comprehension focuses on your ability to understand and interpret longer texts. You’ll get four passages, each followed by several questions. The passages cover different subjects, including law, science, and the humanities.
Both sections challenge you to find main ideas, infer meaning, and evaluate reasoning. Reading quickly but carefully is important.
How LSAT Scores Without Studying Affect Law School Admissions
Your LSAT score carries weight in law school admissions. Scoring low without studying may affect your chances at certain schools, your ability to get scholarships, and your predicted performance in law school.
LSAT Scores as Predictors of Law School Success
The LSAT is designed to measure skills needed for law school, like reading comprehension, logical reasoning, and analytical thinking. Admissions committees use this test to compare applicants from different backgrounds.
If you take the LSAT without preparation, your score might not reflect your true abilities. A low score can suggest to admissions officers that you may struggle in their programs. Many law schools rely on LSAT scores, along with GPAs, as the two main predictors of how well a student will do.
Your chances of getting into a “top” law school may drop sharply with a below-average score. Prepared or not, the LSAT is a standardized tool, so your results are compared against thousands of other test-takers each year.
Correlation With GPA and Law School Grades
Many schools use regression analyses to study the relationship between LSAT scores, undergraduate GPA, and law school grades.
The correlation between LSAT scores and first-year law school grades is moderate. Research shows LSAT scores usually predict law school grades slightly better than GPA alone.
Here’s a simple comparison table:
Factor
Correlation With Law School Grades
LSAT Score
Moderate
Undergraduate GPA
Slightly lower
Both Combined
Strongest
Schools often view both LSAT and GPA together to make admission decisions. Weakness in one area (like a low LSAT) can sometimes be offset by a strong GPA. Still, low LSAT scores gained without studying can hint at lower potential for academic performance in law school classes.
Impact on Admissions and Scholarship Opportunities
Law school admissions officers usually look for a “good” LSAT score, often above the median for their program. A below-average score, especially from not studying, can put you at risk of being rejected by more competitive schools.
Scholarship opportunities also depend on your test score. Financial aid packages and merit scholarships are often reserved for those with higher LSAT results. Without a strong score, you might pay full tuition or get less aid.
Some law schools may still admit applicants with lower scores if other parts of their application stand out, but your chances are lower. Data from many law schools shows that higher LSAT scores often lead to more acceptance letters and bigger scholarship offers.
Comparing LSAT Preparation Approaches and Outcomes
Different ways to prepare for the LSAT lead to very different scores and experiences. Some people use formal LSAT prep courses, while others rely on practice tests or official prep materials.
Difference in Scores: No Prep vs. LSAT Prep Courses
If you take the LSAT without studying, your score will likely be close to the average raw score, often around 150 out of 180. Most test-takers who do not prepare score in the 145–153 range.
LSAT prep courses, such as The Princeton Review and Kaplan, can help raise scores by teaching strategies, focusing on weak areas, and providing realistic practice. Some students who take high-quality courses may see their scores go up by 5–15 points.
Here’s a simple comparison:
Preparation Type
Typical Score Range
Score Increase
No Preparation
145–153
—
Prep Course
155–165+
5–15 points
Better scores often mean more law schools and scholarships become available to you.
Practice Tests and Official LSAT Prep Resources
Practice tests help you get used to LSAT question types and time limits. Taking official LSAT practice tests, especially those released by LSAC and free options from Khan Academy, can boost your comfort and accuracy.
Using both timed and untimed practice tests lets you spot where you make mistakes and track improvement. Most experts say you should take several full-length tests before the real exam.
Official resources and practice from real test questions matter more than just reading review books. They match the format and logic of the actual LSAT.
Influence of Study Time and Endurance
Your score can depend on how much you study and your test endurance. Studying a little each week for several months usually works better than trying to cram in a few days.
Endurance is important. The LSAT is about three hours long, so building concentration by taking regular, full-length practice tests helps your mind and body adjust to the stress.
Many students who increase their study hours over 2–3 months see steady improvement. Small, regular study sessions tend to build stronger skills than occasional, long study periods.
Alternatives to the LSAT: GRE and Other Standardized Tests
Some law schools accept the GRE as an alternative to the LSAT. The GRE tests different skills, such as math and vocabulary, so your strengths may change which test is better for you.
If you have taken other standardized tests like the SAT or ACT, you probably have some idea of how you handle test days and study plans. This could help you choose between different law school tests or focus your studies.
Not every law school takes the GRE, so check with each school before deciding. Some students find the GRE format friendlier or less stressful than the LSAT.
Frequently Asked Questions
Taking the LSAT without studying often leads to lower scores, which can impact your chances of getting into law school. Most first-time test takers score near the average, but preparation usually helps improve these results.
What is considered a good LSAT score for someone who hasn’t studied?
A typical unprepared test taker scores between 145 and 153. A score above 150 without studying is seen as decent by many test-takers. Most top law schools look for scores much higher than this range.
Can you achieve a competitive LSAT score on the first attempt without preparation?
It is unlikely to get a highly competitive score like 160 or above without studying. Most people need some preparation to do well. Without preparation, your first attempt likely reflects only your raw skills.
What are the typical results of taking an LSAT practice test without prior studying?
You will probably get a score near the national average, which is about 150. Many people find logic games and reading comprehension sections tough without practice. Your performance can reveal your current strengths and weaknesses.
How does an average LSAT diagnostic score compare to one with adequate preparation?
Most people improve their scores by at least 5 to 10 points after studying. Without preparation, your score is usually lower than it could be after some practice and review. Studying helps you understand question types and test strategies.
Is it advisable to take the LSAT without any prior studying, and what might the outcomes be?
Taking the LSAT without studying is not recommended if you want to get into a good law school. Low scores are harder to improve in later attempts due to some schools’ policies on multiple scores. Preparation gives you a better chance of reaching your target score.
What impact does not studying have on your LSAT score compared to those who do study?
People who study for the LSAT usually score higher. Not preparing can keep your score around the average mark or just above it. Those who prepare can reach scores needed for more selective schools.
The LSAT—short for the Law School Admission Test—is a crucial step in the law school admissions process. Whether you’re a college student, a working professional, or someone considering a career shift, you’ve likely wondered: Can anyone take the LSAT?
The simple answer is yes, almost anyone can. However, there are nuances and best practices you should consider before signing up. In this comprehensive guide, we’ll walk through who can take the LSAT, who should wait, how to register, and how to prepare effectively.
What Is the LSAT
The LSAT is a standardized test used primarily by law schools in the United States and Canada to evaluate applicants. It focuses on skills essential for law school success—reading comprehension, logical reasoning, and analytical thinking.
The test consists of multiple-choice sections and an unscored writing sample. It’s not based on legal knowledge, but rather on your ability to think like a lawyer.
Who Administers the LSAT
The Law School Admission Council (LSAC) is responsible for developing, administering, and scoring the LSAT. LSAC also operates the Credential Assembly Service (CAS), which centralizes law school application documents.
Most law schools require applicants to submit their LSAT scores through their LSAC account. The council also sets policies regarding test-taking frequency, accommodations, and misconduct.
Are There Educational Prerequisites?
Surprisingly, no formal education is required to register for the LSAT. You don’t need a high school diploma, GED, or college degree to take the test.
That said, most test-takers are college students or graduates. This aligns with law schools’ admissions requirements, which typically include a completed undergraduate degree.
While anyone can technically take the LSAT, those without a college education are unlikely to be eligible for law school admission immediately after the exam.
Are There Age Requirements?
There are no official age restrictions for the LSAT. Whether you’re 17 or 70, you can register and sit for the exam.
In practice, most test-takers are between the ages of 20 and 30. This age group generally aligns with the traditional law school applicant pool.
Younger test-takers should be mindful that LSAT scores are only valid for five years. Taking the test too early might mean you’ll need to retake it later.
Is the LSAT Open to International Applicants?
Yes, international students are welcome to take the LSAT. Many law schools in the U.S. and Canada accept applicants from all over the world, provided they meet the educational and visa requirements.
Some programs specifically target foreign-trained lawyers or offer international law tracks. It’s important to check with each school about specific admissions policies.
The LSAT is offered internationally and, more recently, in an online format with remote proctoring—making it more accessible than ever for global applicants.
How Do You Register for the LSAT?
To register, you’ll need to create an account on LSAC.org. Once logged in, you can select a test date, choose between in-person or online testing, and pay the registration fee.
As of 2025, the fee for the LSAT is approximately $222, not including optional services like score previews or additional reports. Registration closes several weeks before the test date, so plan accordingly.
LSAC also offers fee waivers for those who meet certain financial criteria. These waivers can cover not only the LSAT fee but also related services like the CAS.
Are There Restrictions on How Many Times You Can Take the LSAT?
Yes. While you can take the exam (LSAT) more than once, LSAC places firm limits on frequency:
Up to 3 times in a single testing year
No more than 5 times within 5 years
A maximum of 7 times in your lifetime
These limits are designed to discourage over-testing and ensure fairness in the admissions process. Multiple scores are reported to law schools, but many institutions consider your highest score.
Some law schools also look at score trends, especially if there’s a significant difference between attempts. So it’s important to prepare thoroughly each time.
What About Criminal Records?
Having a criminal record does not disqualify you from taking the LSAT. LSAC does not screen for criminal history during registration.
However, you will need to disclose criminal or disciplinary issues when applying to law schools. These disclosures are part of the character and fitness evaluation required for eventual bar admission.
Taking the LSAT is still possible and can be worthwhile, even if you have a past record. Just be honest and prepared to provide context during the application process.
Does LSAC Offer Accommodations?
Yes. LSAC provides reasonable accommodations for test-takers with documented disabilities. These may include:
Extended time
Breaks between sections
Screen reader compatibility
Alternative testing formats
You’ll need to submit official documentation and apply early, as approval can take several weeks. LSAC reviews each request on a case-by-case basis.
Accommodations are also available for those with limited access to technology, especially for remotely proctored exams. Contact LSAC directly for guidance.
Who Should Take the LSAT?
You should consider taking the LSAT if:
You’re planning to apply to law school within the next 1–2 years
Your target schools require or prefer the LSAT over other tests
You are committed to pursuing a JD degree
The LSAT is still the most widely accepted law school admissions test, even though some schools also accept the GRE. A strong LSAT score can help you stand out and potentially earn scholarships.
Some people rush into the LSAT without being ready. You should hold off if:
You’re unsure whether law school is the right path
You haven’t prepared adequately
You’re considering programs that don’t require the LSAT
The LSAT is not just expensive—it’s mentally demanding and carries lifelong score implications. Use your limited attempts wisely by planning and preparing thoroughly.
What’s the Best Way to Prepare?
Timeline
Most successful test-takers begin studying 3 to 6 months before their exam date. This allows time to build skills, take practice tests, and strengthen weak areas.
Cramming doesn’t work well for the LSAT. The exam requires endurance, strategy, and careful reading under time pressure.
Study Materials
Resources range from free (e.g., Khan Academy’s official LSAT prep) to premium (e.g., tutoring, live classes, or comprehensive courses). LSAC also offers official practice tests, which are essential tools.
The best prep method depends on your learning style, target score, and budget. Whatever you choose, make sure you simulate real test conditions often.
What Happens After the LSAT?
Score Reporting
Your score is typically available about three weeks after the test date. You’ll be notified by email and can view your score through your LSAC account.
LSAT scores range from 120 to 180, with a median around 150. Law schools may receive all your scores from the past five years.
Some schools “super-score” (take your highest), while others look at trends or averages. Knowing this can help guide your decision to retake.
Should You Retake?
If your score is below your target range, a retake may be a good idea. Just make sure to change your prep approach—repeating the same mistakes won’t yield better results.
Keep in mind that your test history is visible to schools. Too many retakes without improvement could raise questions.
Final Thoughts: Yes, You Can Take the LSAT—But Should You?
So, can anyone take the LSAT? Technically, yes. There are no education, age, or nationality restrictions to sit for the exam.
But whether you should take the LSAT depends on your goals, preparation, and timing. It’s not a test you take just for fun—it’s a serious investment in your future legal career.
If law school is your destination, the LSAT is your gateway. Approach it with purpose, and you’ll give yourself the best possible chance of success.
Scroll back a decade or two—math education was all chalkboards, thick textbooks, and perhaps the occasional desktop software. Fast forward. Now? It’s browsers. Not apps. Not downloads. Browsers.
Strange, right? But no. Perfect, really. Because the rise of math EdTech platforms optimized for browsers isn’t just a fleeting shift in design preference—it’s a complete reinvention of how students engage with numbers, logic, and abstract reasoning.
What’s the catalyst behind this seismic change? Accessibility, flexibility, and the relentless forward-march of digital transformation in education.
Why Browsers? Why Now?
Here’s the twist: you don’t need a high-end device to run a math lesson anymore. You need a screen, an internet connection, and a browser—Chrome, Firefox, Edge, even Safari if you’re brave.
No app store approvals. No memory-hogging installs. No device compatibility drama. Just open a tab and go. According to a 2023 report by HolonIQ, browser-based EdTech usage in K–12 classrooms jumped by 47% since 2020. Forty-seven. That’s not marginal; that’s monumental.
Behind the scenes, tech stacks have matured. WebAssembly, HTML5, JavaScript frameworks—boring words for the average user, but gold for developers. These innovations allow for interactive graphs, real-time equation solving, gamified math challenges—all within the browser.
Beyond Worksheets: Interactivity in the Browser
Old digital math tools? They mimicked paper. Static. Predictable. A glorified PDF. Today’s browser-based platforms? Something else entirely.
Imagine this: a student solves a quadratic equation and immediately sees a visual graph adjust in real-time. They get hints, drag sliders, manipulate variables—and if they make a mistake, the system nudges them gently toward the answer, rather than slapping a red X on their screen.
AI Math Problem Solver is just an example of math platforms optimized for browser use. You can download it here, directly from the Chrome Store. It works great with formulas and functions of any complexity. Just take a screenshot of the problem, and you will get a step-by-step solution.
We’re talking about active learning. Engagement. Not just consumption. According to EdSurge, students using interactive browser math tools showed a 23% improvement in problem-solving retention compared to traditional digital worksheets. That’s not just a win. That’s a breakthrough.
Democratising Math: A Browser in Every Pocket
Let’s not forget the big picture. Equity. Access. Fairness.
EdTech platforms optimized for browsers are—by design—accessible across devices and economic backgrounds. In many underserved regions, students don’t own personal tablets or installable software. But they do have shared school Chromebooks or budget Android phones with a browser.
This matters. A lot. In a UNESCO 2022 global learning access study, browser-based platforms ranked among the top three most-used digital resources in low-income educational programs.
Here’s the magic: when math EdTech lives in a browser, it lives everywhere. A rural student in Kenya, an urban teen in Mumbai, and a homeschooled child in Oregon—all can use the same interactive platform with nothing more than a browser and bandwidth.
Personalization Without Pressure
Let’s talk about algorithms. Not just the mathematical kind, but the AI and data-driven systems running behind the scenes.
Modern browser-optimized math platforms don’t just serve the same problem set to every student. They adapt. Learn. Suggest. Recommend.
User A struggles with fractions? The platform notes it, adjusts the difficulty, and loops in helpful visuals. User B races through linear equations? The platform scales up the complexity and offers bonus content.
This isn’t one-size-fits-all education anymore. It’s tailored math journeys—personalized without becoming invasive or overwhelming.
A survey by LearnPlatform in 2024 found that 62% of teachers preferred browser-based platforms precisely because of their ability to personalize learning paths without requiring additional teacher input.
No extra work. Just better outcomes.
Pitfalls? A Few. Perfection? No.
Let’s not romanticize. Browser-based doesn’t mean bulletproof. Lag can ruin an experience. Offline access remains tricky. Some platforms still rely heavily on JavaScript rendering, which can glitch on older devices.
And then there’s the data question. With every click and keystroke monitored to “optimize” experience, privacy concerns bubble up. Who owns the student data? How is it stored? Used?
There’s still work to do—on regulation, transparency, and safeguarding. But the momentum isn’t slowing. And the benefits? Arguably outweigh the hurdles.
A Glimpse Ahead: What Comes Next?
Already, some platforms are experimenting with augmented reality, directly in-browser. Picture this: a student rotates a 3D geometry figure on their desk using just a webcam and a web app.
Web-based voice recognition is improving, too. Soon, solving equations might involve simply speaking them aloud.
Even AI-generated tutoring via browser tabs is no longer science fiction—it’s on the near horizon. The goal? Not to replace teachers, but to amplify their reach and make learning constant, contextual, and curiosity-driven.
Conclusion: The Browser Becomes the Classroom
It snuck up on us. Quietly. Almost invisibly. But the browser has become the new classroom for math learners. No walls. No bells. No boundaries.
Just a screen. An open tab. And a problem waiting to be solved.
As the rise of math EdTech platforms continues, one thing is clear: the future of learning isn’t stored in a cabinet or printed in a book—it’s streamed, live-rendered, and optimized for the browser you’re using right now.
Which begs the question: if math is everywhere, and the tools are already in your pocket—what’s stopping you?
Trying to figure out when you should start studying for the LSAT can feel overwhelming with so much advice out there. Most people should begin studying three to six months before their test date, but your timeline depends on your own schedule and how much time you can study each week. Starting early can help keep stress low and give you more time to learn for the test.
Making a solid plan early will help you feel more confident and ready on test day.
Key Takeaways
Begin studying three to six months before your LSAT test date.
Choose your timeline based on your schedule and study needs.
Consistent and early preparation leads to better results.
Understanding LSAT Timing and Importance
The Law School Admission Test (LSAT) is a key part of the law school application process. Knowing when to take the test and how it is used can help you plan and prepare more effectively.
How the LSAT Fits into Law School Admissions
The LSAT is required by almost all law schools in the United States and Canada. The test measures skills like reading comprehension, logical reasoning, and analytical thinking.
Your LSAT score is sent to law schools through the LSAC, which handles most of the application process. Schools use your score to compare you with other applicants in a fair and standard way.
Some law schools use the LSAT score as the most important part of your application, while others balance it with your GPA, letters of recommendation, and personal statement. Preparing for the LSAT early gives you more time to build the skills that matter for the test.
Typical LSAT Testing Schedule
The LSAT is offered multiple times each year. Most often, it is given in January, February, April, June, August, September, October, and November. You can take the LSAT up to three times per testing year and up to seven times in a lifetime.
LSAC recommends registering as early as possible because spots can fill up quickly. Most students aim to take the test about a year before they want to start law school. For example, if you plan to start law school in Fall 2026, you should take the LSAT by the summer or fall of 2025.
Planning your testing schedule can give you more chances to retake the exam if needed. Law schools usually consider only your highest LSAT score, but it’s important to check each school’s policy.
Role of LSAT Score in Applications
Your LSAT score is a core factor in law school admissions. It helps schools decide if you have the skills needed for legal study. Many top law schools publish the average LSAT scores of their admitted students, and a higher score can make your application stronger.
Law schools may use cutoff scores or median scores when reviewing applications. This means having an LSAT score in the school’s range increases your chances of admission.
Some law schools are starting to accept other tests, like the GRE, but most still require the LSAT. You need to know the score requirements of the schools you want to apply to and allow time to retake the test if you need a higher score.
Key Factors in Deciding When to Start LSAT Studying
Your best starting point for LSAT studying depends on your current year in college, the demands of your major, your GPA, and how well you understand each section on the LSAT. Balancing your coursework and test prep is necessary for building a strong law school application.
Your College Year and Academic Calendar
When you begin LSAT prep often fits around your college year and school calendar.
If you are a sophomore or junior, starting LSAT studying about 6-12 months before your planned test date gives you enough time.
Use summers or lighter academic terms if possible, so you can focus on LSAT prep without losing track of your coursework.
Think about deadlines for law school applications and factor in time for potential retakes.
Many students aim for the June or September LSAT dates right after their junior year. This schedule lets you focus on school during the year and do most of your prep when classes are lighter. Planning around your college calendar can keep your stress level lower.
GPA and Coursework Considerations
Your GPA is one of the main parts of your law school application, along with your LSAT score.
If your classes are tough or your major is demanding, avoid cramming LSAT studying during your hardest semesters.
Try to pick a study period when your coursework is manageable. Heavy course loads can lower both your GPA and LSAT prep quality.
Some majors require more reading and writing, which may help with LSAT sections like Reading Comprehension, but you’ll still need to practice LSAT-specific skills.
Check your school’s grading periods and assignment deadlines before you commit to an LSAT prep schedule. Use a planner or calendar to block out study times and stay organized.
Understanding the LSAT’s Sections
The LSAT has three main question types: Reading Comprehension, Analytical Reasoning (logic games), and Logical Reasoning.
If you are strong in standardized tests, you might pick up some sections quickly, but each part of the LSAT needs focused practice.
Some students find Analytical Reasoning challenging if they haven’t seen logic games before. Start early if you are less familiar with logic concepts.
Reading Comprehension questions often use dense, formal writing. Regular practice is key, even if you read a lot for your major.
Make a study plan that covers all three LSAT sections. Use official prep books, sample tests, and practice problems. Track your progress and adjust your focus based on which areas you struggle with the most.
Effective LSAT Prep Strategies and Timelines
You need to plan your LSAT prep carefully, with a focus on time management, study methods, and the specific LSAT test date you choose. Picking the right timeline and strategies will help you balance studying with your other commitments and improve your performance on this important standardized test.
Common Study Timelines by Test Takers
Most students start preparing for the LSAT about three to six months before their test date. If you have a strong academic background or are comfortable with standardized tests, you might need less time, around two to three months. However, those with busy schedules or less test experience often need longer.
Here is a table showing typical LSAT prep timelines:
Prep Duration
Hours per Week
Best for
2 Months
15-20
Experienced test takers
3-4 Months
10-15
Average students
5-6 Months
5-10
Busy students or new to LSAT
You should consider your starting score, your goal score, and how many hours you can study each week. Take a practice test early to see where you stand.
Balancing LSAT Studying with Other Commitments
It can be hard to fit LSAT prep into your life, especially if you are working or attending classes. Make a study plan that matches your weekly routine. Break your study time into shorter sessions if you are busy.
Use a digital or paper calendar to block out study periods. If you get tired, swap long sessions for several 30-minute blocks. Consistency helps more than long, occasional study days.
List all your major commitments—jobs, school, family—and decide what you can adjust. If you have less time during the week, add more study hours on weekends.
Preparing for Specific LSAT Administrations
Many students choose to take the June LSAT or other official administrations based on law school application cycles. Check application deadlines for your preferred schools and count back to choose the right test date.
If you want to apply early, aim for the summer or fall LSAT dates. For each administration, registration deadlines are usually about six to eight weeks before the exam.
Create a countdown to your LSAT date. This keeps your prep on track. Review full-length practice tests under timed conditions, matching the official test day as closely as possible.
Sign up for email reminders from the Law School Admission Council (LSAC) to avoid missing important dates. Make sure you know the rules for your specific LSAT administration, especially for digital or in-person test formats.
Frequently Asked Questions
There are specific timelines and strategies for LSAT preparation. Balancing your study with schoolwork and starting at the right time can help you get better results.
How many months in advance should one begin LSAT preparation?
You should start studying for the LSAT about three to six months before your test date. This gives you enough time to review materials, take practice tests, and improve your weak areas.
What is the optimal timeline for studying for the LSAT?
Most people find that studying 10-15 hours each week for about three to four months is enough. If your schedule is busy, you might need to start earlier or study more during weekends.
Can starting LSAT prep in high school give you an advantage?
You do not need to start LSAT prep in high school. High school is early, and the test measures skills you will develop in college. Focus on doing well in your classes and building strong reading and logic skills.
What college year is most suitable for beginning LSAT study?
Many students begin LSAT study in their junior year of college. This timing lets you take the test and get your results before applying to law school in your senior year.
How can I balance LSAT preparation with my college coursework?
Make a schedule that sets aside specific times each week for LSAT prep. Try to study when you feel most alert, and adjust your workload if you have big exams or papers coming up.
Does early LSAT preparation improve chances of admission to top law schools?
Starting early can lead to a higher LSAT score, but only if you use your time effectively. Law schools care about your highest LSAT score, not how early you started studying. Focus on quality prep over a long period instead of just starting early.
Are you wondering how many times you can take the LSAT? You are allowed to take the LSAT up to three times in a single testing year, five times within the current and five past testing years, and a total of seven times in your lifetime. Knowing the exact retake limits helps you plan your testing strategy and avoid wasting a chance.
Understanding the LSAT retake policy matters if you are aiming for your best score. Each attempt counts, so it’s important to know your options before signing up again.
Key Takeaways
There are strict limits on how many times you can take the LSAT.
Planning ahead helps make the most of your allowed attempts.
Know the rules before you choose to retake the test.
LSAT Retake Policies and Limits
LSAC has strict limits on how many times you can take the LSAT. Recent rule changes affect both retake policies and how law schools may view multiple LSAT scores.
How Many Times Can You Take the LSAT
You can take the LSAT up to three times in a single testing year (from August 1 to July 31). If you want to take the LSAT more than three times, the LSAC allows five total attempts within five testing years.
You are limited to seven total lifetime attempts. Any canceled or incomplete tests count toward these totals. You cannot exceed these limits unless you are granted a rare exception by LSAC for special cases.
If you reach your testing limit, you will not be able to register for more LSAT dates. Make sure to track your attempts carefully.
Attempt Limit
Number Allowed
Per Testing Year
3
Across 5 Years
5
Lifetime
7
LSAC Testing Rules and Recent Policy Changes
The Law School Admission Council (LSAC) updates its rules and policies from time to time. In recent years, LSAC lowered the total number of LSAT attempts allowed over a lifetime to seven. This includes all regular, accommodated, and even canceled test administrations.
LSAC also tracks LSAT scores and test attempts across all testing formats. If you cancel your score or do not attend your scheduled test, the attempt still counts toward your limit. Testing accommodations do not change the number of attempts allowed.
LSAC sometimes grants extra attempts after special requests, typically only for major reasons like medical issues or military service. Most test-takers will not receive exceptions to these policies.
Impact of Multiple LSAT Attempts
When you take the Law School Admission Test more than once, all of your LSAT scores are reported to law schools. Some schools focus mostly on your highest score, while others might consider your average or all reported scores.
Taking the LSAT multiple times can show persistence and motivation. However, frequent retakes may raise questions in some admissions processes, especially if your scores do not improve.
LSAC does not penalize you for retaking, but it is important to prepare well before each test. Use each attempt wisely. Law schools can see every test you take, whether you cancel the score or not, unless the test was an administrative cancellation.
Strategic Considerations for Retaking the LSAT
Deciding when to retake the LSAT can be important for your chances with law school admissions. There are practical factors, costs, and preparation tips that can help you make the best choice for your situation.
Effect on Law School Admissions
Taking the LSAT more than once is common and not usually a problem for most law schools. Many schools, including the University at Buffalo School of Law, look at your highest LSAT score rather than averaging all your scores. However, some competitive schools may notice big differences between your test attempts.
A large score increase might make admissions officers wonder about your prep methods or if there was a special reason for the change. Still, most admissions committees will focus on your best score if you show improvement. Review each school’s official policy before making a decision.
If you have already taken the test multiple times, consider whether further attempts are likely to boost your score enough to make a difference for your chosen schools. Unnecessary retakes can waste time and money.
Prepping for Multiple Attempts
Good LSAT prep is essential, especially if you plan to take the test more than once. Try to focus on your weak areas, such as analytical reasoning, reading comprehension, or logical reasoning. Use official practice tests to check your progress and get used to the format.
Set a study schedule and use a mix of resources to practice for each section, even the LSAT writing section. Track your results to see if your practice test scores are improving. If you do not see steady progress, adjust your study plan or consider a prep course.
Make time for review between attempts to avoid repeating the same mistakes. Improving your prep habits can help you raise your score and meet the admission requirements of your target law schools.
Choosing Your Test Date
Pick your test date with care. Make sure you have enough time to study and take practice tests before your next LSAT. Look at your application deadlines for each law school, as a late test date could delay your application and affect your chances.
LSAT dates fill up fast, and slots at local test centers can get booked early. Register as soon as you are ready to secure your preferred date and location. Try not to rush to take the test again unless you have made real progress in your prep.
If you plan on applying to law school soon, aim to take the LSAT far enough in advance for your scores to reach schools on time. Keep the admissions process and key deadlines in mind when scheduling your next attempt.
Fee Waivers and LSAT Costs
Taking the LSAT can get expensive, especially if you plan to retake it. The test fee includes one official LSAT, one LSAT writing sample, and access to some official prep resources. Extra fees apply for sending your scores to more law schools or for additional services.
Fee waivers are available to lower costs. The Law School Admission Council (LSAC) offers fee waivers for people who qualify, helping cover the costs of the test, LSAT prep, and CAS registration. If cost is a concern, apply for a fee waiver early through the LSAC website.
Plan your budget before registering, especially if you may need multiple attempts. Careful management of your prep and test dates can help you avoid extra fees and ensure you can afford all parts of the law school admissions process.
Frequently Asked Questions
You can take the LSAT more than once, but there are strict limits you must follow each year and over your lifetime. Law schools can see your full LSAT testing history and consider it as part of your application.
What is the limit on the number of times you can sit for the LSAT?
You may take the LSAT up to three times in a single testing year. There is a five-time limit within a five-year period.
You can only take the LSAT seven times total in your lifetime.
Does retaking the LSAT look bad to law schools?
Law schools will see all of your LSAT scores, not just your best one.
Most schools consider your highest score, but some may review your full testing record.
Are there restrictions on how many times you can take the LSAT in a single year?
Yes. You can only take the LSAT three times during one testing year.
The testing year lasts from August to June.
Will law schools be able to see all of my LSAT attempts?
Yes. Law schools see every reportable LSAT score and cancellation on your record.
They use this information when making admissions decisions.
Can retaking the LSAT improve my chances of acceptance?
If you increase your LSAT score, some schools may be more likely to accept you.
A higher score can also help you qualify for more scholarships.
Is there a penalty for taking the LSAT multiple times?
There is no official penalty from LSAC for multiple attempts.
However, some law schools may ask why you tested several times. Multiple low scores can raise questions, but most schools focus on your highest score.
We all want to do things faster. But each connection to the internet reports to its own digital overlord. That includes the tech manufacturers, business associates, and advertising partners.
Increasingly, personal data finds its way to bad actors, resulting in an unprecedented increase in fraud, stolen identities, and cyber scams. Fortunately, it’s not that hard to be safer and more private online. It starts with small, basic steps.
Good Security Starts With Good Privacy
Digital security, or cybersecurity, means securing your devices and accounts against hackers or other unauthorized access. Privacy, on the other hand, means stopping people or companies (including Big Tech) from monitoring your activities.
Unfortunately, intimate digital data from web tracking and snooping has become so easily available that our lack of privacy is starting to endanger our cybersecurity.
3 Practical Daily Privacy Tips
Data breaches are far more common than people think. It’s not just big banks or powerful companies that get breached. Cybercriminals regularly breach smaller businesses because they have fewer cyber defenses. However, these three privacy tips can help you:
Small businesses aren’t immune. Be cautious about sharing personal details with service providers like your gym or wellness spa, as they may lack strong cybersecurity.
Think before you share. Avoid oversharing lifestyle habits or following random social media accounts that could expose personal data.
Read before you agree. Terms and conditions often reveal how companies use your data — generic policies usually mean your information is used for marketing.
6 Practical Daily Security Tips
Use a VPN (Virtual Private Network). A VPN encrypts each device’s connection and makes it harder to take over one of your devices. For better privacy, you should install an Android or iOS VPN on each device. You can choose a different server location for different services. For example, you can connect to a server in your home city on your laptop for shopping. At the same time, you can find the best VPN and connect to a European city to live-stream sports games.
Set up encryption on your devices. This step will lock away sensitive information like work files, emails, and texts. Encryption scrambles the contents of the files, making them indecipherable to someone who tries to read them without using the correct decryption keys.
Install a good antivirus on each device. Also, install an antivirus on your home Wi-Fi router, which can close unauthorized incoming connections and block certain types of malware.
Review your login and password habits. You know your passwords should be long, strong, and complex. Sadly, that also makes it almost impossible to remember them. Use a good password manager to help you.
Add two-factor authentication (2FA). You’ll have to keep your phone or laptop with you to make sure you receive the authentication notification, but it is much safer. The alternative is getting a physical USB key that you can carry with you.
Turn on automatic updates on all your devices. Updates contain important security patches to protect you against new cyber exploits.
Pump up Privacy Measures To Enhance Your Digital Security
Every day, we share a large amount of personal data online. Each interaction is an opportunity for a hacker or fraudster to snatch our login details and other sensitive information.
Fortunately, basic measures can go a long way. For better cybersecurity, get an antivirus, VPN, and password manager and make them a routine part of your day.
Let’s face it. Life gets busy. Finding time to learn something new can feel impossible between work, errands, and endless scrolling. But what if your phone could help you grow smarter while stuck in traffic, waiting for coffee, or even walking the dog?
Thanks to a wave of brilliant mobile apps, learning on the go is no longer a fantasy. It’s part of everyday life. Whether you’re hoping to finally sharpen your business skills or just soak up a few big ideas, an app out there makes it fun and straightforward. No classrooms, no pressure — just bite-sized knowledge whenever and wherever you want.
Similarly, you can explore and learn different online games on your smartphone without spending a dime. You canplay demo games for free to master the strategy and develop a winning plan. No need for unnecessary spending; it’s just learning and having fun.
The challenge? Choosing the right one. That’s why we invite you to discover quick cashout gaming sitesand mobile learning apps that make smart use of your screen time and might change how you learn forever.
Top Mobile Learning Apps
The key to learning on the go is choosing apps that fit your style. Below are some learning apps you can use to begin your learning journey, regardless of location.
Coursera
Want to learn from top universities like Yale or Stanford while sitting on a train? Coursera gives you access to thousands of courses, some free and others paid, with certificates. It’s more structured and in-depth, great for learners aiming for career advancement.
Coursera offers both free and paid courses from professional tutors. It also offers certification from top universities worldwide and offline learning capabilities.
Duolingo
Language fluency is one of the most in-demand skills worldwide, and Duolingo puts it right before you. Duolingo gives you access to learn over 40 different languages, including English, Spanish, Dutch, Swahili, Latin, and more.
This app gamifies the language learning experience, making it addictive in the best way. With daily goals, streaks, and quick lessons, it’s perfect for learning a few new words during lunch breaks, bus rides, or even offline.
LinkedIn Learning
As a user of LinkedIn, you have access to LinkedIn Learning. It is a learning platform designed for everyone looking to grow and enhance their skills. LinkedIn Learning is home to thousands of professional courses across different fields that provide improved job prospects.
Skillshare
Think of Skillshare as a school for creatives like photographers, musicians, writers, and designers. Skillshare gives you access to an extensive library containing courses led by professional creators worldwide. It is also a flexible learning platform where you can learn anytime.
Quizlet
Quizlet is your go-to if you’re prepping for an exam or just want to memorize new info fast. Create your own flashcards or explore millions of sets made by other learners. It’s simple, effective, and perfect for quick learning bursts.
Start Learning: How to Access Mobile Learning Apps
Today, several mobile learning apps are created by top developers worldwide, making them reliable platforms for you to learn. It doesn’t matter whether you use an iOS device, a Xiaomi device, or any other Android phone. You only need to download the app from a mobile app store.
Criteria for Ranking Mobile Apps
Educational mobile apps have transformed learning for everyone. There are several mobile learning apps that you can use, each of which serves different purposes. For instance, mobile apps are created specifically for academicians, creatives, business owners, and more. We ranked the best mobile apps in their respective categories by evaluating the following features:
User Interface and Ease of Use
One of the first things to look out for in a mobile app is its user interface. Is it responsive and intuitive? Is the app laggy and inconsistent? These are essential qualities an app must meet to be considered high-quality. Since the primary purpose of an educational app is to facilitate learning, it needs to be built with a good user interface to ensure users enjoy smooth usage.
A good user interface is smooth and easy to navigate. This allows you to find your way around from the get-go without prior technical knowledge. You should be able to sign up, subscribe, and learn without external help.
Quality and Variety of Content
Learning apps must be equipped with extensive libraries. These libraries give users access to both beginner and professional courses, helping them build their skills and develop their careers.
But beyond that, a good mobile app for learning prioritizes quality education. It should collaborate with experts and tutors from different fields. An extensive library provides diverse topics, multiple learning styles, expertly crafted materials, interactive learning sessions, and updated courses.
Access to Premium or Advanced Courses
Most mobile learning apps offer premium or advanced courses. Although you might be required to subscribe to gain access to these courses, ensure the app version provides premium courses. An educational app with access to advanced courses helps you to prepare for professional exams, job interviews, etc.
Offline Learning Capabilities
Another notable feature to look out for is the app’s offline learning capabilities. For some students, learning with the internet can be distracting as they can easily drift off to social media apps and other platforms. This is why educational apps must prioritize offering their users flexibility and offline learning. However, you need to use a mobile learning app that doesn’t hinder your learning process even when you aren’t online.
Certification and Credibility
In today’s corporate world, certifications are highly important. A certificate doesn’t just show that you learned a skill or program. It also demonstrates your commitment to learning and personal development. This makes you stand out and boosts your chances of securing a job, an admission, or even a promotion in your current role.
But a certificate is one thing; credibility is another. You need to ensure your preferred educational app is a reputable and trustworthy learning platform, as this enhances your standing among others.
Pricing and Subscription Options
The best learning apps aren’t just known for their extensive libraries, quality tutors, and smooth user interface. They also offer flexible and affordable subscription plans.
Depending on your preferred package, there are several subscription options. Some apps give you access to all their courses once you subscribe monthly or annually. Meanwhile, for others, you might have to pay per course.
However, most of these apps require subscriptions to gain access to their premium services, including:
Advanced courses;
Certificates of completion;
Unique career tools.
Pros and Cons of Mobile Learning Apps
While mobile learning apps are known for their unique benefits, there are also downsides you need to consider before downloading a mobile learning app. Here are the pros and cons you can expect by using a mobile learning app:
Pros
Cons
You can learn anytime and anywhere
You might get distracted due to notifications from other apps
It gives you access to thousands of courses
You may experience fatigue due to the screen time
It is often cheaper than institutions and universities
Your interaction with tutors may be limited
You receive a professional certificate for completing a course or program
Conclusion
Learning doesn’t have to mean hours at a desk or thick textbooks. With the right app, your daily routine can become a series of small but powerful learning moments.
Learn what you want, when you want, and at a pace that fits your life. So, if you’ve ever felt like there’s no time to learn, it might just be hiding in your pocket. In this article, we recommend a list of the top mobile learning apps that can help you in your personal development journey.
When preparing for a standardized test, taking time to prepare is important. What many people don’t know is that there are automated tools that can assist in that preparation. These tools are designed to help streamline the studying and preparing stage of getting ready for these tests.
Standardized tests are designed to test your knowledge and skills on a subject; regardless of which test you are taking, going in without any preparation or study is a sure-fire way to fail. Smart students and dedicated people will make sure to spend plenty of time studying and preparing, setting themselves up to be able to pass these tests and setting themselves up for success.
Studying on its own is no guarantee of success, however, and there are many schools of thought on what exactly the best ways to study are. Thankfully for modern students, there are plenty of automated tools that can be used to enhance the act of studying.
These tools aren’t about doing the work for you or shortcutting your way to knowledge, rather, they allow you to cut through some of the chaff and busywork associated with studying. Automated tools for studying are more about using your time in the most efficient and effective way possible.
Automation in the workplace
Just to divert from our discussion of automation as a study aid, we can briefly look at some industries that utilise automation in much the same way that we are suggesting can be done for students.
In the medical and construction industries in particular, automation can be a massive boon in terms of accuracy and time saved.
By using automated tools like an automated cell counter to help obtain data from samples, medical professionals are able to obtain accurate data with the use of automated tools and digital programs that would otherwise take many man-hours to obtain, and be susceptible to and prone to human error.
For professionals working in construction, obtaining accurate measurements and preparing blueprints is made much easier with automated tools and programs. By using automated tools to assist them, engineers and others working in construction are able to put their time and energy towards other tasks.
These industries all use automation to save time, increase accuracy, and improve efficiency. If we take these same principles and apply them to study, we will find that automation can help us prepare for big exams.
How can automated study tools help exactly?
Hopefully, you’re now convinced of the usefulness of using automation to help you study, and you probably want to know exactly how these tools can help you. As an overview, automated study tools can:
Help you figure out your weaknesses.
Give you questions designed to improve your weak spots.
Promptly provide reasoning for your failures.
Show you how far you have improved and how far you have to go.
Provide a flexible and fluid teaching style that will change based on how you study.
Now, to get into the specifics of what exactly these tools can provide, depending on the exams that you might have coming up.
GED, ACT, and SAT
These are the broadest types of tests, they require the examinees to be proficient in a wide range of subjects, from mathematics and science to writing and reading comprehension skills. This means that preparing for them is a complex affair, but automated programs can help by:
Generate quizzes and help you focus on areas or concepts that you can’t grasp.
Provide timed tests that cover a wide range of subjects as practice.
Scale the difficulty of the questions up or down based on how you do.
The benefit of automation here is that you won’t ever waste time going over concepts you are already sufficiently proficient in, or target areas that you are strong in.
GRE and GMAT
These exams also require a mix of subject proficiencies but are particularly heavy on math and logic. When studying for these tests, automation can provide:
A breakdown of more complex problems into more bite-sized explanations.
Help practising writing in an analytic and critical manner.
The ability to time on a per-question basis helps to improve the overall flow of the exam.
This help can be just what you might need to push over the mark and get into the business programs that these tests are designed to act as a barrier to entry for.
MCAT
For many people, the MCAT might be the hardest test on this list. It requires in-depth knowledge of a variety of complicated medical and scientific fields of study. Automated tools can help by:
Allowing you to review a large amount of content in specialized bite-sized portions.
Providing the opportunity to use techniques like spaced repetition to aid with long-term memory.
Keep track of how well you are doing across different disciplines and focus on weak areas.
By helping provide a more structured approach to study, pre-med students can benefit greatly from using automated study tools.
LSAT
Similar to the MCAT, the LSAT might be the hardest test that many people undertake in their lives. It requires high levels of reading comprehension, acute critical thinking skills, and adroit use of logic. Automated tools help pre-law students prepare for the LSAT by:
Providing relevant logic games and readings that are designed for their skill level.
Pick up elements in their answers that are the product of faulty reasoning.
Construct and deploy practice tests that are adaptive to your needs.
Like all of the other tools, being diligent and using these tools consistently is the key to improving your chances of passing the associated tests.
Conclusion
Automation exists to make our lives easier and is a big part of many different industries. Using it to study is not cheating or a shortcut; it is simply using a tool to improve your own abilities. Using automation to learn will even stand you in good stead when you need to engage with automated tools in whatever industry you find yourself in.
Have you ever tucked in for a comfortable evening with blankets stacked high and popcorn ready, only to discover that your favourite show has abruptly disappeared from Amazon Prime Video?
Isn’t that annoying? That sinking feeling when the show you planned your entire evening around is missing from your local catalog. I have been there, so believe me when I say it is quite annoying.
Thankfully, there is a solution; let us discuss how to modify the location of Amazon Prime Video.
Methods to Change Your Amazon Prime Video Location
Okay, you’re sold. Let’s dive into how exactly you can do this. There are several methods—some official, some sneakier, all pretty easy.
Officially Changing Your Amazon Account Country/Region
Amazon lets you officially change your account region, but heads-up: it’s a bit of a hassle. You’ll have to update your billing address, possibly switch payment methods, and it might mess with your Kindle or other Amazon services. Still, if you’re relocating permanently, this might be your safest bet.
Using a VPN to Change Your Prime Video Region
Now we’re entering the fun zone. VPNs are your secret weapon for region-hopping. According to VPNpro tech experts, using a reliable VPN can safely mask your location, making it appear like you’re tuning in from wherever your heart desires – so you can change Amazon Prime Video location with ease.
The catch? Amazon’s pretty clever at detecting VPNs, so choose carefully. Providers like NordVPN or ExpressVPN usually do the trick. Don’t worry; I’ll show you exactly how to set this up in just a moment.
Using Smart DNS
Another neat trick is Smart DNS. No heavy lifting needed—just configure your device once, and you’re good. It’s quicker than VPNs, but keep in mind: it won’t encrypt your connection, and it mostly unlocks American content only.
Why Change Your Amazon Prime Video Location?
Let’s start with the “why.” Changing your Prime Video location might sound a bit techy or complicated, but it’s actually super practical, especially for travel addicts, expats, or anyone just craving more variety.
Access a Wider Variety of Content
Amazon Prime has totally different shows and movies depending on your location due to licensing deals. For instance, folks in the US get access to way more content compared to, say, someone watching in Germany. Imagine missing out on your favorite series just because of geography—talk about unfair!
Watch Amazon Originals While Traveling
Ever hopped on a plane and discovered your “go-to” Amazon Originals are now off-limits? Changing your Prime Video region lets you watch your favorite shows even when you’re globetrotting. It saved me during a rainy evening in London when my hotel had exactly zero English channels.
Lower Subscription Prices (Potential)
Did you know some countries offer Prime Video subscriptions at lower rates? You could actually pay less for the same (or even more) content just by tweaking your virtual location. That’s some serious streaming savings right there.
Step-by-Step Guide to Changing Location with a VPN
Ready to try it? Here’s a straightforward guide that’ll have you streaming your heart out:
Choosing a VPN Provider
Make sure your VPN reliably bypasses Amazon’s detection—NordVPN, Surfshark, or CyberGhost usually do a solid job. Avoid sketchy, free options; Amazon spots them from a mile away.
Clearing App Data (Mobile and TV Apps)
On mobile or smart TVs, clear the app’s cache and data to avoid lingering location info sabotaging your efforts.
Using a Secondary Browser (Desktop)
On your desktop, use a separate browser and clear your browsing history and cookies. Trust me, it helps avoid confusion between your actual location and your shiny new virtual one.
Connecting to a VPN Server
Pick your preferred server—maybe the US, Canada, or the UK—connect, and voila! You’ve officially region-hopped.
Accessing Prime Video and Verifying the Change
Visit primevideo.com, search for previously unavailable content, and boom—welcome to your new streaming paradise!
Troubleshooting VPN Issues with Amazon Prime Video
Let’s face it, glitches happen. Here’s how to tackle common VPN hiccups:
VPN is active but not working
Double-check your server location. Sounds basic, but we’ve all been there.
Clearing Cache and Cookies
Clear your browser’s cache and cookies—this trick works like magic.
“Based outside of [country]?” Error
Again, clear those cookies and refresh. If stubborn, try reconnecting to another VPN server.
Amazon Prime’s VPN or proxy error
Amazon sometimes blocks known VPN IP addresses. Swap servers and retry; patience pays off.
“This video is currently unavailable to watch in your location” Error
Activate “Stealth mode” or switch protocols (techy jargon alert: your VPN will guide you through this). Still stuck? Customer support usually has your back.
Differences Between www.amazon.com and www.primevideo.com
Interestingly, these sites can detect location differently. If one is giving trouble, try the other.
Optimizing Your Viewing Experience
You’ve switched locations—awesome! Now, level up your streaming game:
Checking Content Availability with JustWatch.com
Use JustWatch.com to quickly see what’s streaming and where. It’s a lifesaver for serial binge-watchers.
Disabling Location Services on Mobile Devices
Turn off GPS on your mobile devices to prevent accidental location leaks—just head into settings and switch location services off.
Using Prime Video on Different Devices
A quick heads-up for streaming on various gadgets:
Smart TVs
Use Smart DNS or install VPN apps directly on your TV. Alternatively, share your VPN connection from another device or router.
Mobile Devices
If GPS location gives you trouble, use your browser instead of the app.
Desktops/Laptops
Remember: browser history clearing is your best friend.
Alternative Settings (Subtitle Language, etc.)
Change subtitles or audio languages easily in Prime Video settings. Ideal for learning a new language or simply wanting to comprehend what is occurring on screen!
Frequently Asked Questions (FAQ)
If I use a VPN with Amazon Prime Video, will I get banned?
Amazon usually just blocks VPN access, not your account. But don’t push your luck!
Is it allowed to switch the area of my Amazon Prime Video using a VPN?
It is kind of a grey area depending on your country, but generally speaking, yes.
Will changing my Amazon region affect my other Amazon services?
Potentially yes, especially Kindle and Amazon Music, so consider carefully.
Can I use a free VPN to change my Amazon Prime Video region?
I wouldn’t recommend it—Amazon easily blocks free VPNs, plus your security might be compromised.
Why is my Amazon Video in another language?
This happens occasionally—click the “Translate to English” button or change language settings.
Now it’s your turn! Have you tried changing your Prime Video location? How did it go? Any hilarious or disastrous stories? Share below and let’s chat!
Final Thoughts: Which One is Right for You?
Your unique needs will determine which antiviral programme is best for you. McAfee is wonderful for identity protection, Bitdefender is good for people who want less intervention, and Norton 360 is great for comprehensive coverage.
In the end, purchasing quality antivirus software is essential for maintaining online security in 2025. Browse with confidence and safeguard your digital life.